Diagram Editor User Guide
Webix Diagram is a powerful tool for creating diagrams of any complexity. Besides settings via the corresponding API, the widget includes a special interface for managing blocks and their links. To open the Diagram editor, there is a special control in the application interface.

Diagram Editor
Diagram editor allows you to manage blocks and links via the corresponding interface, namely:
- create and delete blocks
- establish links between blocks
- manage blocks and links parameters
- manage blocks and links placement.
Main Screens
Visually Diagram editor consists of 4 parts:
- Toolbar
- Shapes panel
- Workspace
- Settings panel.
Toolbar
Toolbar is at the top of the screen and includes special controls for managing the Diagram editor.

Here you can find the following controls:
- the "Reset" button allows you to reset settings to the initial state
- the "Undo" and "Redo" icons allow you to manage changes in the editor and make one step back or forward
- the zoom icon allows you to manage the scale of the Workspace. The scale will decrease or increase when you click on the corresponding "-" or "+" icons. By default, the value is set to 100%. You can also adjust the zoom level by scrolling the mouse wheel while holding the Ctrl key.
- the grid size icon allows you to set the step for moving the blocks (distance between grid dots) in the Workspace. By default, the distance between dots is 10 px
- the editor mode icon allows you to switch between the setting and display modes
- the "Autoplace" button allows you to arrange blocks automatically. Due to a special algorithm under the hood, blocks will be distributed in a most handy and efficient way
- the "Apply" button allows you to apply all changes and return to the view mode.
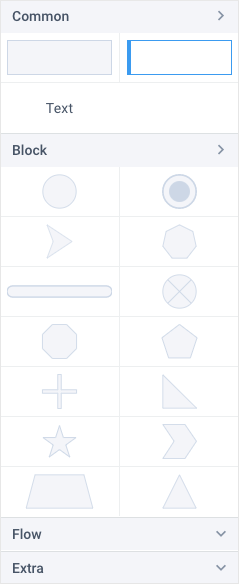
Shapes Panel
The Shapes panel is on the left part of the screen. Here you can find shapes divided into special groups. To collapse or expand a group, you can click on its name above. Depending on the configuration, the groups and their shapes may differ.
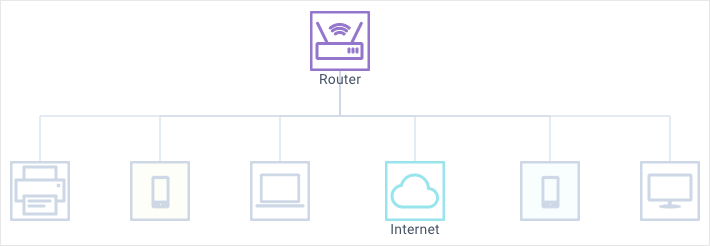
Workspace
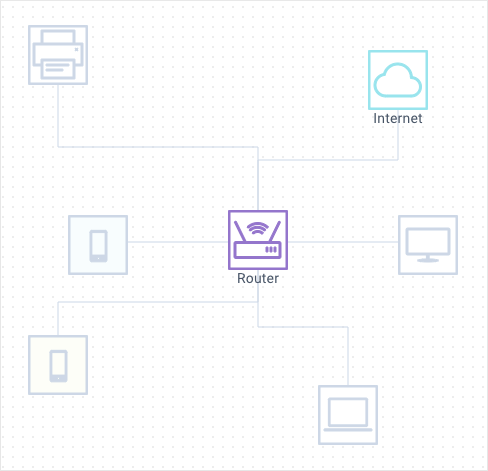
The Workspace panel is in the center of the screen. It contains blocks and links that make up the diagram. Depending on the mode set (via the icon for switching editor modes), the panel can be displayed with a grid (in setting mode) or without it (in display mode).
Workspace in setting mode
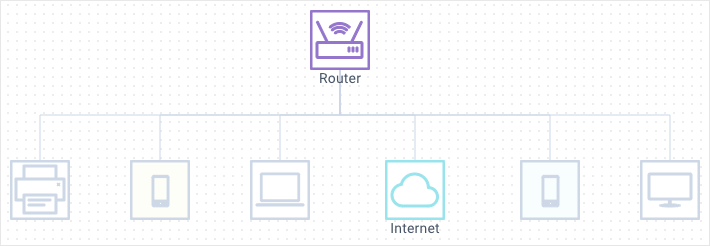
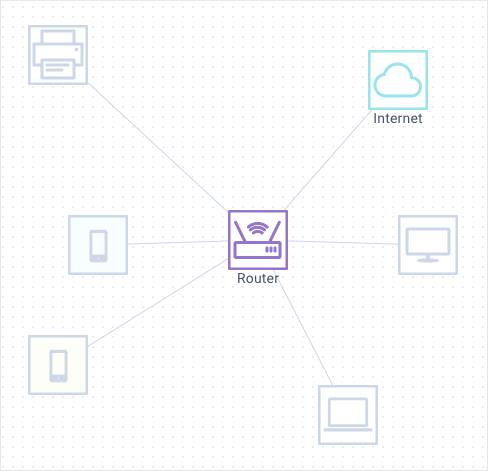
Workspace in display mode
In the Workspace panel you can:
- create new blocks
- copy blocks
- delete blocks
- move blocks
- resize blocks
- establish/delete links between blocks.
All of these operations are covered further in this article.
Scroll the workspace panel with the mouse wheel or by dragging while holding the Ctrl key.
Settings Panel
The Settings panel allows you to configure blocks and links. Here you can set both the default settings (for all diagram elements) and individual settings for each particular block and link.
Note that individual settings have a higher priority in comparison with the default ones.
Depending on the selected element, the functionality of the Settings panel will differ.
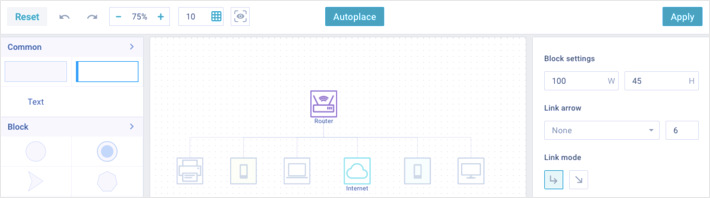
Default Settings
To set the default settings for all blocks and links at once, click on the free space in the Workspace panel. The Settings panel will display an interface for changing the default settings.
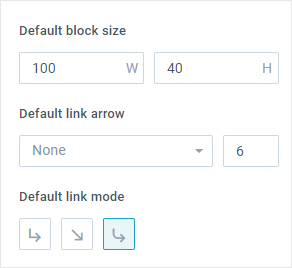
Default settings for blocks
In the Block settings section, you can set the default width and height for all the diagram blocks. The initial width and height of the block are 100 and 45 pixels (if the other dimensions are not specified).
To set the default width or height for all blocks, click on the corresponding input field and type the desired value. You can also use the special arrows (up/down) on the right part of each field (they appear when the mouse pointer is over the field or when the field is in focus).
Default settings for arrows
In the Link arrow section, you can set the type and size for all arrows.
By default, all links are displayed without arrows (the none option).
To set the default arrows type, click on the type selector and select the desired option from the drop-down list.
To set the default arrows size, click on a special input field on the right part of the section and specify the desired value. You can also use the special arrows (up/down) on the right part of this input (they appear when the mouse pointer is over the field or when the field is in focus).
Default settings for links
In the Link mode section, you can set the default displaying type for all the diagram links. There are three types of links: "edges", "direct" and "curve". To set either, click on the corresponding icon in the section.
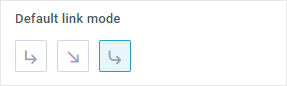
"Edges"
"Direct"
"Curve"
Working with Blocks
The Diagram editor allows working with blocks, namely:
- add new
- copy
- delete
- place
- rotate
- specify coordinates
- manage individual block settings.
Adding blocks
To add a new block, you need to select a desired shape in the Shapes panel and drag it to any place inside the Workspace.
Copying blocks
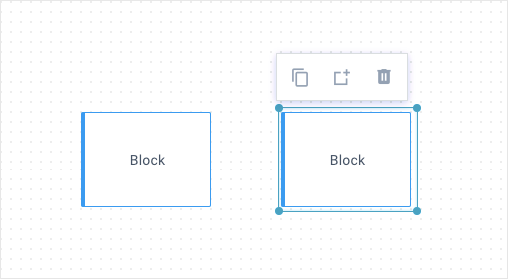
To copy a block, you need to click on it in the Workspace. A small menu with three icons will be displayed above the top part of the selected block. Click on the clone icon of this menu to copy the block and place its instance from the right side of the original block. The focus moves to the copied instance. All the block parameters and its content will be also copied.
Deleting blocks
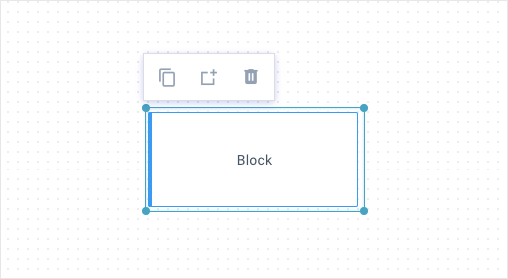
To delete a block, you need to click on it in the Workspace. A small menu with three icons will be displayed above the top part of the selected block. Click on the bin icon to delete the block.
Note that you can also delete the selected block by pressing the "Delete" key.
Placing blocks
There are three ways to place blocks:
- auto-placement
- drag-n-drop
- coordinates in the individual block settings.
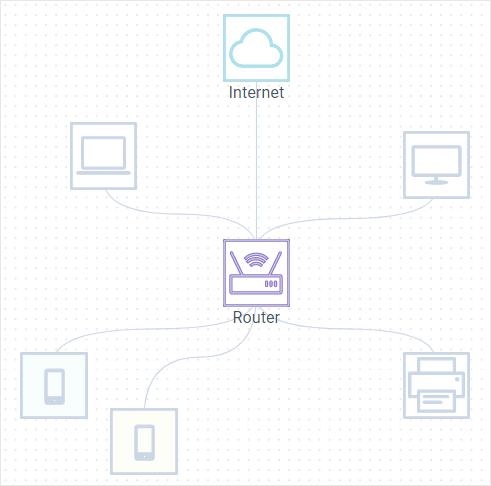
Auto-placement
To use the auto-placement, click on the "Autoplace" button in the Toolbar. This button launches an algorithm that arranges the blocks in the most optimal way, depending on their links.
Drag-n-drop
You can arrange blocks using drag-n-drop.
Rotating blocks
You can rotate blocks on the workspace using a special control on the right side of a selected block.
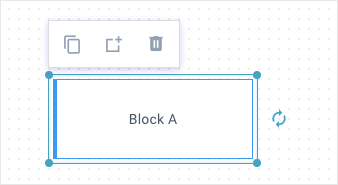
To rotate a block around its axis, hold down the rotation control with the left mouse button and move it clockwise or counterclockwise. During block rotation, the arrows will be replaced with the current angle degree.
Block sizes
There are several ways to manage block sizes:
- via the default block settings
- via the block resizing in the Workspace
- via the individual block settings.
Block resizing
To resize a block, click on it in the Workspace. A rectangular frame with round markers at each corner will be displayed around the selected block. You need to press down any of these markers with the left mouse button, drag it to the desired size and release it.
Individual block settings
To define individual settings for a particular block, you need to click on it in the Workspace. The Settings panel will display the individual settings of the block:
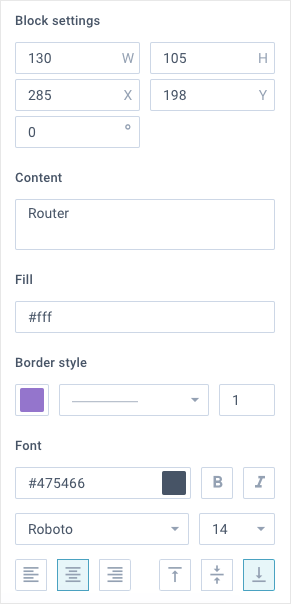
Here you can specify:
- block settings
- block content
- fill color
- border style
- font settings.
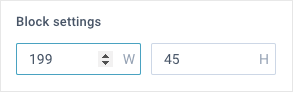
Block settings
In the Block settings section you can set the following parameters:
- width and height
- coordinates (X and Y)
- rotation angle.
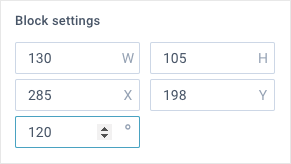
To change any of these parameters, click on the corresponding input field and type in the desired value. You can also use the special arrows (up/down) on the right part of these inputs (they appear when the mouse pointer is over the field or when the field is in focus).
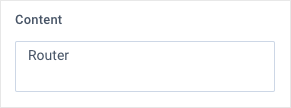
Block content
In the Content section you can specify the text that will be displayed in the current block.
Fill color
In the Fill section you can set the fill color of the current block.
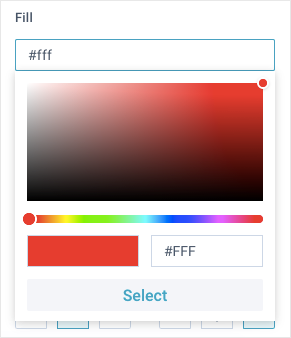
To set the fill color, you need to click on the color selector, select the desired color or specify its HEX code and confirm the selection.
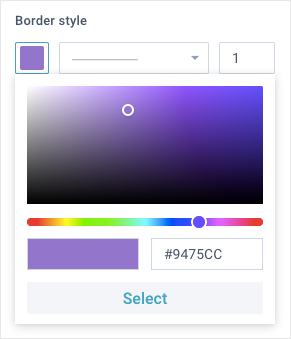
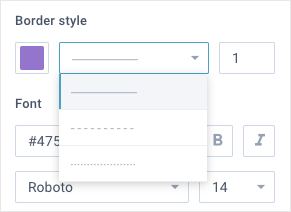
Border style
In the Border style section you can set the color, type and thickness of the block border.
To set the border color, click on the color selector, select the desired color or specify its HEX code and confirm the selection.
To set the border type, click on the type selector and select the desired option from the drop-down list.
To set the border thickness, click on the input field on the right part of this section and specify the desired value. You can also use the special arrows (up/down) on the right part of this input (they appear when the mouse pointer is over the field or when the field is in focus).
Font settings
In the Font section you can set the font parameters for the block content.

Here you can specify:
- font color and style
- font type and size
- text alignment (horizontal and vertical).
Note that you cannot set fill color and border style for the text block (Common-Text). These parameters are not provided for this block.
Working with Links
The Diagram editor allows working with links, namely:
- establish links between blocks
- delete links
- move links
- manage individual link settings.
Establishing links
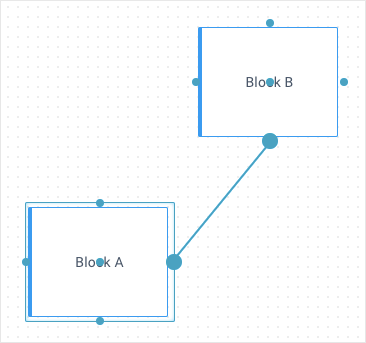
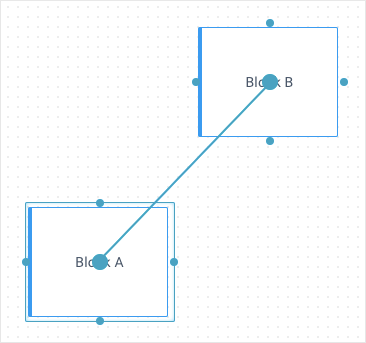
To establish a link between blocks, click on the selected block in the Workspace. A small menu with three icons will be displayed above the top part of the selected block. Click on the add link icon to display a rectangular frame with round markers in the middle of each side around the selected block. The same marker will appear in the center of the block itself.
To connect two blocks, press down any block marker with the left mouse button, drag it to one of markers of another block and release the button.
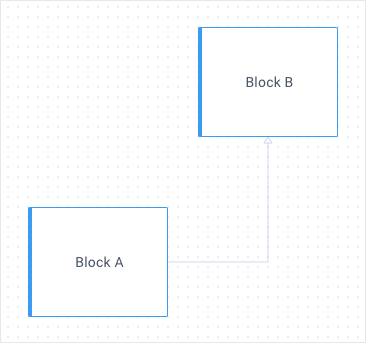
To establish a link with default parameters, you need to connect any of the block markers to one of the side markers of another block.
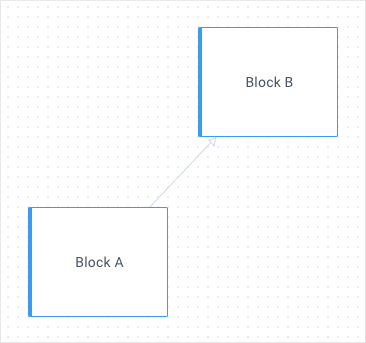
The result will be as follows:
If you connect the central markers, you will establish the "direct" link between blocks.
The result will be as follows:
Deleting links
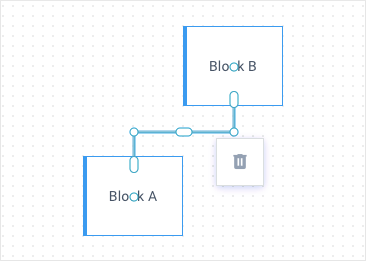
To delete a link between blocks, you need to click on this link in the Workspace. A small bin icon will be displayed next to the selected link. Click on this icon to remove the link.
Moving links
You can move links on the workspace using drag-n-drop. When clicking on a link, the dedicated handles will come up on it.
Oval handles
The oval handles allow you to move the link horizontally and vertically. To do this, hold down the handle with the left mouse button and drag it in the needed direction.
Note, if you move the link with the direct type, it will get the edges type. If such a link has an arrow, you need to make sure that the handle with this arrow is connected to the nearest edge marker of the block. Otherwise, the arrow will be overlapped by the block.
![]()
Round handles on the link edges
You can change the start and end points of a link dragging it by the round handles on the link edges. You can connect these handles to any marker of the current or any other block, as well as leave them on an empty space of the workspace. To do this, hold down the handle with the left mouse button and drag it to the desired place.
Note, if you leave the handle on an empty space and change the link type or apply the auto-placement, it will return back to the block it was connected to before moving.
Round handles on the link bends
You can move the bends of the link with the edges type using the round handles on these bends. To do this, hold down the handle with the left mouse button and drag it to the desired place.
Individual link settings
To define individual settings for a particular link, you need to click on it in the Workspace. The Settings panel will display the individual settings of the link:
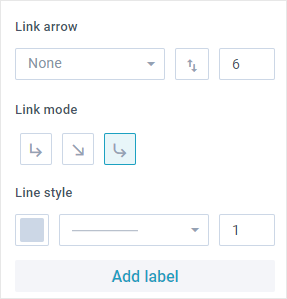
Here you can specify:
- link arrow settings
- link mode
- line style.
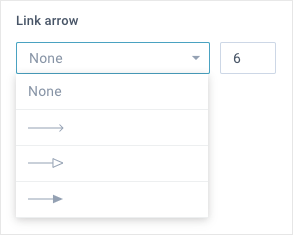
Link arrow settings
In the Link arrow section you can set the type, direction and size of the current link arrow.
![]()
By default, all links are displayed without arrows (the none option).
To set the arrow type, click on the type selector and select the desired option from the drop-down list.
To change the arrow direction, click on the special icon with two arrows.
To set the arrow size, click on the input field on the right part of the section and specify the required value. You can also use the special arrows (up/down) on the right part of this input (they appear when the mouse pointer is over the field or when the field is in focus).
Link mode
In the Link mode section you can set the current link type. There are special icons to switch between the "edges" and "direct" types.
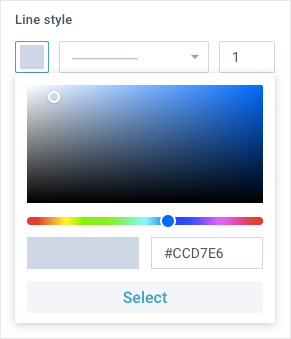
Line style
In the Line style section you can set the color, type and thickness of the current link line.
To set the line color, click on the color selector, select the desired color or specify its HEX code, and confirm the selection.
To set the line type, click on the type selector and select the desired option from the drop-down list.
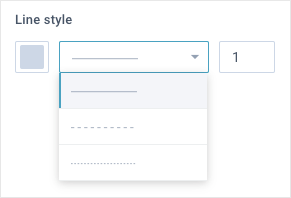
To set the line thickness, click on the input field on the right part of this section and specify the desired value. You can also use the special arrows (up/down) on the right part of this input (they appear when the mouse pointer is over the field or when the field is in focus).
Working with Link Labels
You can use the Diagram editor to perform the following operations with link labels:
- add label to a link
- delete a label
- move a label
- manage label settings.
Adding Labels
To add a label to a link, you should take the following steps:
- Click on the desired link in the Workspace.
- Click on the "Add label" button in the Settings panel.
You can add multiple labels to one link.
Deleting Labels
To delete a label, you should take the following steps:
- Click on the desired label in the Workspace.
- Click on the small bin icon, which will be displayed next to the selected label.
Also, if you delete a link, all the labels connected to it will be deleted too.
Moving Labels
You can move the label along the corresponding link using drag-n-drop.
Label Settings
To define individual settings for a label, you need to click on it to open the Settings panel:
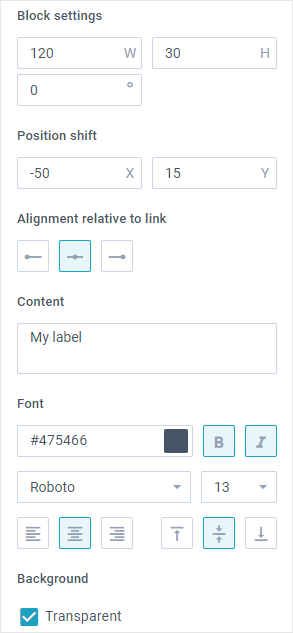
For each label you can specify the following settings:
- Block settings
- Position shift
- Alignment relative to link
- Content
- Font
- Background
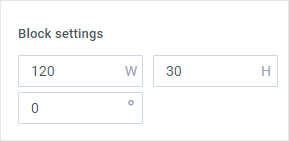
Block settings
In the Block settings section you can set the following parameters:
- width and height
- rotation angle.
Position shift
In the Position shift section you can define the horizontal (x) and vertical (y) offsets relative to the label position. Starting coordinates are calculated depending on the alignment style: "center", "start" or "end".

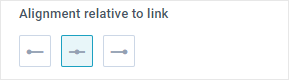
Alignment relative to link
In the Alignment relative to link section you can define the position of a label:
- at the beginning of a link
- in the middle of a link
- at the end of a link.
By default, a label is aligned in the middle of a corresponding link.
Content
In the Content section you can edit the text of the label.
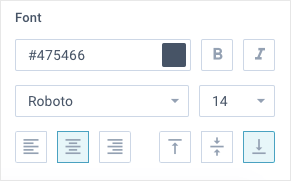
Font
In the Font section you can set the font parameters for the block content.
Here you can specify:
- font color and style
- font type and size
- text alignment (horizontal and vertical).
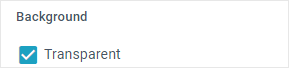
Background
In the Background section you can enable/disable transparent background for the label.