Quick Start with Tree
This tutorial will walk you through creating a basic application containing Tree. You will learn how to initialize a Tree, populate it with data and set the desired configuration.
The final code of the tutorial can be used as the start point while creating applications using Tree.
Related sample: Quick start with DataTree
A new HTML file and related code files
To start, create a new HTML file and include the related Webix code files in it:
- webix.css
- webix.js
A basic html page with the included code files
<!DOCTYPE html>
<html>
<head>
    <meta http-equiv="Content-Type" content="text/html; charset=utf-8" />
    <title>Quick start with Tree</title>
    <script src="../codebase/webix.js" type="text/javascript" charset="utf-8"></script>
    <link rel="stylesheet" href="../codebase/webix.css" type="text/css"
        charset="utf-8">
</head>
<body>
    <script>        //here you will place your JavaScript code    </script>
</body>
</html>
Object Constructor
After you have included the necessary files, you can move to Tree initialization.
To create a new Tree object you need to use the next constructor:
Tree constructor
webix.ui({
    view:"tree"
});
In fact, it's enough to initialize a Tree. You also can put a tree inside an HTML container.
For example, let's create a div element with id="box":
<div id="box" style="width:400px;height:200px;"></div>Next, let's use the webix.ui constructor and specify the created container via the corresponding property:
Basic Tree configuration
webix.ui({
    container:"box",
    view:"tree"
});
Loading Data
There are different ways to load data into Tree (read about them in chapter Loading Data into Tree).
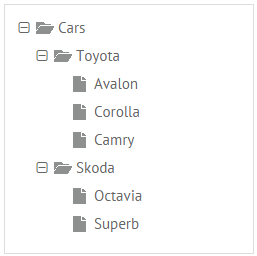
We will use the easiest of the ways and specify data directly in the constructor with the help of the data property:
Loading data into the tree
webix.ui({
    // container:"box",
    view:"tree",
    data: [
        {id:"root", value:"Cars", open:true, data:[
            { id:"1", open:true, value:"Toyota", data:[
                { id:"1.1", value:"Avalon" },
                { id:"1.2", value:"Corolla" },
                { id:"1.3", value:"Camry" }
            ]},
            { id:"2", open:true, value:"Skoda", data:[
                { id:"2.1", value:"Octavia" },
                { id:"2.2", value:"Superb" }
            ]}
        ]}
    ]
});
Congratulations! Now you can run your app with a Tree.
Related sample: Quick start with DataTree
General Configuration Settings
For more settings, read other articles in this documentation:
- Node Templates - available templates for customizing data content;
- Items Selection - describes how to enable selection in the tree;
- Sorting in Tree and Filtering in Tree - tell about means for sorting and filtering.
What's Next
- Check the code sample of the mentioned above example (use the link above)
- Read about possible data formats and how you can get data from database
- Find out about nodes manipulations (adding, deleting nodes etc.)
- Check online samples.