Kanban Board General How-Tos
Here you will find the answers to some of the questions that may arise during the creation of Kanban Board.
How to Change the Color of the Left Card Border?
The default color of the left border of a card is specified in the CSS class .webix_kanban_list_content. Set the necessary color in the border-left property:
kanban.css
.webix_kanban_list_content {
    ...
    border-left: 3px solid #27ae60;
}
You can redefine this CSS rule and set a new color for all tasks in your Kanban board.
However, if you need to set a new color for a separate item, you need to define the color property in the item data. So, there will be something like this in your data source:
webix.ui({
    view: "kanban",
    id: "myBoard",
    data: [
        { id:"1", status:"new", text:"Update Client Area", color:"red" }
    ]
});
If you set the color like this, you will be able to edit it with the API or a custom editor:
// get an item
var item = $$("myBoard").getItem("3"); // '3' is the item ID
// set a new 'color' property
item.color = "red";
// update the item
$$("myBoard").updateItem("3");
Users can also change the color of the left border with Kanban editor. For this, you will need to provide the collection of colored states and set the colors configuration property of Kanban:
var colors_set = [
    { id:1, value:"Normal", color:"green" },
    { id:2, value:"Low", color:"orange" },
    { id:3, value:"Urgent", color:"red" }
];

webix.ui({
    view: "kanban",
    id: "myBoard",
    colors:colors_set,
    data: [
        { id:"1", status:"new", text:"Update Client Area", color:3 }
    ]
});
Note that the initial color is set by the ID from the set of colors.
How to Set the Background Color to the Item?
To apply a specific CSS class for an item you can set the $css property for it. This class will be added to className of item element:
webix.ui({
    view:"kanban",
    data:[
        { id:"1", status:"new", text:"Task 1", $css: "critical" }
    ]
});
Here is an example of setting a new background color for an item with the 'critical' $css property:
<style>    .critical .webix_kanban_list_content{
        background-color: #fff2c1;
        border-color:  #e0d7b7;
        border-left-color:  #f5cf3d;
    }
</style>
How to Change the Status of an Item?
The status of an item can be changed in several ways:
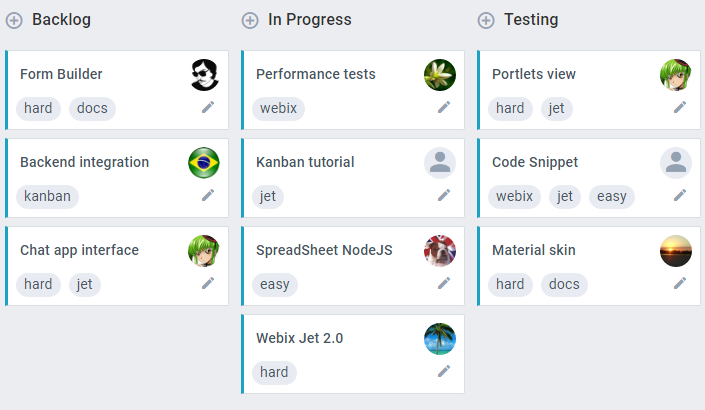
by dragging an item to a different column,
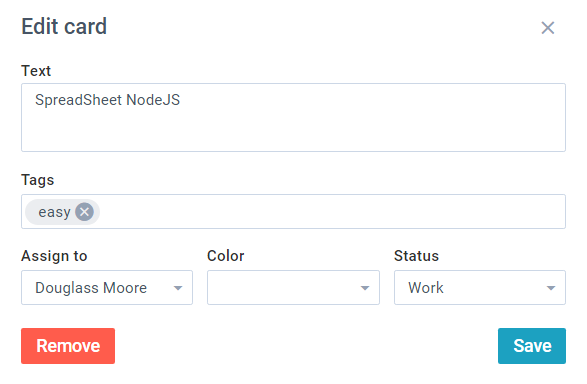
by changing the status in the Kanban editor,
by setting the status property of the card data with API:
// get an item
var item = $$("myBoard").getItem("1");  // '1' is the item ID
// set the 'status' property
item.status = "work";
// update the item
$$("myBoard").updateItem("1");
How Can Users Add New Cards?
There are two ways that you can choose to let users add new cards:
Adding Cards with Editor
You can enable Kanban editor and use it for adding new cards.
Follow these steps:
1. Enable the editor in the Kanban configuration:
{
    view:"kanban",
    id:"myBoard",
    editor:true,        cols:[
        { header:"Backlog", body:{ view:"kanbanlist", status:"new" }},
        { header:"In Progress", body:{ view:"kanbanlist", status:"work" }},
        { header:"Done", body:{ view:"kanbanlist", status:"done" }}
    ],
    url:"./data/tasks"
}
2. Add a button that will show the editor by calling the showEditor method:
{
    view: "button", label: "Add new card",
    click:() => {
        $$("myBoard").showEditor();
    }
}
A user can fill in the form and add the card to any Kanban list.
Related sample: Kanban: Adding New Items
Adding Cards with Header Add Icon
Kanban has another convenient way of adding a new card - KanbanHeader.
Cards can be added with the help of the "+" icon.
Follow these steps:
1. Instead of placing Kanban lists into Accordion, create a simple Layout and add KanbanHeaders linked to the necessary lists:
webix.ui({
    view:"kanban",
    cols:[
        {
            rows:[
                { view:"kanbanheader", label:"Backlog", link:"new" },
                { id:"new", view:"kanbanlist", status:"new" }
            ]
        },
        ...
    ],
    url:"./data/tasks"
});
After a click on the icon, an empty card will appear in the list.
2. If you want to add some default text for each new card or do something else before a card is added, hadle the onBeforeCardAdd event:
webix.ui({
    view:"kanban",
    cols:[
        {
            rows:[
                {
                    view:"kanbanheader", label:"Backlog", link:"new",
                    on:{
                        onBeforeCardAdd(obj,list){
                            obj.text = "New task";
                        }
                    }
                },
                { id:"new", view:"kanbanlist", status:"new" }
            ]
        },
        ...
    ],
    url:"./data/tasks"
});
How to Forbid Dragging Items from/to a Column?
In case you need to forbid moving tasks from/to particular columns, you should make use of Kanban Events.
For example, you may ban dragging to columns that are not situated next to the source column. Thus tasks will be dragged only between two neighboring columns.
To implement this idea, the onListBeforeDragIn event can be used.
The handler function will take 3 parameters:
- dragContext - {object} drag-n-drop context object with a set of properties:
- from - the source object,
- to - the target object,
- source - the ID of the dragged item(s),
- target - the ID of the drop target, null for drop on empty space,
- start - the ID from which drag-n-drop started
- e - {event object} a native event object
- list - {object} the list object where the event has happened
//specifying event handler
function onBeforeDragIn(dragContext,e,list){
    // item id
    var item =this.getItem(dragContext.start);

    // if we move an item from one list to another
    if(dragContext.from != dragContext.to){
        //the status of the source column
        var statusFrom = dragContext.from.config.status;
        //the status of the target column
        var statusTo = dragContext.to.config.status;
        //assigning indexes to statuses
        var statusIndex = { "new":0, "work":1, "test":2, "done":3 };
        //getting difference between the source and target columns' indexes
        //if it's more than 1, the item won't be moved
        var diff = Math.abs(statusIndex[statusFrom] - statusIndex[statusTo]);
        if (diff>1){
            return false;
        }
    }
    return true;
}

webix.ready(function(){
    webix.ui({
        view:"kanban",
        id:"myBoard",
        on:{
            onListBeforeDragIn: onBeforeDragIn
        },
    });
});
Related sample: DND Events in Kanban
Back to topIf you have not checked yet, be sure to visit site of our main product Webix html5 framework and page of buy kanban board product.