Details and Examples of Data Formats
Expected data formats
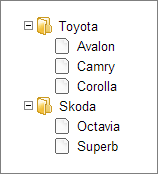
JSON
[
    { "id":"1", "open":"true", "value":"Toyota", "data":[
        { "id":"1.1", "value":"Avalon" },
        { "id":"1.2", "value":"Camry" },
        { "id":"1.3", "value":"Corolla" }
    ]},
    { "id":"2", "value":"Skoda", "data":[
        { "id":"2.1", "value":"Octavia" },
        { "id":"2.2", "value":"Superb" }
    ]}
]
XML
<data>
    <item value='Toyota' open='1'>
        <item value='Avalon'></item>
        <item value='Camry'></item>
        <item value='Corolla'></item>
    </item>
    <item value='Skoda'>
        <item value='Octavia'></item>
        <item value='Superb'></item>
    </item>
</data>
Available Data Keys/Attributes
You can define the following attributes/keys in the data set:
| Attribute | Description |
|---|---|
| value | the item value (the title of the related node) |
| open | defines whether the branch will be opened initially |
| css | the name of the CSS class that will be applied to the data item |
| checked | checks the checkbox related to the item |
| intermediate | sets the 3rd state of the checkbox related to the item |
| webix_kids | the flag of dynamic loading |
JSON Data. Using Simplified Form
You can use the simplified form of JSON and specify data as in:
[
    { "value":"Toyota", "open":"true", "data":[
        "Avalon", "Camry", "Corolla"
    ]},
    { "value":"Skoda", "data":[
        "Octavia", "Superb"
    ]}
]
Related sample: Tree: JSON Dataset
Compare simplified format with the standard form.
Custom JSON Format
To use custom attributes in JSON dataset, you can define your custom JSON format (read more in article Data Drivers).
When you specify a custom format, don't forget to set the expected data type to the name of a new format.
Here is a simple example:
var myjson = webix.DataDriver.myjson = webix.copy(webix.DataDriver.json);

myjson.child=function(obj){
    if (obj.$level == 1)
        return obj.cars;
};

var tree = webix.ui({ view:"tree", datatype:"myjson", ... });
the 'child' function defines which object properties should store sub-items
As a result, your data will look as in:
//full form
[
    { "id":"1", "open":"true", "value":"Toyota", "cars":[
        { "id":"1.1", "value":"Avalon" },
        { "id":"1.2", "value":"Camry" },
        { "id":"1.3", "value":"Corolla" }
    ]},
    { "id":"2", "value":"Skoda", "cars":[
        { "id":"2.1", "value":"Octavia" },
        { "id":"2.2", "value":"Superb" }
    ]}
]
//simplified form
[
    { "value":"Toyota", "open":"true", "cars":[
        "Avalon", "Camry", "Corolla"
    ]},
    { "value":"Skoda", "cars":[
        "Octavia", "Superb"
    ]}
]
Related sample: Tree: JSON Dataset
Custom XML Format
To use custom tags, you can define your custom XML format (read more in Data Drivers).
When you specify a custom format, don't forget to set the expected data type to the name of a new format.
Here is a simple example:
var myxml = webix.DataDriver.myxml = webix.copy(webix.DataDriver.xml);
myxml.records = "/cars/car";

myxml.child = "model";

tree = webix.ui({   view:"tree", datatype:"myxml", ... });
the 'records' property defines the root tags
the 'child' property (also can be a function that takes the data object as a parameter) defines which tag should store sub-items
As a result, your data will look as in:
<cars>
    <car value='Toyota' open='1'>
        <model value='Avalon'></model>
        <model value='Camry'></model>
        <model value='Corolla'></model>
    </car>
    <car value='Skoda'>
        <model value='Octavia'></model>
        <model value='Superb'></model>
    </car>
</cars>
Related sample: Tree: XML Dataset
Back to top