Layout and Resizer
API Reference
Overview
Layout is a concept element that doesn't contain anything in itself yet determines the way "meaningful" components are arranged. It divides the page into rows and columns where all other components are placed.
Initialization
Layout consists of rows and columns separated from each other by borders (except for a borderless layout). Rows contain an array of view objects arranged horizontally while cols is an array of vertically arranged objects. Border setting and border types are described in the corresponding chapter of the manual.
webix.ui({
    container:"layout_div",
    type:"space",
    rows:[
        {...},
        {
            cols:[
                {...},
                {...}
            ]
        }
    ]
});
When setting layout, you can omit the view:"layout" line and start setting rows and cols at once:
webix.ui({
    type:"wide",
    rows:[
        {...}, {...}
    ]
});
- The container property defines the ID of a DIV element where you place the layout. Though it is an optional parameter, it makes sizing and positioning simpler.
- The ID of Layout should be specified if you are going to work with it later.
Horizontal and Vertical Layout
Horizontal layout:
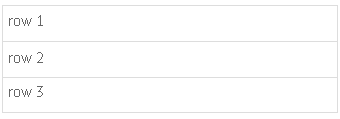
Three-row layout
webix.ui({
    container:"layout_div", // corresponds to the ID of the div block
    rows:[
        { template:"row 1" }, // here you place any component you like
        { template:"row 2" },
        { template:"row 3" }
    ]
});
Vertical layout
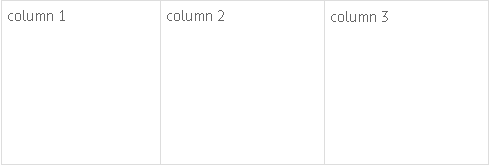
Three-column layout
webix.ui({
    container:"layout_div", // corresponds to the ID of the div block
    cols:[
        { template:"col 1" }, // here you place any component you like
        { template:"col 2" },
        { template:"col 3" }
    ]
});
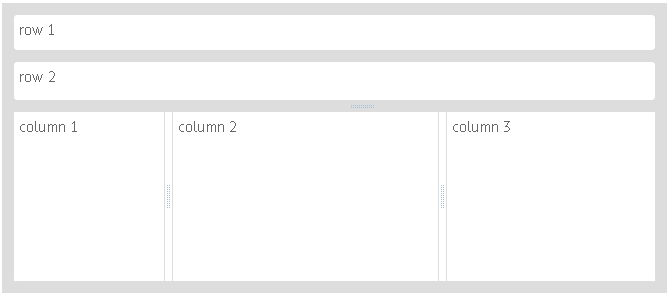
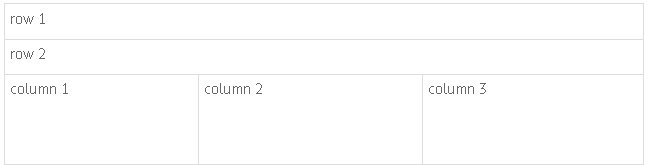
Complex layout
Any row can be divided into columns and any column may contain rows. This is how simple layouts are nested into each other:
webix.ui({
    container:"layout_div", // corresponds to the id of the div block
    rows:[
        {template:"row 1"}, // here you place any component you like
        {template:"row 2"},
        { cols:[
            { template:"col 1" },
            { template:"col 2" },
            { template:"col 3" }
        ]}
    ]
});
Related sample: Layout and Resizer
Saving/Restoring Layout State
Webix Layout enables you to store/restore the state of the layout to a cookie, a local or session storage.
Saving the current state
To save the current state of a layout to the local storage, you should call the serialize method as in:
var state = $$("layout").serialize(serializer);
webix.storage.local.put("layout-state", state);
As a parameter the serialize() method takes the serializer function that contains the serialization logic.
Restoring the saved state
To restore the saved state of a layout, you should make use of the restore method. It takes two parameters:
- state - (object) a state object
- factory - (function) a function that implements the logic of creating inner layout views
var state = webix.storage.local.get("layout-state");
$$("layout").restore(state,factory);
Types of Layout
There are several widgets that present layouts with extended functionality. You can use them if you need to define strict positions of elements, place a complex data structure inside a layout or arrange elements on a page in a grid-like manner.
If you have found yourself being occupied with implementation of some similar task, these are Webix solutions for you:
Resizer Lines
With the Webix library, you can make a draggable border, or so-called, resizer lines between layout rows and columns. The resizer line can be moved in both directions and change the dimensions of the components on both sides of it.
Resizer lines don't actually change the component's size. They only help users adjust the component's visual scheme to their needs.
It's recommended to set minWidth and maxWidth parameters for columns subject to resizing (minHeight and maxHeight for the rows). It prevents them from collapsing, as when the minimal width or height value is achieved, the resizer line cannot be moved anymore.
webix.ui({
    container:"layout_div",
    id:"layout",
    rows:[
        {...}, // 1st row, non-resizable
        {...}, // 2nd row
        {view:"resizer"},
        {...}, // 3rd row
        {view:"resizer"},
        {cols:[  // 4th row
            { // 1st column
                width:150,
                minWidth:50,
                maxWidth:250
            },
            {view:"resizer"},
            {....}, // 2nd column
            {....} // 3rd column
        ]}
    ]
})
Related sample: Limits on Resizing
Responsive layout behavior depending on window/screen size is discussed separately.
Headers
Check how to make headers for different components here.
webix.ui({
    rows:[
        {   view:"template", // optional
            template:"Header for Column 1",
            type:"header"
        },
        {...}
    ]
})
Related Articles
- AbsoluteLayout
- DataLayout
- FlexLayout
- Grid Layout
- Responsive Layouts
- Sizing Components
- Resizing
- Setting Borders to the Components
- Adding Headers to Components
- Multiview
- Accordion
- Scrollview
- Carousel
- Layout CSS Image Map