Form
API Reference
Overview
Any form is a means of getting some information from users. It contains input fields and select components like checkboxes, radio buttons alongside with submit/cancel buttons depending on the situation. Find them all in our Controls Guide.
Initialization
UI-related form inherits from view. It resembles layout very much as it is divided into columns and rows where controls are put.
- elements - the form's specific property, an array of vertically arranged controls and control groups;
- cols - an array of horizontally arranged controls and control groups;
- rows - (alias to elements) an array of vertically arranged controls and control groups.
There exists a possibility to specify common configuration for all controls included in this or that form.
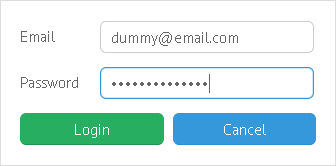
Login form
webix.ui({
    view:"form",
    id:"log_form",
    width:300,
    elements:[
        { view:"text", label:"Email", name:"email"},
        { view:"text", type:"password", label:"Password", name:"password"},
        { margin:5, cols:[
            { view:"button", value:"Login" , css:"webix_primary"},
            { view:"button", value:"Cancel"}
        ]}
    ]
});
Related sample: Form: Basic Initialization
In order to interact with controls (set/get values, validate them), you should specify the name property for each needed control. Names should always be unique. If you want to bind them together (or implement something else), we recommend that you forego the bind() function and provide your own logic.
Related sample: Form: Custom Binding Logic
Setting Initial Values
Initial form values can be set in different ways:
Setting value of each element separately
Every form control features value property:
{ view:"text", id:"fname", value:"Adam Smith"}
Or, you can call the setValue() method for it:
$$("fname").setValue("Adam Smith");
However, this way is not effective while working with the whole form.
Using setValues API
To set form values in a scope, you can use its setValues method. It takes an object with values as first (and mandatory) parameter:
$$("$form1").setValues({
    value1:"111", value2:"222"
});
Data names of these values must coincide with values of name parameters of the corresponding form elements:
elements:[
    { view:"text", name:"value1"},
    { view:"text", name:"value2" }
]
Complex Data
Form values can be of any complexity level, which means that sub items are acceptable. For these needs the form should have the following configuration:
- complexData property should be set to true;
- element names should be written in dot-notation.
webix.ui({
    view:"form",
    id: "sets",
    complexData:true,
    elements:[
        { label:"Width", view:"text", name:"layout.width" },
        { label:"Height", view:"text", name:"layout.height"}
    ]
});

$$("sets").setValues({
    layout:{
        width:250,
        height:480
    }
});
Related sample: Form: Data with Complex Properties
Loading/parsing values
Webix form can load or parse data like any data management component. All the data loading rules are true for it.
Again, data attributes should coincide with names of form fields:
Parsing
var data = {id:1, fname:"Ann", lname:"Brown"};

webix.ui({
    view:"form", id:"myform", elements:[
        { view:"text", name:"fname"},
        { view:"text", name:"lname"}
    ],
    data:data
});
//or
$$("myform").parse(data);
Loading
$$("myform").load("data.php");
Grouping Controls in Form
Dividing form into sections
Form elements can be divided into columns and rows with any level of complexity.
{ view:"form", elements:[
    {cols:[
        { rows:[
            { view:"text"},
            { view:"datepicker"}
        ]},
        { view:"checkbox"},
        { view:"button"}
    ]}
]}
To add user-friendliness to form interface, separated blocks can be set within it by:
- Adding headers with section type before control blocks;
- Dividing a form into fieldsets.
Sections
Form elements are placed into different row arrays where the first row is a section header. Its template defines the text value of the header:
{view:"form", elements: [
    { rows:[
        { template:"Alpha fields", type:"section"},
        { view:"text", label:"Alpha 1", value:"" },
        { view:"text", label:"Alpha 2", value:"" }
    ]},
    { rows:[
        { template:"Beta fields", type:"section"},
        { view:"text", label:"Beta 1", value:"" }
    ]}
]}
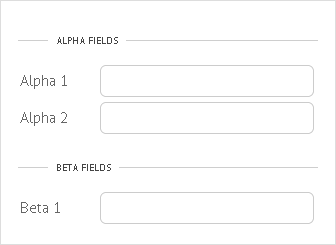
Related sample: Splitting Form into Sections
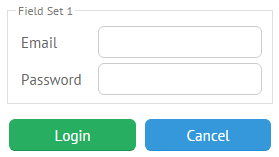
Fieldset
Fieldset is a collection of controls surrounded by a border from all the sides. Webix Fieldset features text label and body where rows or cols array of controls are stored:
{view:"form", elements:[
    { view:"fieldset", label:"Field Set 1", body:{
         rows:[
            { view:"text", label:"Login"},
            { view:"text", label:"Email"}
         ]
    }}
]}
Multiview Form
Form field can be placed into different tabs thus forming a multiview layout. Switching between tabs there is implemented with tabbar and segmented buttons as well as with the help of the dedicated tabview.
The switching controls are placed directly into the array of form elements.
{view:"form", elements:[
    { view:"tabview",
        tabbar:{
            options:["A","B"]
        },
        cells:[
            { id:"A", rows:[
                { view:"text", name:"value1", label:"value1" },{}
            ]},
            { id:"B", rows:[
                { view:"text", name:"value2", label:"value2" }, {}
            ]}
        ]
    }
]}
Related sample: Form with Tabs
Retrieving Form Values
Getting the value of a single element
Since form elements comprise an associative array, you can refer to each of them by the name property of any item.
var form1 = [
    { view:"text", label:"Login", name:"login", id:"log"},
    { view:"text",  label:"Email", name:"email", id:"email"},
    { view:"button",  name:"submit", value:"Submit", id:"btn"}
];

webix.ui({
    view:"form",
    id:"my_form",
    elements: form1
});

// accessing the "login" field object
var login = $$("my_form").elements.login;

// getting the value of the "login" field
var loginValue = $$("my_form").elements.login.getValue();
Or, you can apply the getValue() method directly to the needed control as follows:
var loginValue = $$("log").getValue();
Getting values of all form elements
To get an associative array of all elements' values (name:value pairs), you can use getValues method. To get to the necessary value, you should specify the name of the needed control.
var values = $$("my_form").getValues(); //returns { login:"", email:"", submit:"" }

values.login; // returns current value of "login" field
Additionally, you can get only changed and unchanged form values with the following methods respectively:
- getDirtyValues - returns a hash of changed values;
- getCleanValues - returns a hash of unchanged values.
Disabling Form Elements
Any form element can be disabled or switched to the readonly mode.
webix.ui({
    view:"form",
    elements:[
        { view:"text", readonly:true},
        { view:"text", disabled:true }
    ]
});
Related sample: Form: Attributes
See also Form and HTMLform Treatment article to learn more about the most important form methods.
Reacting on Changes in Input Fields
If you want to track the moment when the value in an input changes from one to another and attach some event to it, make use of the dedicated onChange event.
The event is attached to element object that can be retrieved by its ID or name.
The attached function can be any you wish. Here is an example of logging the changes. The function takes three arguments:
- newv - new control value
- oldv - previous control value
- config - shows the change source. Can be of the follwing values:
- "user" - if the change was made by the user
- "auto" - if the change was made by the library (e.g. when setValues was called).
$$("form1").elements["login"].attachEvent("onChange", function(newv, oldv, config){
    webix.message(`Value was changed from ${oldv} to ${newv}. Source: ${config}`);
});
Related sample: Form: "onChange" Event
Getting Parent Form for the Input
The easiest way to get to the parent form from any of its elements is to call the getFormView:
Validating form on input changing
{
    view:"text", on:{
        onChange:function(){
            var form = this.getFormView();
            form.validate();
        }
    }
}
Sending Form Data
Form data can be sent to server in either of the following ways:
1 . Using Webix Ajax helper:
webix.ajax().post("some.php", form.getValues());
//with callback
webix.ajax().post("some.php", form.getValues(), function(text, data, xhr){ });
2 . Using webix.send method that emulates HTMLform submitting:
webix.send("come.php", form.getValues());
3 . Indirectly, via the bound master component or DataCollection:
The method is good when the form is used for editing the data of the main component (datatable, tree, list, etc.). In this case not the form data matters but the data of the main component. Form saves the data to the master component while the master handles the server side part.
// data from a selected list item is pushed to the form
form.bind(list);

//pushes the data back to the list item
form.save()
Data binding concept is described in a separate documentation article.
Related Articles
- Form and HTMLform Treatment
- Uploading Files with Form
- HTMLform
- Controls List
- Controls Common Functionality Guide
- Data Validation in Forms
- Event Handling
- Data Binding
- Creating Message Boxes