Available only in PRO Edition
Portlet
The widget is available in the Webix Pro edition.
API Reference
Overview
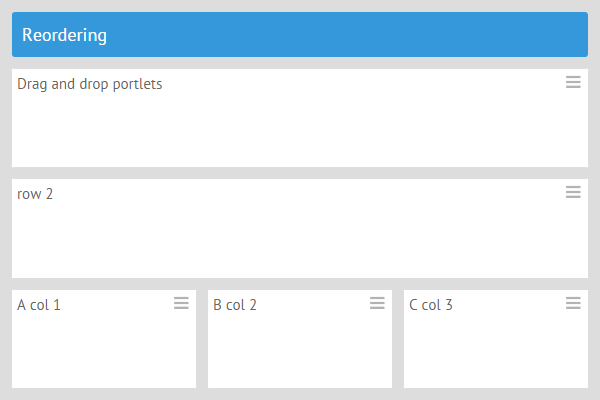
Portlet is a layout component that allows placing other widgets inside of it. You can easily drag this or that portlet anywhere you want on the page.
Thus, it's possible to change the app's structure in a simple way, without writing any extra code.
Initialization
As any other component, Portlet can be initialized in a container or as a full-screen view.
To initialize a portlet in a div container, you should create a container first:
<div id="divA" style="width:600px;height:400px;"></div>Then, in order to place the component into the container, specify the container property inside of the view constructor, as it's shown in the example below.
Portlet consists of a body (taking either a view or a text template) without the head section. A header can also be added. You'll find the details below.
webix.ui({
    container:"divA",
    type:"space",
    view:"portlet", body:{
        template:"Drag and drop portlets"
    }
});
Related sample: Portlet: Move Cells
Moving Portlets
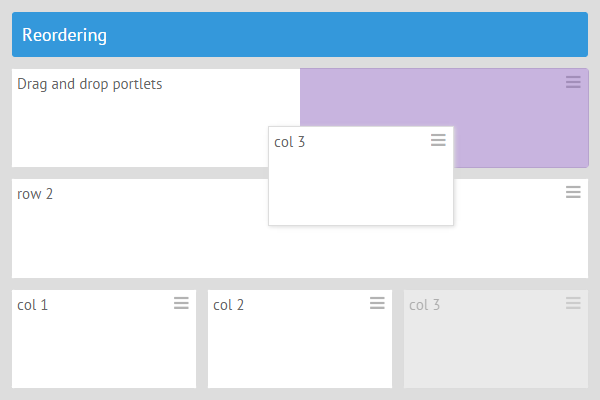
You can move portlets by the handle. While dragging a portlet, possible positions for dropping are defined by highlighting. A portlet can be placed as a column or as a row.
Related sample: Portlet: Move Cells
There are also two events that will help you to handle portlets' moving - onBeforePortletMove and onAfterPortletMove.
They fire before/after a portlet's moving correspondingly and take the following parameters:
- source - (object) the original parent layout
- parent - (object) a new parent layout
- active - (object) also this, a portlet to move
- target - (object) a target view (highlighted, will be placed beside the active one within the parent layout)
- mode - (string) drag direction relative to the target
Both these events are attached not to separate portlets, but globally:
webix.attachEvent("onBeforePortletMove", function(source,parent,active,target,mode){
    // some code here
});
Related sample: onBeforePortletMove Event
webix.attachEvent("onAfterPortletMove", function(source,parent,active,target,mode){
    // some code here
});
Related sample: onAfterPortletMove Event
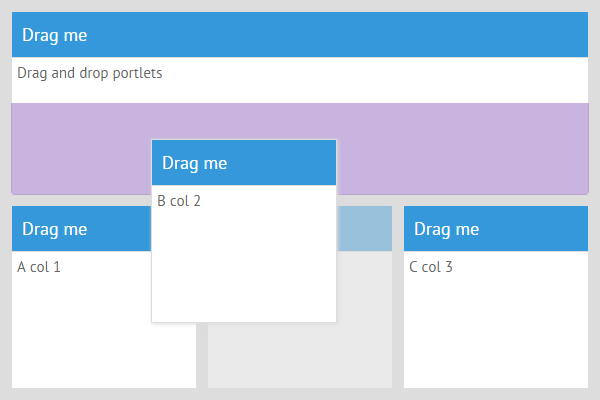
Dragging by the Header
In order to drag a portlet, you can use not only the handle, but also the portlet header. Just set some string value for the header property in the portlet definition:
webix.ui({
    type:"space",
    view:"portlet", header:"Drag me", body:{
        template:"Drag and drop portlets"
    }
});
Related sample: Portlet: Drag Header
Modes of Moving Portlets
Replacing portlets
Instead of simply moving a portlet to a new position, it's also possible to replace the target portlet with the moved one. This mode is enabled by specifying the mode property with the value "replace":
webix.ui({
    type:"space",
    view:"portlet", mode:"replace", body:{
        template:"Drag and drop portlets"
    }
});
Related sample: Portlet: Replace Cells
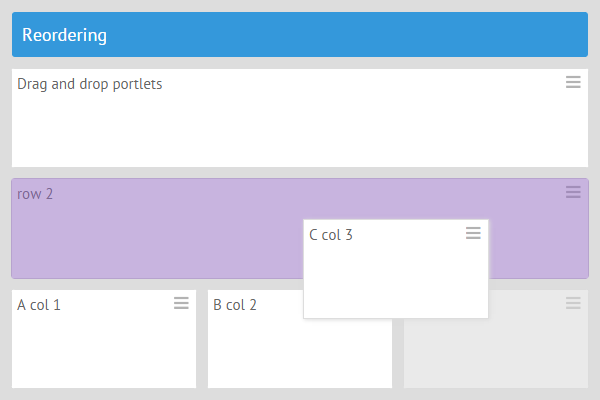
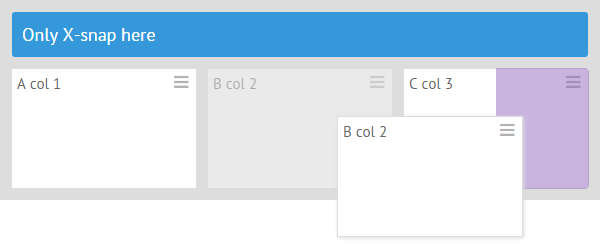
One direction moving
There are two modes that allow portlets move either only in the horizontal direction or in the vertical one. They are called "cols" and "rows", respectively. In the "cols" mode portlets are moved only along the x-axis. In the "rows" mode portlets can only be placed along the y-axis.
webix.ui({
    type:"space",
    rows:[
        { template:"Only X-snap here", type:"header"},
        { type:"wide", cols:[
            { view:"portlet", mode:"cols", body:{
                template:"A col 1"
            }},
            { view:"portlet", mode:"cols", body:{
                template:"B col 2",
            }},
            { view:"portlet", mode:"cols", body:{
                template:"C col 3"
            }},
        ]
        }
    ]
});
Related sample: Portlet: One Direction
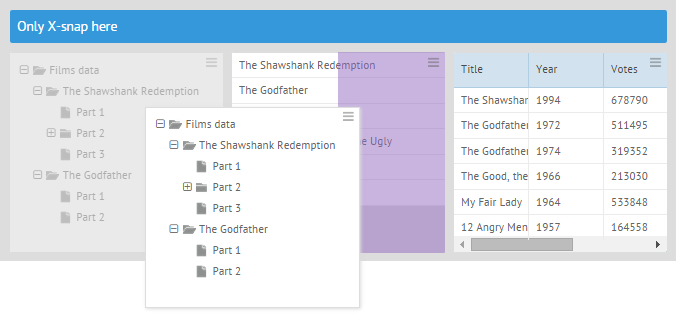
Adding Other Components
It's very easy to add some other component into a portlet. All you need to do is specify the view name, data source and any other necessary properties of the component in the portlet's body:
webix.ui({
    type:"space",
    rows:[
        { template:"Only X-snap here", type:"header"},
        { type:"wide", cols:[
            { view:"portlet", mode:"cols", body:{
                view:"tree", data:smalltreedata
            }},
            { view:"portlet", mode:"cols", body:{
                view:"list", data:small_film_values_set, select:true, autoheight:true
            }},
            { view:"portlet", mode:"cols", body:{
                view:"datatable", data:small_film_set, autoConfig:true, autoheight:true
            }},
        ]
        }
    ]
});
Related sample: Portlet: Drag Components
Saving/Restoring Portlet State
Webix Portlet provides the possiblity to save and restore the state of portlets to a cookie, a local or session storage.
For these needs you should store the configurations of all components/layouts within portlets to recreate them multiple times. You also need to provide some unique identifier (e.g. key) to access them later:
var contents = {
    "template1" : {
        key:"template1", template:"Area A"
    },
    "list1" : {
        key:"list1", view:"list", template:"#votes#", data:small_film_set
    }
    // other portlets configs
};
Then you can initialize portlets using these configuration objects with the help of the factory function:
function factory(conf){
    return { view:"portlet", icon:false, body:webix.copy(contents[conf]) };
}

webix.ui({
    type:"wide", id:"portlets", rows:[
        factory("template1"),
        factory("list1")
        // other portlets
    ]
});
After that you are ready to work with portlets' state.
Saving the current state
To save the current state of portlets to the local storage, you should call the serialize() method of the portlets parent layout:
var state = $$("portlets").serialize(serializer);
webix.storage.local.put("portlets_state", state);
As a parameter the serialize() method takes the serializer function that contains the serialization logic of each particular component within a portlet body.
//saves the unique "key" property of each component
function serializer(obj){
    return obj.config.key;
}
Restoring the saved state
To recreate the portlets content, you need to get the state object by its name from the storage and call the restore() method of the portlets parent layout:
var state = webix.storage.local.get("portlets_state");
if (state)
    $$("portlets").restore(state, factory);
The factory function declared above implements the logic of creating portlets. It will return a portlet from the existing component configuration (here configurations are stored in the contents object) to which it will point by the serialized key.
Related sample: Portlet: Save State
Back to topIf you have not checked yet, be sure to visit site of our main product Webix web ui framework and page of ui draggable product.