GoogleMap
Since 4.0
API Reference
Overview
The GoogleMap widget allows working with geographical data with the help of Webix and Google Map API. This widget is based on View and inherits API from DataStore.
Initialization
You can initialize a basic GoogleMap widget using the code below:
webix.ui({
    //provide your own Google API key
    key:"AIzaSyAi0oVNVO-e603aUY8SILdD4v9bVBkmiTg",
    view:"google-map",
    id:"map",
    zoom:6,
    center:[ 48.724, 8.215 ]
});
Pay attention that before working with Webix GoogleMap you need to get a personal Google API key.
Related sample: GoogleMap::Basic
Main Properties
- key - your application's API key
The following properties define configuration of the GoogleMap widget:
- id - (string) defines the unique ID of the widget
- zoom - (number) defines the resolution of map objects displaying
- center - (array) sets the center of the map. It's an array of two elements (latitude and longitude) with comma delimiter
- mapType - (string) sets the Google map type. There are four Google map types: "ROADMAP","SATELLITE","HYBRID","TERRAIN". Uppercase is a must
- layerType - (string) the type of map layer. There are two types of layer you can use for the GoogleMap widget:
- "marker" - allows setting markers for particular points (Related sample: GoogleMap::Markers)
- "heatmap" - presents values via colors (Related sample: GoogleMap::HeatMap)
- mapId - (string) a unique identifier that represents Google Map styling and configuration settings that are stored in Google Cloud. Map IDs are used to enable features or manage or style maps on your websites and in your applications. The map ID is required for using such feature as Advanced Markers. Check details
- template - (function) a template function used for markers customization
Loading Data into GoogleMap
GoogleMap widget is DataStore-based, so you can work with it as with any other data widget.
Each map point is a separate data object. You can store a set of map points in a dataset and use all common ways of data loading to load data into a map.
For example, you can set data inline with the help of the data parameter:
webix.ui({
//provide your own Google API key
key:"AIzaSyAi0oVNVO-e603aUY8SILdD4v9bVBkmiTg",
view:"google-map",
id:"map",
zoom:6,
center:[ 48.724, 8.215 ],
data:[
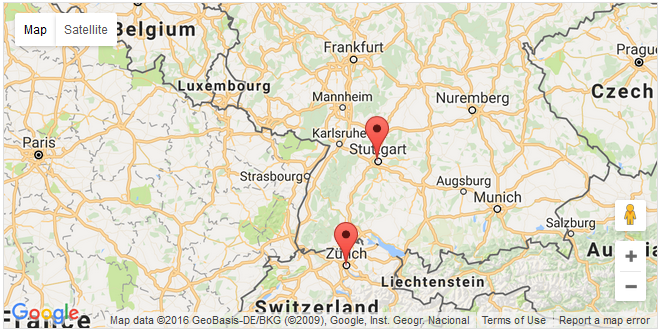
{ id:1, lat:48.782, lng:9.177, label:"A", draggable:true },
{ id:2, lat:47.366, lng:8.55, label:"B", draggable:true },
{ id:3, lat: 48.137, lng: 11.575, label:"C", draggable:true }
]
});
All data objects will be displayed as markers or heatmap, depending on the specified type of layer.
Obligatory properties
There are two required properties that should be specified in the point's data object:
- lat - (number) the latitude coordinate
- lng - (number) the longitude coordinate
All other available properties can be found in the Google API Reference.
Getting the GoogleMap object
To get the map object, you can make use of the getMap method.
var mapObj = $$("map").getMap();
The method can take the waitMap parameter. If the parameter is passed, the method returns a promise which will be resolved when the map is rendered.
$$("map").getMap("waitMap").then(function(mapObj){
    // some code
});
Rendering data on a map
The drawData() method draws data on a map.
$$("map").drawData();
Working with Markers
Since v11.2 the GoogleMap widget uses the API of the Google Maps Advanced Markers instead of Markers.
Getting marker object
To get the marker object, use the getItem() method:
$$("map").getItem(id).$marker;
Controlling marker visibility
You can set the hidden property for a marker (data object), to hide and show it, when needed.
{ id:1, lat:48.782, lng:9.177, hidden:true}
Showing a marker
To show a marker, use the showItem() method. The method scrolls the map to the location where the specified marker is situated. It takes the marker's ID as a parameter:
$$("map").showItem(1);
Catching a click on a marker
To catch a click on a marker, use the onItemClick event:
$$("map").attachEvent("onItemClick", function(id, marker){
    // your code
});
The handler function takes two parameters:
- id - (number) the marker id
- marker - (object) the marker object
Detecting drag-n-drop actions
There are two DnD-related events. They are available for markers that have enabled draggable property in their configuration:
{ id:1, lat:48.782, lng:9.177, draggable:true}
1) onAfterDrop event fires after drag-n-drop of a marker is finished. The handler function takes two parameters:
- id - (number) the marker id
- item - (object) the data object
$$("map").attachEvent("onAfterDrop", function(id, item){
    // your code
});
2) onDrag event fires when drag-n-drop of a marker has started.
$$("map").attachEvent("onDrag", function(id, item){
    // your code
});
The handler function takes two parameters:
- id - (number) the marker id
- item - (object) the data object
Related sample: GoogleMap::Draggable Markers
Customizing a marker
Since v11.2 the GoogleMap widget uses the API of the Google Maps Advanced Markers, which provides wide customization possibilities.
Note that you should specify the Map ID via the mapId option in the GoogleMap widget configuration for using the Advanced Markers functionality.
To be able configuring the markers, make use of the template property. It is a function that takes two parameters:
- item - (object) the data object
- PinElement - (object) the PinElement object for customization of the default pin
The template function returns the HTML element.
In the example below the default pin size is customized:
webix.ui({
  // provide your own Google API key
  key:"AIzaSyAi0oVNVO-e603aUY8SILdD4v9bVBkmiTg",
  // Map ID is required for advanced markers
  mapId:"DEMO_MAP_ID",
  view:"google-map",
  zoom:6,
  center:[ 48.724, 8.215 ],
  template: function(item, PinElement){
    return new PinElement({
      scale: item.id
    }).element;
  },
  data:[
    { id:1, lat:48.782, lng:9.177 },
    { id:2, lat:47.366, lng:8.55 },
    { id:3, lat: 48.137, lng: 11.575 }
  ]
});
Related sample: GoogleMap: Scale Markers
Other common examples for markers customization include:
- using HTML content for markers, as in:
webix.ui({
  // provide your own Google API key
  key:"AIzaSyAi0oVNVO-e603aUY8SILdD4v9bVBkmiTg",
  // Map ID is required for advanced markers
  mapId:"DEMO_MAP_ID",
  view:"google-map",
  template: function(item, PinElement){
    let element;
    switch(item.id){
      case 1:
        element = webix.html.create("img", {
            src:"https://docs.webix.com/samples/common/imgs/32/undo.gif"
        });
        break;
      case 2:
        element = webix.html.create("div", {class:"price-tag"}, "$2.5M");
        break;
      case 3:
        element = new PinElement({
          glyph: webix.html.create("span", {class:"webix_icon wxi-eye"}),
          glyphColor: "#ff8300",
          background: "#FFD514",
          borderColor: "#ff8300",
        }).element;
        break;
    }
    return element;
  }
});
Related sample: GoogleMap: Markers with Custom HTML Content
- making markers interactive, like this:
webix.ui({
  // provide your own Google API key
  key:"AIzaSyAi0oVNVO-e603aUY8SILdD4v9bVBkmiTg",
  // Map ID is required for advanced markers
  mapId:"DEMO_MAP_ID",
  view:"google-map",
  template: function(item){
    const element = webix.html.create("div", {class:"user"},
    `<span class='webix_icon wxi-user'></span><span class='name'>${item.name}</span>`);
    element.onclick = function(){
      this.classList.toggle("active");
    };
    return element;
  }
});
Related sample: GoogleMap: Interactive Markers
Animating markers
You can animate markers, using some custom code. For example, you can apply a function provided below:
webix.ui({
    // provide your own Google API key
    key:"AIzaSyAi0oVNVO-e603aUY8SILdD4v9bVBkmiTg",
    // Map ID is required for advanced markers
    mapId:"DEMO_MAP_ID",
    view:"google-map",
    id:"map",
    zoom:6,
    center:[ 48.724, 8.215 ],
    data:[
      { id:1, lat:48.782, lng:9.177, title:"Stuttgart" },
      { id:2, lat:47.366, lng:8.55, title:"Zurich" }
    ]
  }
});

let isAnimating = false;
let animationStyles;
function animateMarker(){
  const item = $$("map").getItem(1);
  if(!item) return;

  const markerDiv = item.$marker.content;

  if (!isAnimating){
    markerDiv.style.animation = "marker-bounce 0.5s infinite ease-in-out";

    if(!animationStyles){
      animationStyles = document.createElement("style");
      animationStyles.textContent = `
        @keyframes marker-bounce {
            0%, 100% { transform: translateY(0); }
            50% { transform: translateY(-20px); }
        }`;
      markerDiv.appendChild(animationStyles);
    }
  }
  else
    markerDiv.style.animation = "";

  isAnimating = !isAnimating;
}
Related sample: GoogleMap: Markers
Working with Heatmap
Getting heatmap object
To get the heatmap object, you can make use of the getHeatmap method.
var heatmapObj = $$("map").getHeatmap();
Heatmap is constantly updated. You can get the actual heatmap object by using the onHeatMapRender event. It will fire when a heatmap will be (re-)rendered.
$$("map").attachEvent("onHeatMapRender", function(heatmapObj){
    // your code
});
The handler function takes the heatmap object as a parameter.
Specifying heatmap configuration
You can configure the heatmap displaying with the help of the heatmapConfig property. It is an object that can contain various Google API properties for heatmap, e.g. opacity
webix.ui({
  //provide your own Google API key
  key:"AIzaSyAi0oVNVO-e603aUY8SILdD4v9bVBkmiTg",
  view:"google-map",
  id:"map",
  zoom:13,
  center:[ 37.774546, -122.433523 ],
  layerType:"heatmap",
  heatmapConfig:{               opacity:"0.4"         },                          url:"data/heatmap.json"
});
All other available properties can be found in the Google API Reference.
Using Custom Map Source
The default Google Map configuration contains the path to the map source as //maps.google.com/maps/api/js. The protocol that will be used depends on the protocol that you specify for your app.
In case you want to set your own protocol for the map url, you can make use of the src parameter:
webix.ui({
  //provide your own Google API key
  key:"AIzaSyAi0oVNVO-e603aUY8SILdD4v9bVBkmiTg",
  src:"https://maps.google.com/maps/api/js",
  view:"google-map",
  id:"map",
  zoom:6,
  center:[ 48.724, 8.215 ]
});