Available only in PRO Edition
Excel Viewer
Since 3.0
The widget is available in the Webix Pro edition.
API Reference
Overview
ExcelViewer is an extension tool intended for viewing Excel files.
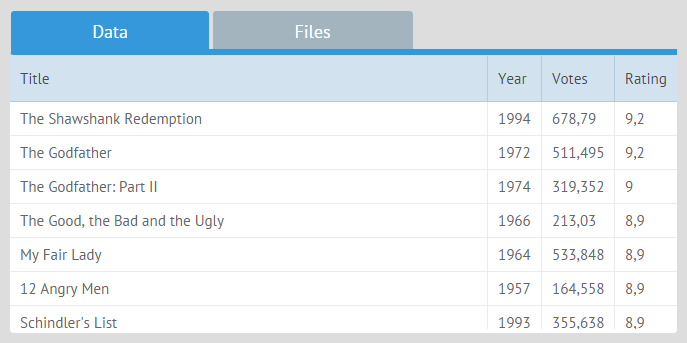
The constructor of the viewer is the following:
{
    view:"excelviewer",
    toolbar:"toolbar",
    excelHeader:true,
    url:"binary->files/data.xlsx"
}
The configuration properties are:
- toolbar - (string) the id of the related excel toolbar, if used;
- excelHeader - (boolean) true to use the first row of the Excel table as a column header;
- url - (string) the url of the excel file that should be displayed.
Binary proxy is used for loading the file, which allows to get its contents as ArrayBuffer.
The default datatype for Excel Viewer is excel. It is strongly recommended not to change it manually to avoid parsing inconsistency.
Excel Viewer API
load()
loads an excel file to the viewer
parameters:
- file - (string) the name of the file to load
- datatype - (string) data type (should be "excel" here)
$$("viewer").load("binary->data.xlsx", "excel");
parse()
parses file data to the viewer
parameters:
- file - (object) uploaded file object
- datatype - (string) data type (should be "excel" here)
{
    view:"uploader", value:"Select Excel File", width:200,
    on:{
        onBeforeFileAdd:function(upload){
            $$("excel").clearAll();
            $$("excel").parse(upload.file, "excel");
            return false;
        }
    }
}
Related sample: Excel File Uploading and Downloading
showSheet()
switches to the specified sheet
parameters:
- name - (string) the name of the sheet
$$("viewer").showSheet("Data");
Excel Toolbar and its API
It's possible to show a toolbar with tabs that correspond to the Excel sheets. In order to render such a toolbar, the dedicated excelbar view should be initialized.
{
    view:"excelbar",
    id:"toolbar"
}
- id (string) - the id of the Excel toolbar.
Excel toolbar API
getInput()
returns the toolbar object
$$("toolbar").getInput();
returns:
- toolbar - (object) the toolbar object
getValue()
returns the currently selected tab
$$("toolbar").getValue();
returns:
- tab - (string) the name of the selected tab
setSheets()
sets tabs in the toolbar (should correspond to excel sheets)
parameters:
- sheets - (array) an array of tabs
$$("toolbar").setSheets(["Data", "Files"]);
setValue()
sets the selected tab within a toolbar
parameters:
- value - (string) the name of the tab to select
$$("toolbar").setValue(value);
Loading Data to Excel Viewer
There are three possible ways of loading data to Excel Viewer:
- specifying the needed file directly in the viewer constructor by using the url parameter:
{
    view:"excelviewer",
    url:"binary->files/data.xlsx"
}
- calling the load method with the file name as a parameter
{ view:"excelviewer", id:"excel", editable:true, header:false },
...
$$("excel").load("binary->files/data.xlsx", "excel");
Binary proxy is used for loading the file, which allows getting its contents as ArrayBuffer. The datatype is "excel".
- parsing uploaded file data with the help of parse method
{ view:"uploader", value:"Select Excel File", width:200,
    on:{
        onBeforeFileAdd:function(upload){
            $$("excel").clearAll();
            $$("excel").parse(upload.file, "excel");
            return false;
        }
    }
}
Related sample: Excel File Uploading and Downloading
Import settings
Excel Viewer allows importing a range of settings from an Excel file. Styles, column width and row heights are imported by default. You can also import:
- column and row spans, if the spans:true property is set in the Excel Viewer configuration:
webix.ui({
    view: "excelviewer",
    data: base_data,
    spans: true
});
Related sample: Excel File Uploading and Downloading
- sheets
By default, Excel Viewer shows only the first imported sheet. In order to browse all of them, you need to set an excelbar:
// setting an excelbar
{
    view:"excelbar",
    id:"toolbar1"
}

// applying the excelbar to the excelviewer
{
    view:"excelviewer",
    toolbar:"toolbar1"
}
- dates
Excel Viewer allows importing Webix-formatted dates from an Excel file.
Customizing Loaded Data
You can customize the presentation of the loaded data, such as displaying headers and controlling the number of the loaded rows.
{
    view:"excelviewer",
    url:"binary->files/data.xlsx@Data[1-10]"
}
The string value of the url property binary->files/data.xlsx@Data[1-10]" includes the following parts:
- binary - the name of the proxy object
- files/data.xlsx - path to the Excel file
- @ - optional, the delimiter that detaches the link from its parameters (can be omitted together with parameters)
- Data - optional, the name of the Excel sheet to render
- [1-10] - optional, the rows that should be rendered in the viewer
Export Settings
Excel Viewer allows exporting a range of settings into an Excel file. Styles and column width are exported by default. You can also export:
- row heights
This setting is regulated by the heights option, which is set to false by default and can take the following values:
- true - to export only custom row heights (different from the default rowHeight);
- "all" - to export both custom and default row heights;
- false - default, row heights are not exported.
webix.toExcel($$("excelviewer"), { heights:true});
In case the styles:true option is set, the heights option is automatically set to "all".
- column and row spans
To export spans, you should set the spans:true property in the second parameter of the toExcel method:
webix.toExcel($$("excelviewer"), { spans:true});
- multiple sheets
By default, Excel Viewer exports the currently active sheet to an Excel file. You have several other options:
1) to export all the sheets, set the sheets:true option in the second parameter of the toExcel method
webix.toExcel($$("excelviewer"), { sheets:true});
2) to export separate sheets, set an array with sheets ids as a value of the sheets option:
webix.toExcel($$("excelviewer"), { sheets:["s1","s2"]});
3) to export a certain sheet, set its id as a value of the sheets option:
webix.toExcel($$("excelviewer"), { sheets:"s2"});
Working with Excel Viewer Offline
The dependencies which are necessary for working with Excel Viewer are generally taken from Webix CDN online catalog. If you need to view and download files via Excel Viewer offline, you should complete the following steps:
- download the package with CDN-files from https://github.com/webix-hub/cdn-extras
If you use Webix version 5.0 or later, use the file xlsx.core.styles.min.js.
In case of a version earlier than 5.0, choose the file xlsx.core.min.js.
- rename the folder to "extras" and move it to the desired directory
- set the path to the local CDN repository as
webix.env.cdn = "/local_folder";
Note that specifying the path to the local CDN repository has some peculiarities:
1) in case you set the path relative to the current page, it should be specified as:
webix.env.cdn = "../../../../local_folder";
2) the absolute path to the repository should be specified as follows:
webix.env.cdn = "http://localhost/local_folder";
If you have not checked yet, be sure to visit site of our main product Webix html5 ui library and page of javascript excel product.