Available only in PRO Edition
DataLayout
Since 3.3
The widget is available in the Webix Pro edition.
API Reference
Overview
Webix DataLayout is based on Layout and operates the DataStore API. Thus, this widget combines the features of a layout and a data component.
It's intended for creating complex data structures, e.g. big lists with dynamic data sub-loading, multipage forms, etc., and allows placing several data components into one layout. Besides, it provides the possibility to dynamically set and retrieve values of the inner elements, similar to the Form widget.
There is also the FlexDataLayout widget that inherits from DataLayout and renders each cell as an element of FlexLayout.
Simple Mode
In order to create a simple data layout, you need to define an empty rows or cols collection that will define the arrangement of elements on the page (vertical or horizontal).
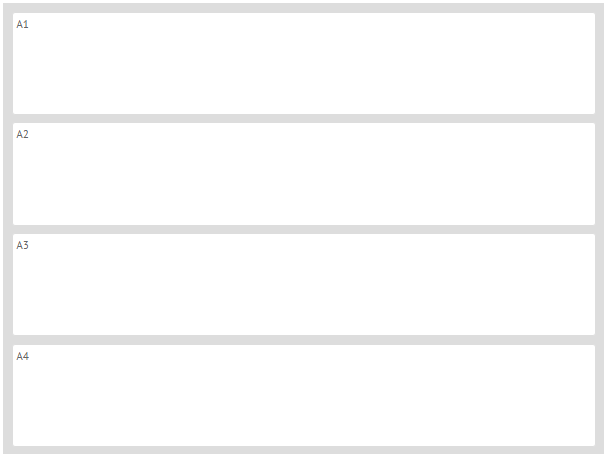
Then place configurations of the necessary views into the data configuration object. For example, a DataLayout can contain several templates:

webix.ui({
    view:"datalayout",
    type:"space",
    rows:[],
    data:[
        { id:"a1", template:"A1", type:" header" },
        { id:"a2", template:"A2", type:" header" },
        { id:"a3", template:"A3", type:" header" },
        { id:"a4", template:"A4", type:" header" }
    ]
});
Pay attention that in the above example the view:"template" definition is omitted for simplicity, as specifying the view type as "template" is optional.
Repeater Mode
To create a more complex structure, you should specify a common template for DataLayout elements as a value of its rows/cols property. It will be applied for each layout element (a row or a column).

webix.ui({
    view:"datalayout",
    type:"space",
    rows:[
        { name:"$value", type:"header", template:"#month# 2016" },
        { name:"data", view:"list", template:"#income#, #count#" }
    ],
    data:[
        { month:"January",
          data:[
            { income: 122342, count:12 },
            { income: 92342, count:8 },
            { income: 222342, count:20 }
          ]
        },
        { month:"February", data:[{ income: 2342, count:2 }] }
    ]
});
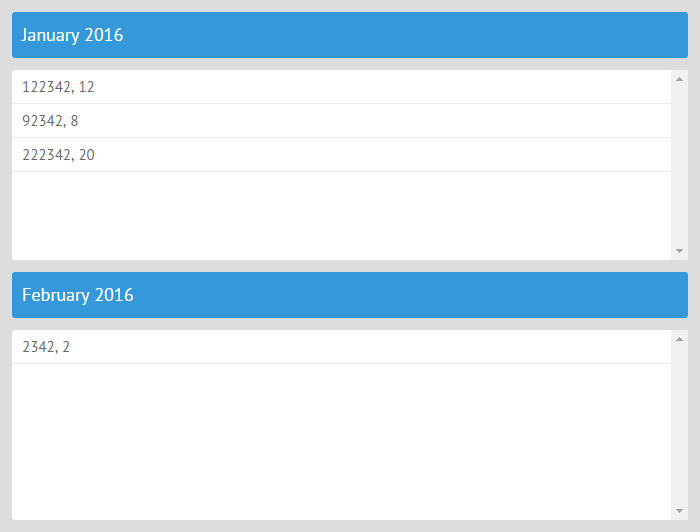
In the above example, the rows collection contains a common template that defines that two views will be shown in each DataLayout element: a template view for the header and a list with data.
Each view in DataLayout has the name property that defines which data elements will be passed to the view. This property can have one of the two values:
- "$value" - presupposes that the whole data item is passed to the view, and a view "decides" what data property should be displayed;
- "some_property" - implies that the value of a particular property in the data item will be passed and displayed in the view.
The view displays the passed data in the following way:
1) If the view is a data component, the passed data will be parsed into the view;
2) If the view is a single-value component (e.g. a label or a button), the passed data will be used as a value of this view.
Related sample: Data Layout - Repeater Mode
Loading Data
Data can be loaded into DataLayout in the same way as into any other data component, i.e. by:
- parsing from a string or an array:
webix.ui({
    view:"datalayout",
    type:"space",
    rows:[
        { name:"$value", type:"header", template:"#month# 2016" },
        { name:"data", view:"list", template:"#income#, #count#" }
    ],
    data:[
        { month:"January", data:[{ income: 122342, count:12 }] },
        { month:"February", data:[{ income: 2342, count:2 }] }
    ]
});
- loading from an external file by means of the load method or the url property:
webix.ui({
    view:"datalayout",
    id:"data",
    type:"space",
    rows:[
      { name:"$value", type:"header", template:"#month# 2016" },
      { name:"data", view:"list", autoheight:true, template:"#income#, #count#" }
    ],
    url:"data/data.js"
});
The details are given in the article Data Loading.
Setting/Getting Elements Values
DataLayout provides a form-like functionality for working with data values. You can get the current values of DataLayout elements and set new ones on the fly.
- to set values, use the setValue method. As a parameter, it takes an array with data objects. Each object contains data values for a particular data view:
webix.ui({
    view:"datalayout",
    id:"data1",
    type:"space",
    rows:[
       { view:"text", label:"Name", name:"month"},
       { view:"datatable", name:"data", autoheight:true, editable:true,
            columns:[{ id:"count", editor:"text"}, {id:"income", editor:"text"}]
       }
    ]
});

$$("data1").setValue([
    { "id":"m2", "month":"February", "data":[
        { "income": 2342, "count":14 },
        { "income": 92342, "count":28 },
        { "income": 224442, "count":50 }
    ]},
    { "id":"m3", "month":"March", "data":[
        { "income": 1844, "count":12 },
        { "income": 239242, "count":28 },
        { "income": 440340, "count":20 }
    ]}
]);
- to get the current values of DataLayout, use the getValue method. It returns an array of data objects that present values of data views:
var values = $$("datalayout").getValue();
Related sample: Data Layout - Saving Complex Data
Manipulating Elements
You can perform all standard CRUD operations with the elements of DataLayout: add, update and remove elements.
- adding new elements into layout
$$("data").add({
  "month":"April", "data":[{"income":5894,"count":4}, {"income": 1458, "count":2}]
});
- getting and updating elements
var last = $$("data").getItem($$("data").getLastId());
if(last){
    last.month = "Hello, December";
    $$("data").updateItem(last.id, last)
}
- removing elements
var first = $$("data").getFirstId();
if(first)
 $$("data").remove(first);
Related sample: Data Layout - CRUD Operations
Complex Data Layout
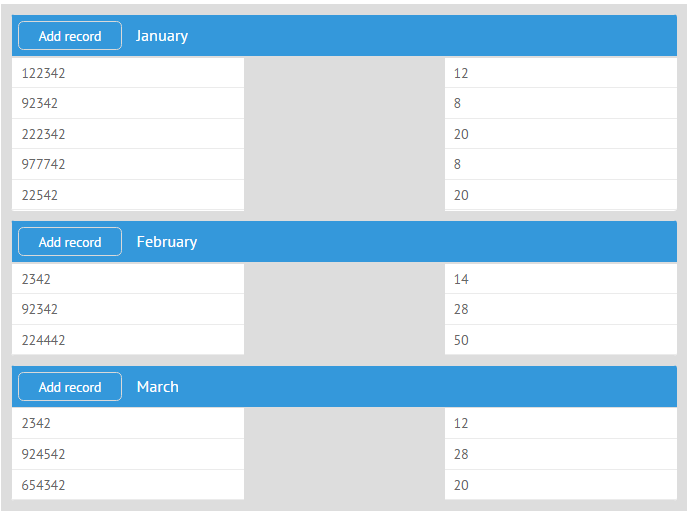
You can also create a complex data layout with nested rows and columns. It can be implemented like this, for example:

Specify the layout you want to embed into the DataLayout:
var subconfig = {
    isolate:true,
    rows:[
        { view:"toolbar", elements:[
            { view:"button", value:"Add record", width: 120 },
            { view:"label", name:"month" }
        ]},
        { cols:[
            { id:"l1", name:"data", view:"list", template:"#income#" },
            { },
            { id:"l2", name:"data", view:"list", template:"#count#" }
        ]}
    ]
};
Define the config of the DataLayout and specify the sub-layout in the rows collection. Set the data source as well:
webix.ui({
    view:"datalayout",
    id:"data",
    type:"space",
    rows:[
        subconfig
    ],
    url:"data/data.js"
});
Related sample: Data Layout - Complex Structure Operations
Back to top