How to Debug
Debug and Minified Versions
Regardless of the installation way, the package includes two versions of the JS sources:
- full (webix.js) - human-readable code with debugging options
- minified (webix.min.js)* - light-weight code for production
So, you can include the appropriate file - only one JS file, not both - in the following way:
<!-- full version -->
<link rel="stylesheet" href="../webix/codebase/webix.css" type="text/css">
<script src="../webix/codebase/webix.js" type="text/javascript"></script>

<!-- minified version -->
<link rel="stylesheet" href="../webix/codebase/webix.min.css" type="text/css">
<script src="../webix/codebase/webix.min.js" type="text/javascript"></script>
Benefits of Debug Version
In order to use the debugging functionality, make sure that you have included the non-minified version of the library - webix.js.
With this file it will be possible to:
- read and understand the source code
- inspect signatures of the methods and event handlers as well as component settings
- get warnings about improper configuration like undefined variables, syntax mistakes, etc.
- get proper error stack instead of some incomprehensible internal errors
- track data loading errors
- use debugging flags (e.g. to log all component events)
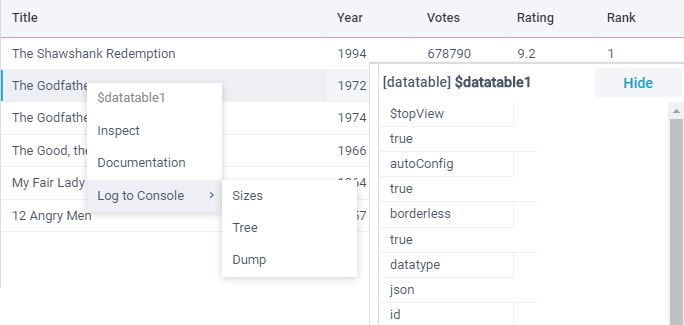
- use a debugging menu for each component.
You can check the details in the related Webix blog article.
Debugging Flags
You can enable the following options for debugging:
- Event logging - the best way to see what events fire in the current application:
webix.debug({events: true});
- Size logging to see the defined and computed sizes of currently used UI components:
webix.debug({size:true});
Before version 6.0 the flags were enabled as:
webix.debug = true;
webix.debug_size = true;
Debugging Menu
You can activate the debugging menu with the Ctrl + Right click combination on the needed component. The menu allows you to:
- look up into the documentation for this component
- get the component dimensions
- study the component hierarchy on the page
- log JS and HTML objects of any component and investigate its configuration and data in use.

Before 6.0
Before Webix 6.0 the files had different names for the full and minified sources respectively:
<!-- debug version -->
<link rel="stylesheet" href="../webix/codebase/webix.css" type="text/css">
<script src="../webix/codebase/webix_debug.js" type="text/javascript"></script>

<!-- standard version -->
<link rel="stylesheet" href="../webix/codebase/webix.css" type="text/css">
<script src="../webix/codebase/webix.js" type="text/javascript"></script>