ToDo User Guide
ToDo is a task organization tool. This widget allows you to create projects, split them into separate tasks and subtasks. You can track your progress with the help of due dates and assign tasks to different users.
Main Screens
Visually, ToDo consists of two parts:
- toolbar
- list of tasks.
Toolbar
The toolbar is situated at the top of the widget and has the following parts:
- project selector
- "Search" icon
- "Menu" icon.
Its main functions are CRUD operations with projects and search.
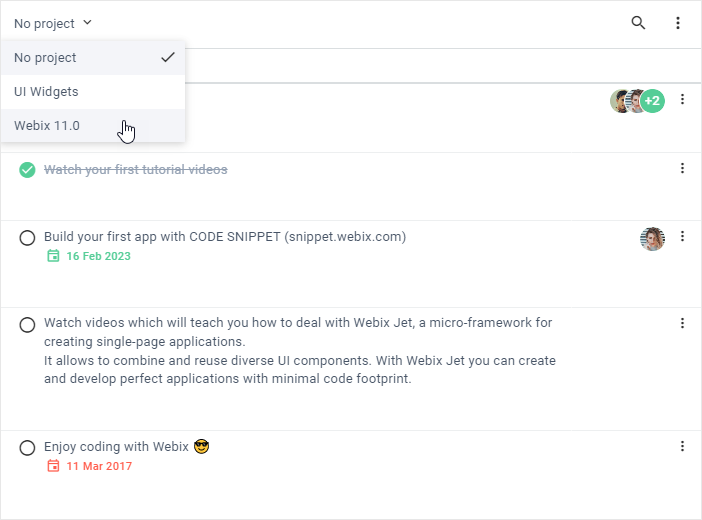
Switching projects
To switch a project, click on the project selector and select the necessary project from the dropdown list.
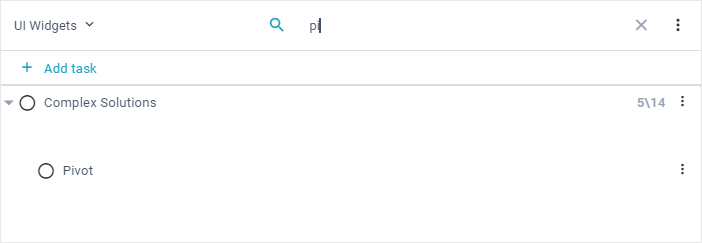
Searching
To search for a particular task, click on the "Search" icon and start typing your query in the search bar.
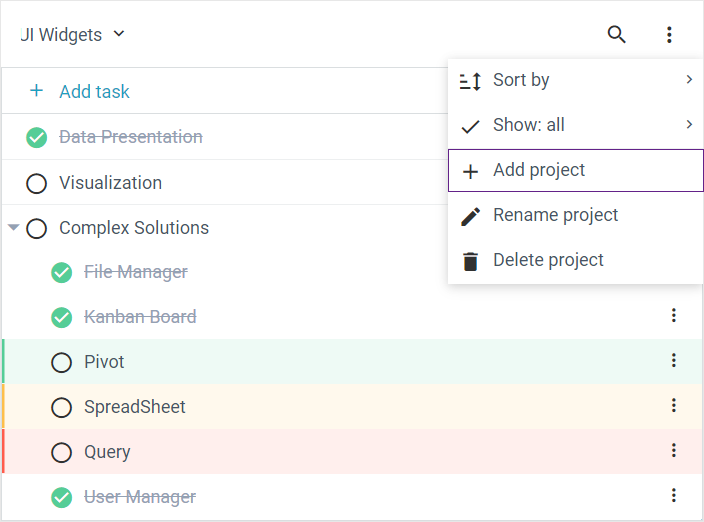
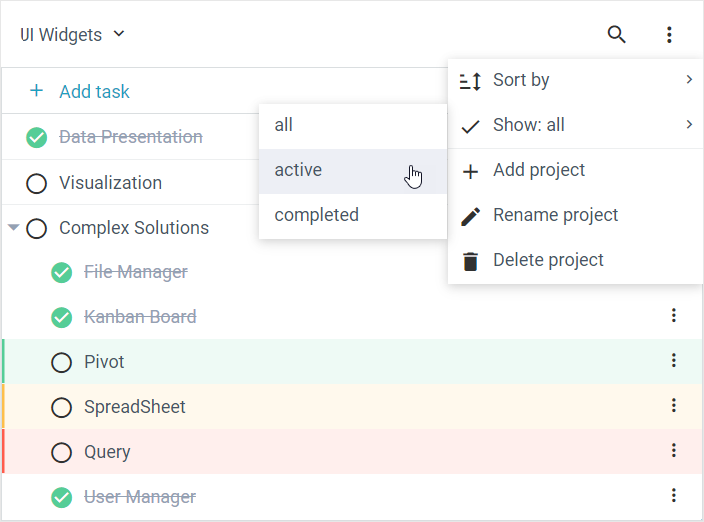
Adding a new project
To add a new project, click on the "Menu" icon and select the "Add project" option.
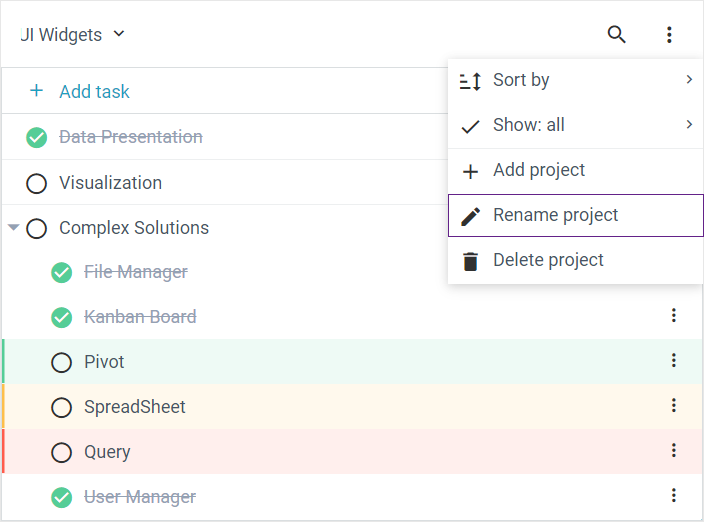
Renaming projects
To rename a project, click on the "Menu" icon and select the "Rename project" option.
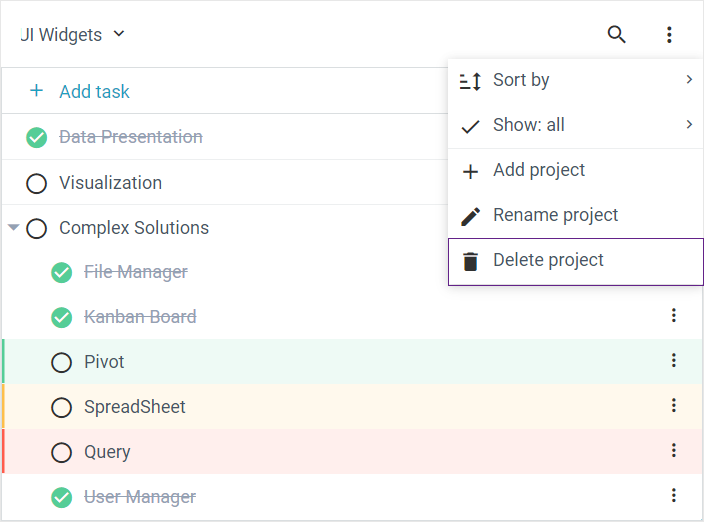
Deleting projects
To delete a project, click on the "Menu" icon and select the "Delete project" option.
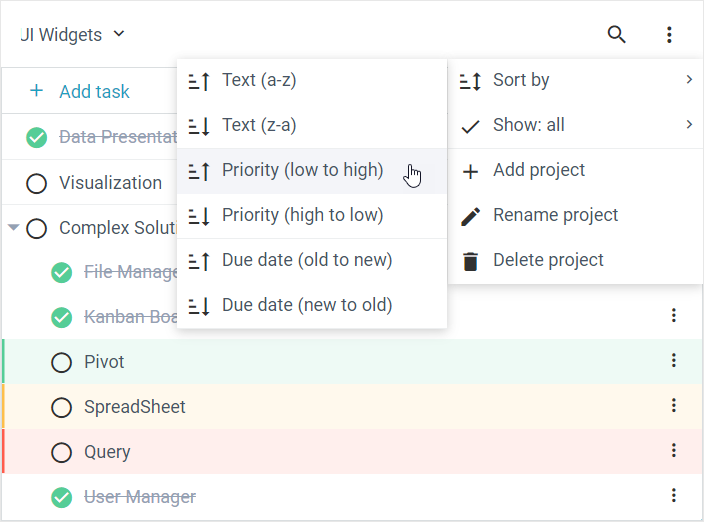
Sorting tasks
You can sort tasks in ToDo by the following criteria:
- text
- priority
- due date.
To sort tasks, take the following steps:
1) Click on the "Menu" icon.
2) Hover over the “Sort by” option.
3) Click on the necessary sorting option to apply it.
Filtering tasks
There are three filtering options that you can use to filter tasks:
- "all"
- "active"
- "completed".
To filter tasks, take the following steps:
1) Click on the "Menu" icon.
2) Hover over the “Show: all” option.
3) Click on the necessary filtering option to apply it.
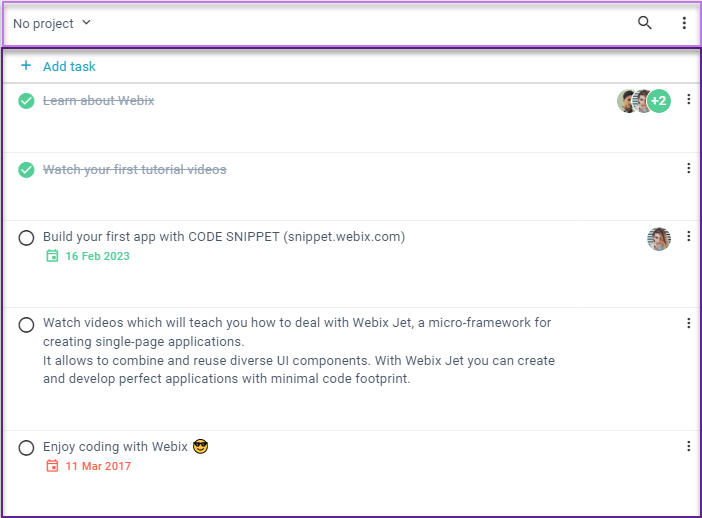
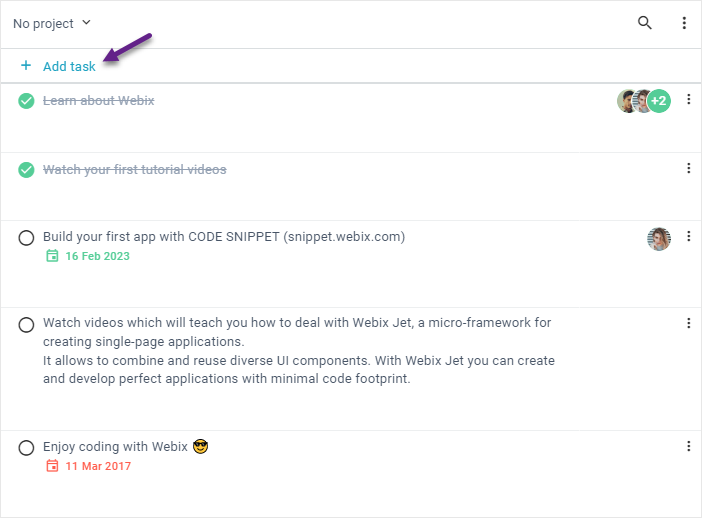
List of Tasks
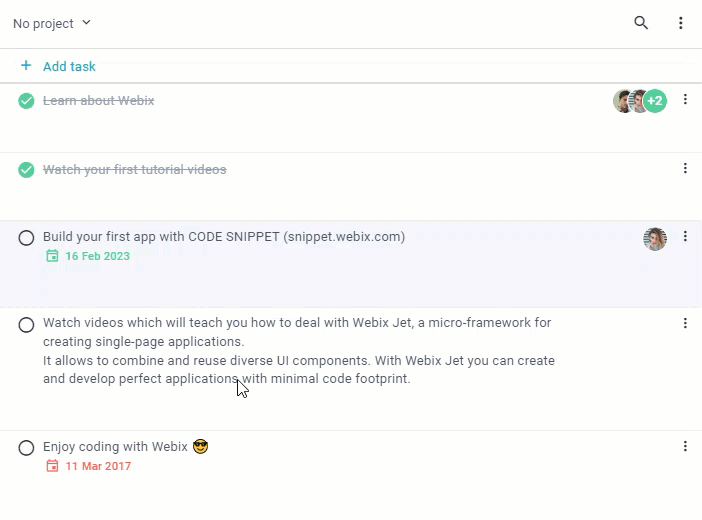
The main part of the screen is a list of tasks. Each task can include the following elements:
- task name
- assigned employees
- due date
- subtasks
- priority.
Users can perform the following operations with tasks:
- add new tasks
- add subtasks
- edit tasks
- copy and paste tasks
- duplicate tasks
- delete tasks
- set due dates
- move tasks to different projects
- assign a task to a user
- indent/unindent tasks
- set the priority of a task.
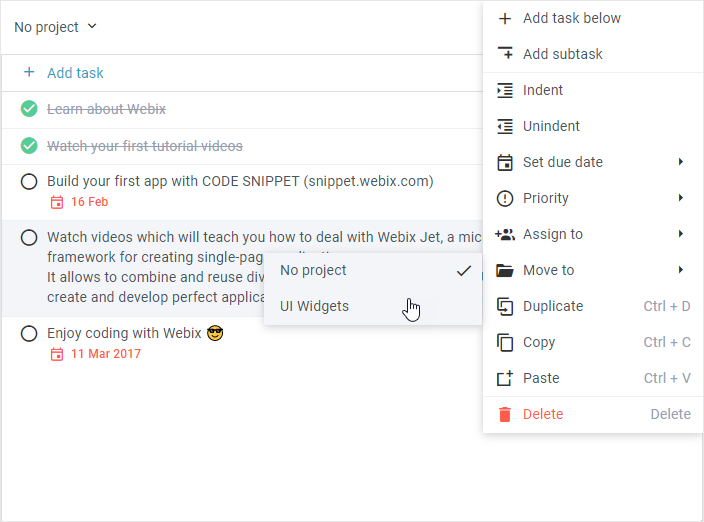
All these operations are made via the context menu. You can open it in two ways:
- click on the "Menu" icon in the right part of each task
- or right click on a task.
Adding a new task
To add a new task to the top of the list, click on the "Add task" button.
To add one task below the other, open the context menu and select the "Add task below" option.
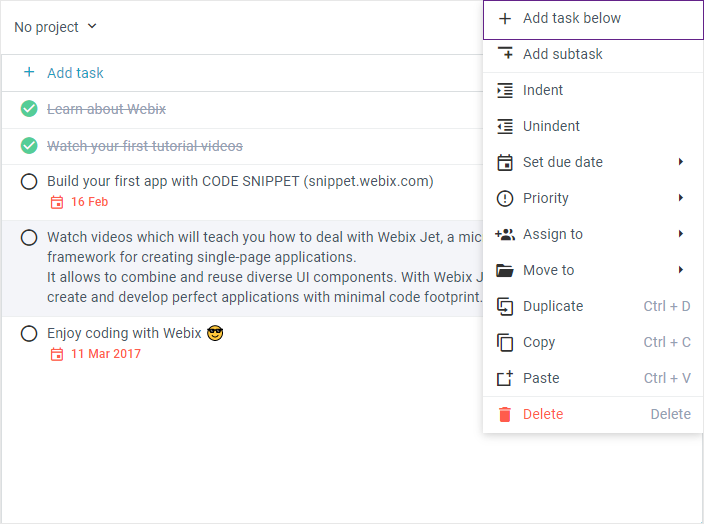
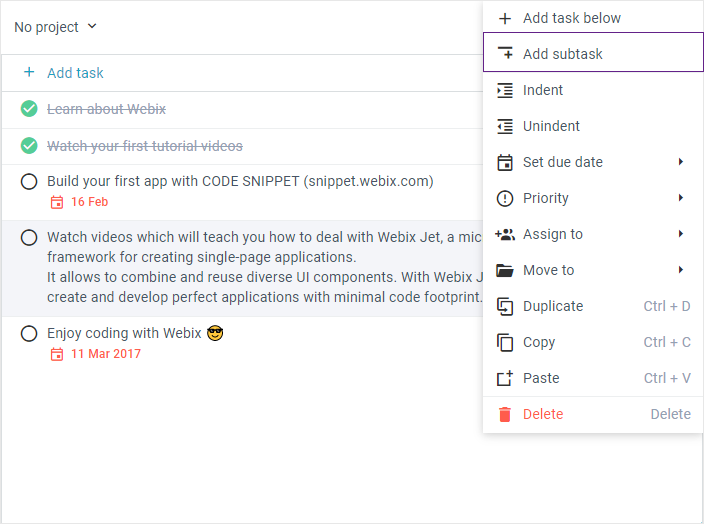
Adding subtasks
To add a subtask, open the context menu and select the "Add subtask" option.
The underlying task can be turned into a subtask for your primary task. To do this, open the context menu and select the "Indent" option.
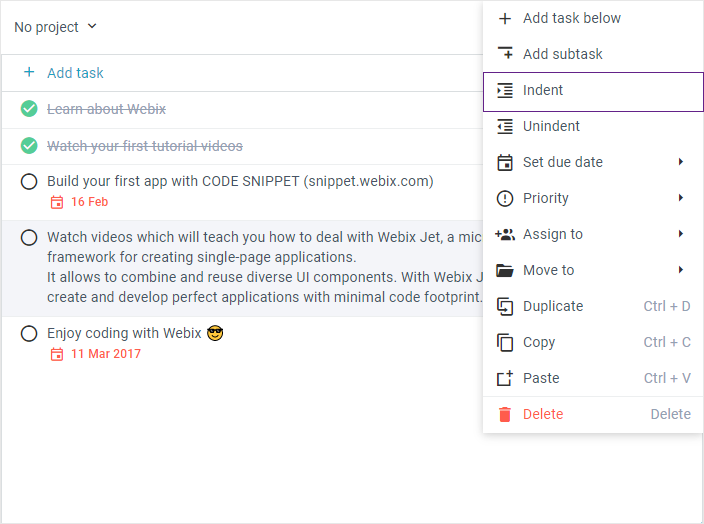
To revert this action, click on the "Unindent" option.
Editing tasks
To edit a task, take the following steps:
1) Double click on the task.
2) Make the necessary changes.
3) Press "Enter" or click anywhere outside the task borders to save changes.
Copying/pasting tasks
To copy a task, open the context menu and select the "Copy" option.
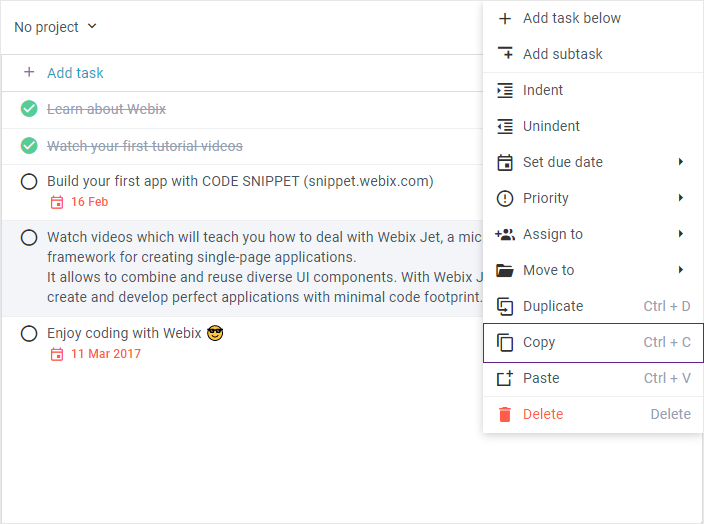
You can also use the Ctrl+C shortcut to copy.
To paste one task after another, open the context menu of a top task and select the "Paste" option. You can also use the Ctrl+V shortcut to paste.
Duplicating tasks
To duplicate a task, open the context menu and select the "Duplicate" option.
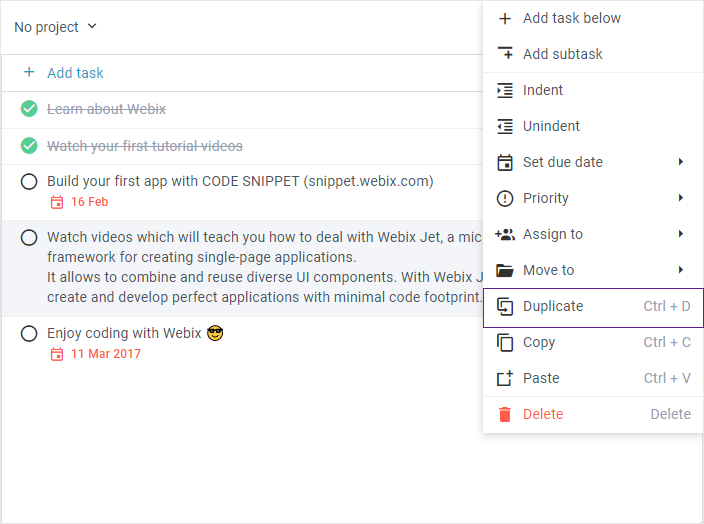
You can also use the Ctrl+D shortcut to duplicate.
Deleting tasks
To delete a task, open the context menu and select the "Delete" option.
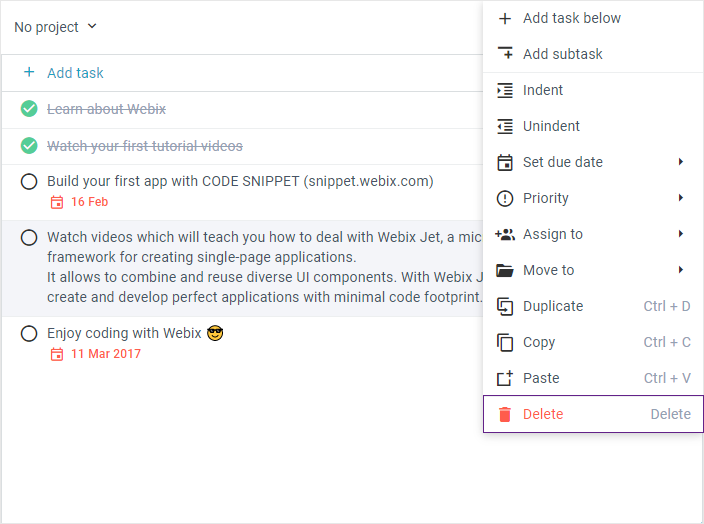
You can also use the "Delete" key for this operation.
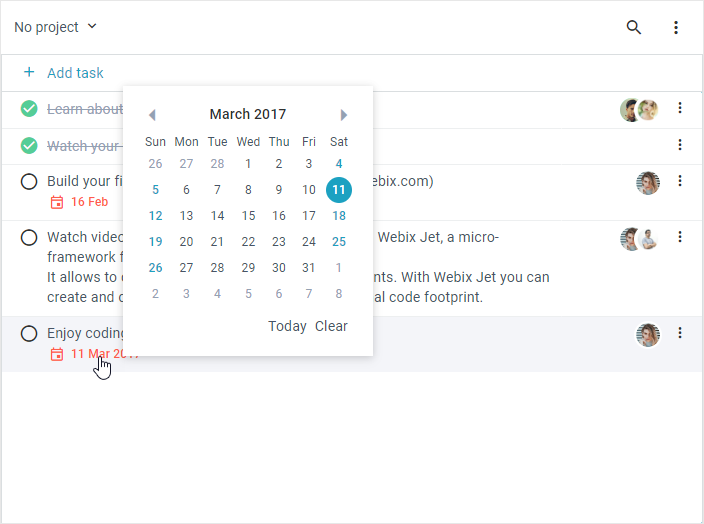
Setting/changing a due date
To set a due date for a task, take the following steps:
1) Open the context menu.
2) Hover over the "Set due date" option.
3) Click on the desired date in the datepicker.

To change a due date, click on it to open the datepicker and select the new due date.
Setting/resetting the priority
Depending on the selected priority level, ToDo highlights prioritised tasks in green, yellow or red.
To set the priority of a task, take the following steps:
1) Open the context menu.
2) Hover over the "Priority" option.
3) Click on the desired priority option: "Low," "Medium," or "High."
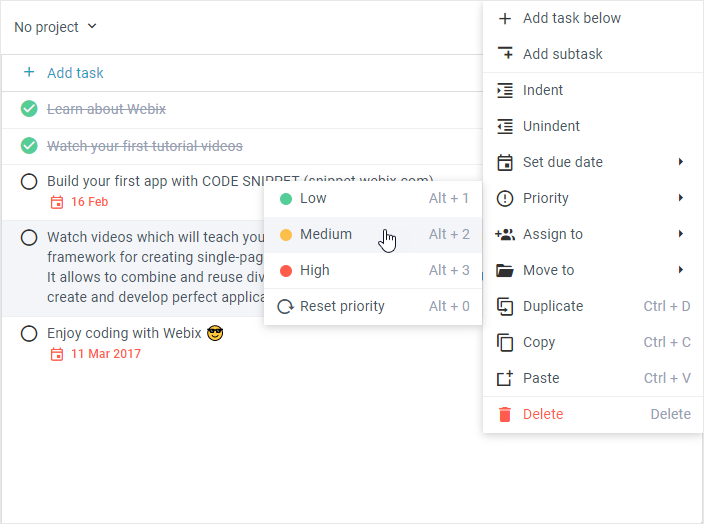
You can also use shortcuts for this operation:
- Alt+1 for "Low"
- Alt+2 for "Medium"
- Alt+3 for "High".
To reset the priority, click on the "Reset priority" option or use the Alt+0 shortcut.
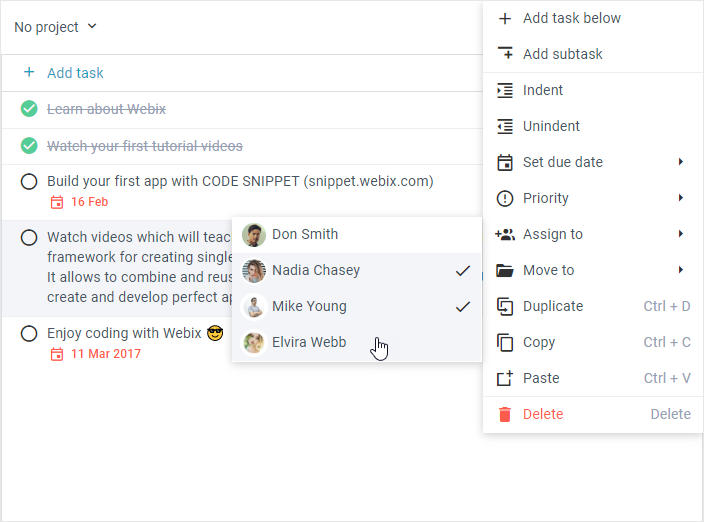
Assigning tasks
To assign a task to a user, take the following steps:
1) Open the context menu.
2) Hover over the "Assign to" option.
3) Click on the desired users to choose them.
Moving tasks
To move a task to a different project, take the following steps:
1) Open the context menu.
2) Hover over the "Move to" option.
3) Click on the project you want to move to.