Advanced
Defining Drag Area
Predefined drag area is useful when using drag-n-drop on touch devices as slide movements over drag area will be interpreted as dragging rather than scrolling.
Related sample: Drag-and-Drop with Drag Handle
By default any draggable item or component can be dragged by clicking and holding the left mouse button on any of its areas, but sometimes it seems more convenient to define a separate area that will be the only place you can click to drag the item.
Such area may be defined by an icon of the item included into the item data template.
Create an icon
<style type="text/css">
.webix_drag_handle{
    background-image:url(./handle.png); // path to the image icon
    background-repeat: no-repeat;
    cursor:n-resize; // type of the cursor to signify drag-n-drop ability
}
</style>
Define drag area
webix.ui({
    view:"list",
    template: "#data#<div class='webix_drag_handle'></div>"
    on:{
        onBeforeDrag:function(ctx, e){
            return (e.target||e.srcElement).className == "webix_drag_handle";
        }
    }
});
The onBeforeDrag event triggers a function that sets the 'webix_drag_handle' class for both the target and source elements.
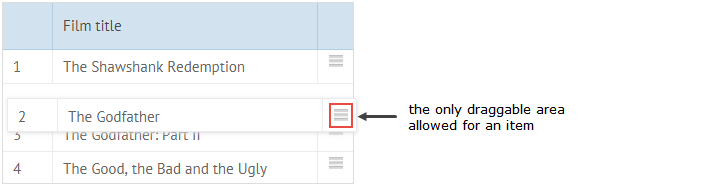
Drag Area with Datatable
To define a drag area for Webix Datatable, you should either add a template to some column or add a separate column with the drag area CSS:
view:"datatable",
drag:true,
columns:[
    { id:"title", fillspace:true, header:"Film title" },
    { id:"drag", header:"", template:"<div class='webix_drag_handle'></div>", width:35}
]
Related sample: Limiting Draggable Area for Items (Dragging Rows)
In case of column drag-n-drop, the drag area can be defined as well:
view:"datatable",
dragColumn:true,
columns:[
    { id:"votes", header:"<div class='webix_drag_handle'></div>Votes", width:120},
    // other columns
]
Related sample: Limiting Draggable Area for Items (Dragging Columns)
Related Articles
- Defining Drag Marker
- Drag-and-Drop with Tree and TreeTable Components
- Drag-and-Drop Between Different Component