HTML5 Drag-n-Drop with Webix Views
HTML5 brought native drag-n-drop techniques that can be used as well for Webix views. Here we study how to drag HTML nodes to the Webix Datatable using HTML5 drag-n-drop.
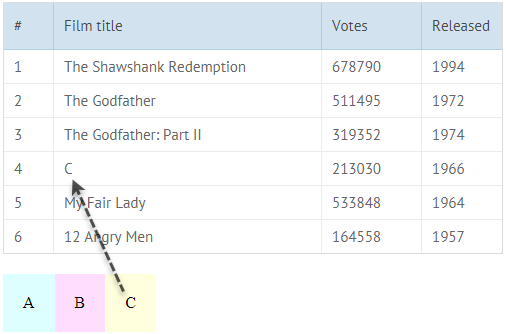
Related sample: HTML5 Drag-and-Drop Handling
Firstly, we make the needed HTML nodes (here - colored divs below the grid) draggable and assign a function to fire when you start dragging them:
<div id="divA" draggable="true" ondragstart="drag(event)" > A </div>
And enable drag-n-drop in both directions (drag from here and drop here) within a Webix grid:
view:"datatable",
// datatable config
drag:true
Secondly, we need to set which data matter during drag-n-drop. In HTML5 data are transferred with the help of (surprisingly) the dataTransfer object. We need the following of its methods:
- setData() - to set transferred data as {key1:value1, key2:value2};
- getData(key) - to get the needed data item by its key;
From HTML nodes we take their text values (innerHTML);
function drag(ev){
    ev.dataTransfer.setData("title",ev.target.innerHTML);
}
When the dragged node is dropped on the target grid item, we get the data from DataTransfer and parse it into the item.
HTML5 events are handled with the event method that takes node or its ID, event type, event handler and "this" object as parameters. Event names are passed without the on prefix:
webix.event(mygrid.$view, "drop", function(e){
    var grid = $$(e); //e - id of drop target
    var id = grid.locate(e); // return ID of target grid item
    grid.getItem(id).title = e.dataTransfer.getData("title"); //setting new title
    grid.refresh(id); //make the changes visible
});
At the same time, we need to prevent the default drag-n-drop behavior, if we want HTML nodes to keep their position (in fact, copying of their innerHTML takes place):
webix.event(mygrid.$view, "dragover", function(e){ e.preventDefault(); });
HTML5 Drag-n-Drop can be studied here (Mozilla Developer Network).
Back to top