Scheduler User Guide
Scheduler is a modern tool for scheduling and time management. You can add single or recurring events, group them into named calendars and reschedule events using editing form or drag-n-drop. Read further to dive into the app interface and main controls.
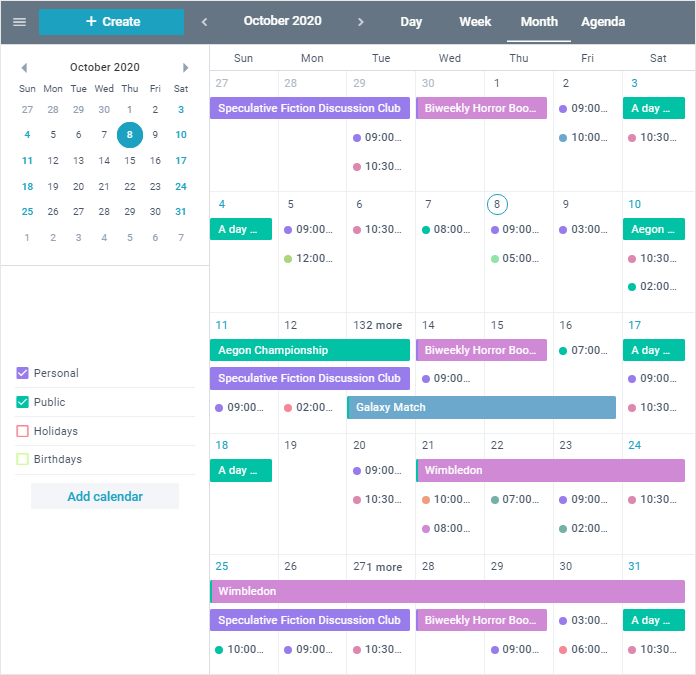
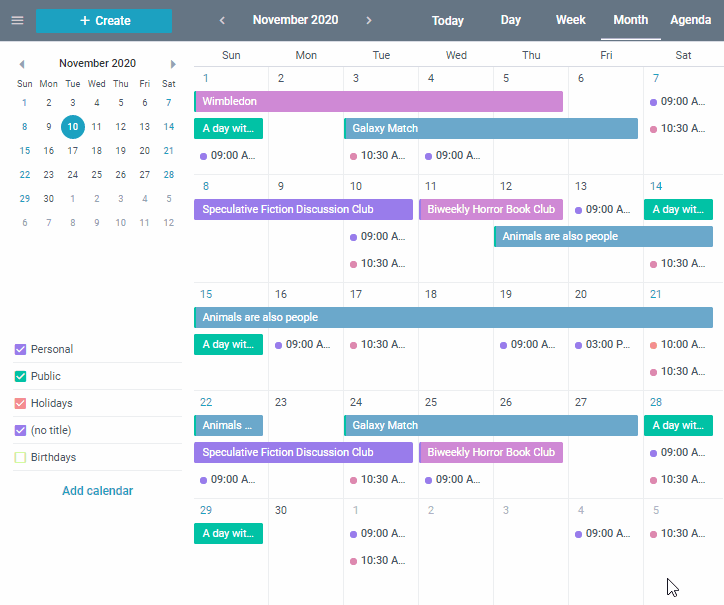
Main Screens
Visually Scheduler consists of 4 parts:
- Topbar with navigation controls
- Events grid
- Left panel
- Right panel.
Topbar

You can find the Topbar on the very top of Scheduler (the panel with various controls). As you can see it contains controls for navigation:
- hamburger icon to show and hide the left side panel
- "Create" button to create a new event
- left and right arrows to navigate in time
- label that displays visible period
- "Today" button to navigate to the current date
- a tabbar to switch between 4 display modes: Day/Week/Month/Agenda.
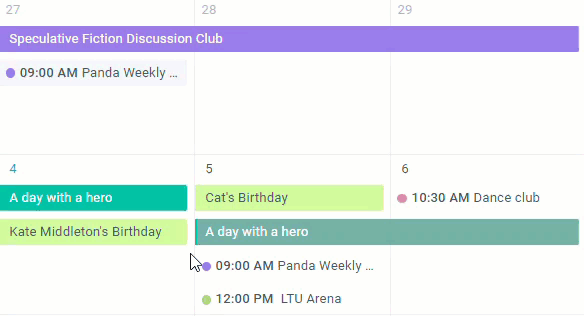
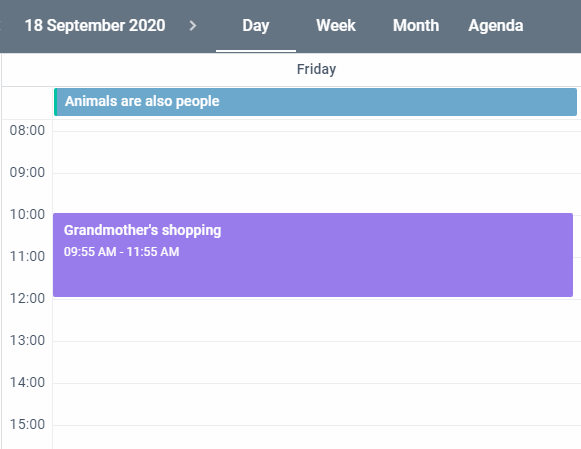
Events grid
Events grid is the core of Scheduler. Here you can look through all the events in the various modes (Day/Week/Month/Year/Agenda), get the information about their time and duration, and manipulate them via editing form or using drag-n-drop.
Left panel
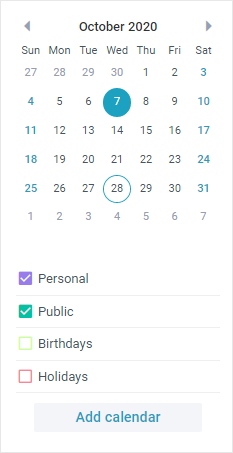
It is used for quick navigation and displaying event groups. It can be shown and hidden by clicking on the hamburger button in the top left corner (right on the Topbar).
It has:
- a small calendar for changing the visible period
- a list of available calendars (event groups) and the button to add more calendars
- "Add calendar" button to create a new calendar.
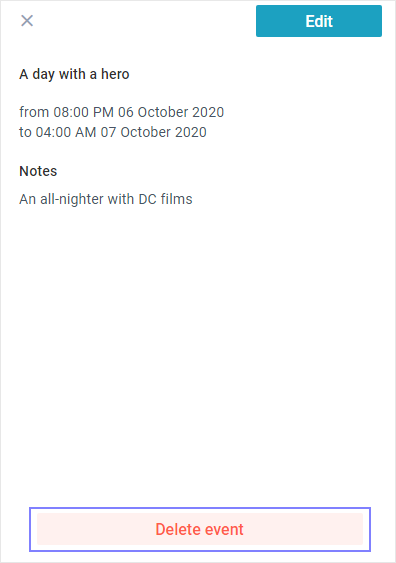
Right panel
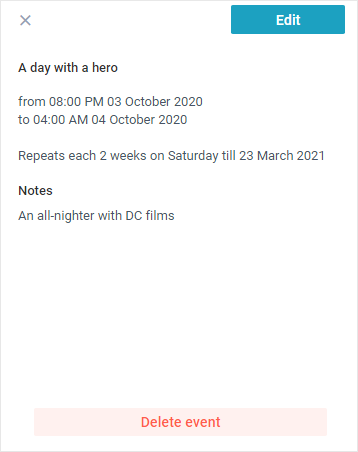
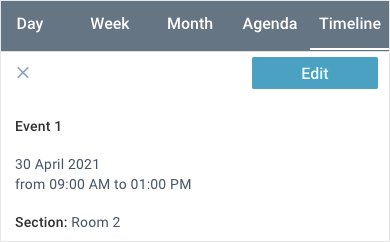
It is designed for previewing and editing events. It can be shown by:
- clicking on any event: Information will be shown
- adding the event: Form will be shown.
When the right panel is shown, the left panel automatically hides. When the right panel closes, the left panel is shown back.
Compact Mode
If you are using Scheduler on your phone or tablet it most probably has a different look like on the picture below.
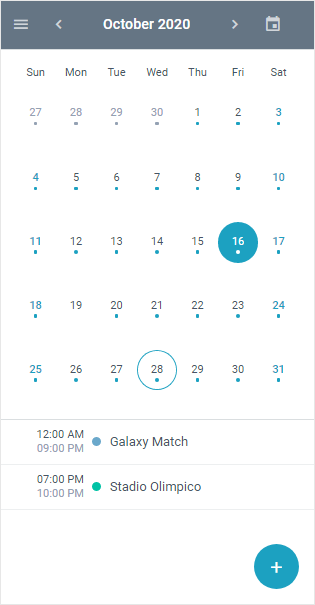
Thanks to the changes in the UI Scheduler preserves its functionality:
- you can create a new event by clicking on the round button with the + icon
- you can show the left panel by clicking the hamburger on the top left corner
- you can view/edit events by clicking on them in the "Day, ""Week" or "Agenda" modes
- you can view/edit month events by clicking on the desired date in the calendar in the "Month" mode and picking the needed event from the list right under the calendar.
Navigation
There are 2 ways to navigate through dates:
- Using arrow controls on the Topbar
- Selecting a date on the calendar from the left panel.
Depending on the current mode clicking the left and right arrows will switch various time intervals:
- in Day mode, you will step 1 day back and forward
- in Week mode, you will step 1 week back and forward
- in Month and Agenda modes, you will step 1 month back and forward
- in Year mode, you will step 1 year back and forward
Clicking the "Today" button will return Scheduler to the current date.
Creating Events
There are four ways to create an event:
- by clicking on the "Create" button (it can be located either on the Toolbar in the desktop mode or a floating button in the bottom right corner in the compact mode)
- by double click on any empty area on the Events grid (for day, week, units, timeline modes)
- by clicking on a day in Year mode
- by using drag-and-drop (for day, week, units modes).
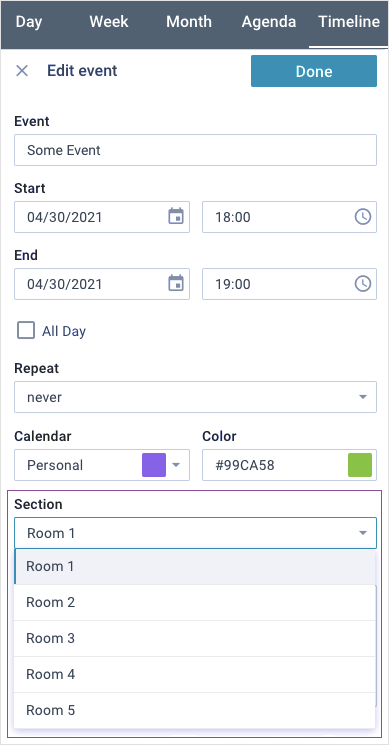
Either of the actions will open a form where you can provide information about the event. Here you can specify:
1) Name of the event
2) Its start and end date
3) Whether the event should last all day
4) Whether the event should repeat
5) Calendar the event belongs to
6) Color of the event
7) Notes.
See the picture below:
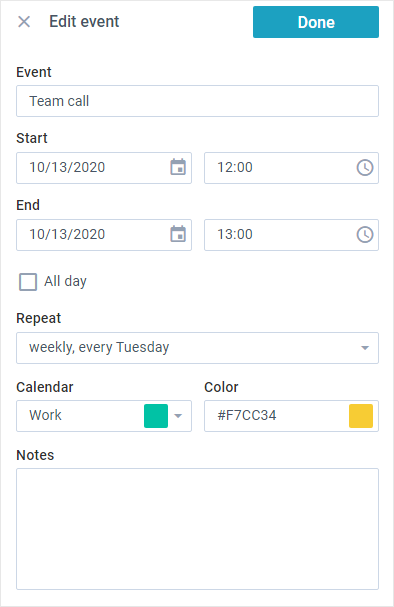
Note that each number in the timepicker selection range is a multiple of 0 or 5.
Creating recurring events
By default, all new events are single. You can make any event recurring by setting it with the Repeat select box. Repeat pattern can be:
- never (single event)
- hourly
- daily
- weekly, e.g. each Monday (depends on a weekday of the origin event)
- monthly, e.g. every 3rd week on Monday (depends on the week number of the origin event)
- yearly, e.g. every year on 3rd Monday in April (depends on the date of the edited event)
- every working day
- custom.
If a custom pattern is selected, a subform will appear. It allows to set:
- frequency of repeating (e.g. every 2nd day)
- end of repeating (by default event is repeated forever) or the number of occurrences
- weekdays on which the event will repeat (e.g. Monday and Thursday for weekly events or just Monday monthly and yearly events)
- the number of a week (for monthly and yearly events, e.g. every 3rd [Monday])
- the number of a day (date) for monthly and yearly events (e.g. every 12th day ([of May]))
- the month (for yearly events, e.g. every May [13]).
Editing Events
To edit an event you should:
1) Click on the desired event. It will open the right panel with event information
2) Press the "Edit" button and make necessary changes
3) Press the "Done" button to save the information and get back to the event info.
The event data will be saved instantly. To close the right panel, click on the "Close" icon.
Editing recurring events
If you try to edit a recurring event, Scheduler will ask you whether you want to:
- edit this occurrence. If you choose this option, the Repeat selector will not be available in the form (hence you will not be able to make this occurrence repeat)
- edit this occurrence and all the following
- edit all the occurrences of this event.
Copying Events
There are two ways to copy an event:
- via drag-and-drop.
- via a shortcut.
To copy an event via drag-and-drop, you should take the following steps:
1) Press and hold the Ctrl* key.
2) Drag and drop an event at the desired position.
3) Release Ctrl key.
* - ”Command” for MacOS
Only works within the currently opened mode and date range.
To copy an event via a shortcut, you should take the following steps:
1) Click on the event you want to copy.
2) Press “Ctrl+C/Command+C” to copy.
Cutting Events
To cut an event, you should take the following steps:
1) Click on the event you want to cut.
2) Press “Ctrl+X/Command+X” to cut.
Pasting Events
To paste an event, you should take the following steps:
1) Click on the place you want to paste an event into.
2) Press “Ctrl+V/Command+V” to paste.
You can paste an event after you switch to a different mode or date range.
Modes that support copy/cut/paste operations with hotkeys and drag-and-drop:
- full: day, week, month, units, timeline
- compact: day, units, timeline.
On touch devices, to make a copy, you should take the following steps:
1) Tap on the event you want to copy and open event info.
2) Tap on the “copy” icon in the top right corner of the opened window.
3) Make changes to a copy in the editor (if needed).
4) Tap on the “Done” button to save.
The same steps apply for copying events in Year mode.
In case of recurring events copying/cutting only works for selected repetition. If you copy, a copy of this repetition is created. If you cut, this repetition is moved to a different time or date.
Deleting Events
You can delete any event by clicking on it and then clicking on the "Delete" button at the bottom of the information panel.
If the event is recurring, the app will suggest to:
- delete this occurrence
- delete this occurrence and the following
- delete all the occurrences of this event.
Creating Event Groups
Event groups are called Calendars. You can create such calendars and distribute events across them. To create a calendar you should:
1) Click the "Add calendar" button on the left panel
2) Provide a name in appeared text input
3) Press Enter or click outside the input to create a calendar.

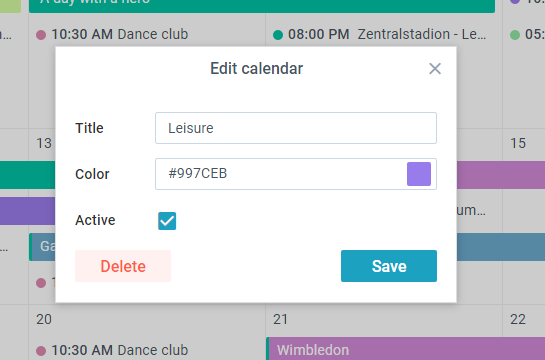
Editing Event Groups
To edit a calendar you should:
1) Hover over the desired calendar and click the 3 dots icon
2) Choose a calendar color or click the "Settings" button to pass to other settings
3) In the popup window make necessary changes
4) Click the "Save" button.
Deleting Event Groups
To delete an event group you should:
1) Hover over the desired calendar and click the 3 dots icon
2) Click the "Settings" button to pass to other settings
3) Click the "Delete" button
4) Click the "OK" button in the confirmation popup.
When you delete an event group, all its events are removed permanently.
Moving and Resizing Events
Drag-and-drop and resizing are possible in the Day, Week and Month modes.
In Day mode it is possible to:
- drag an event to shift it to another time
- drag an event by the resize handle at the bottom of the event to change its end time.
In Week mode it is possible to:
- drag an event to shift it to another week day
- drag an event to shift it to another time
- drag an event by the resize handle at the bottom of the event to change its end time.
For multi-day events located in the upper panel above all week days, you can only change their start and end date by dragging them by the body.
In Month mode it is possible to:
- drag events to move them from one day to another.
In the compact mode, drag-n-drop is supported only in the Day mode.
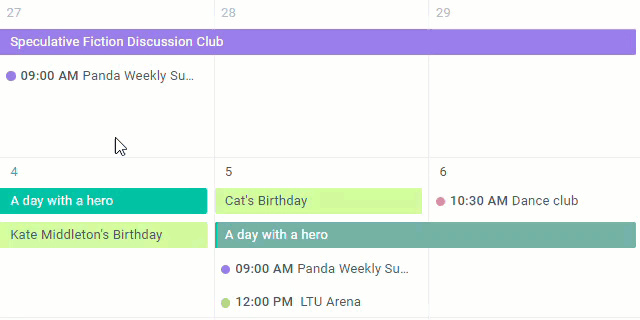
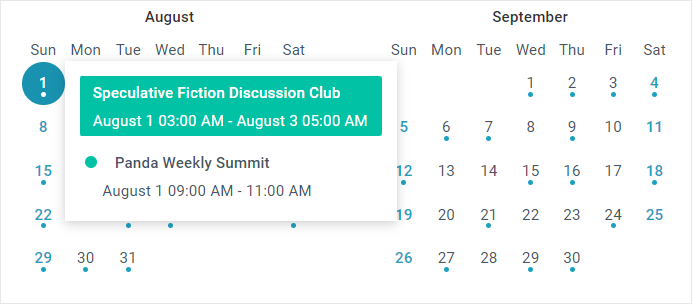
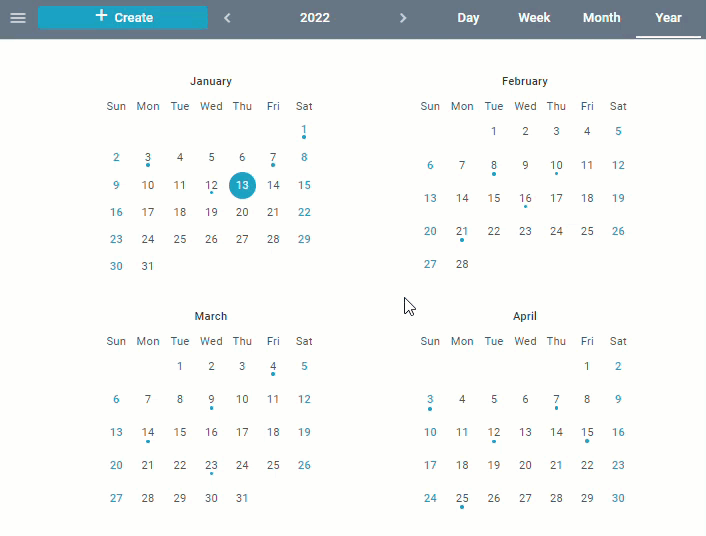
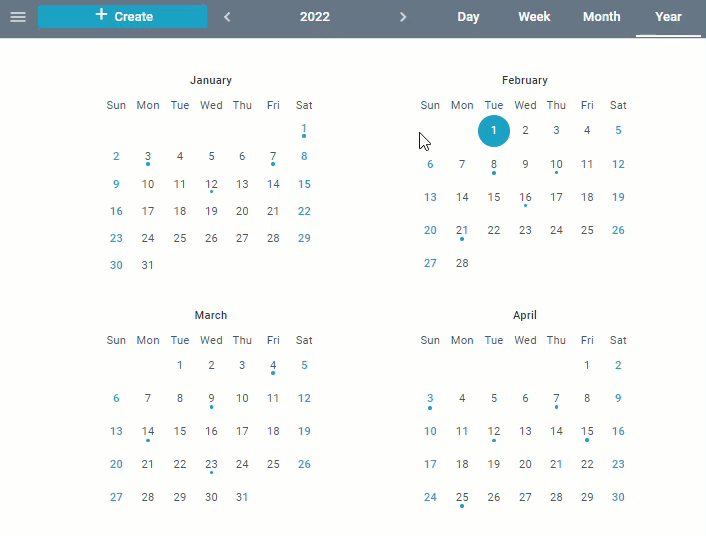
Year Mode
In Year mode, all 12 months are displayed in the events grid, with events displayed as dots below the corresponding day.
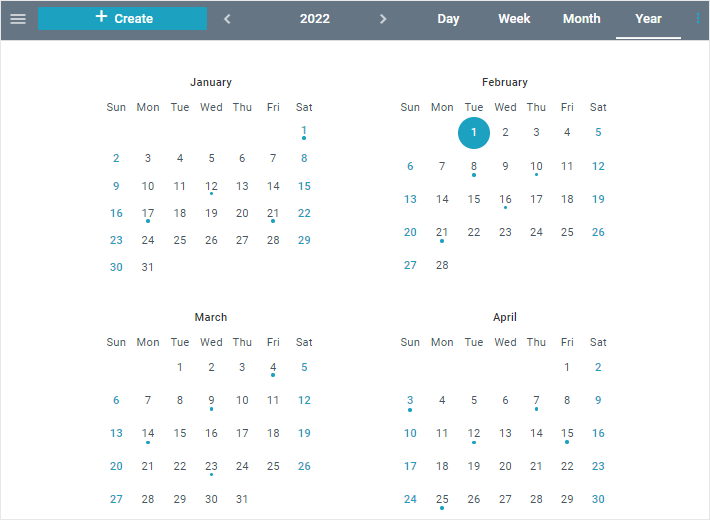
To see all the events for a particular day, click on the day. This will open a popup with the events scheduled for that day.
A double click on the day opens the Day mode and creates an event at 0:00.
To open the Month mode for the corresponding month, click on the month name.
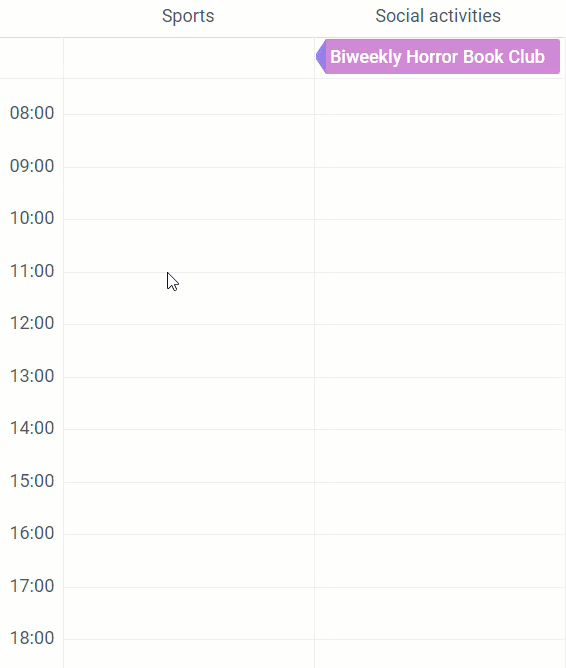
Timeline Mode
The Timeline mode allows you to group events into sections and place them along the horizontal time scale.
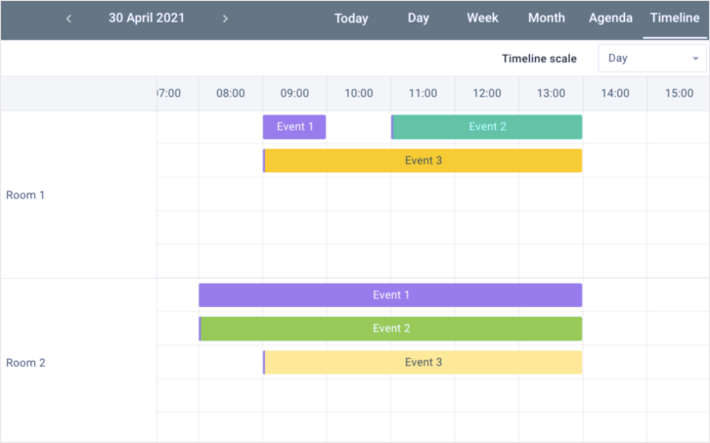
On the Information panel you can find the section the event belongs to, even if you are in a different mode.
Assigning events to the section
You can drag an event vertically, to move it to another section. You can also assign events to the desired section via the edit form. To do this, take the following steps:
1) Click on the event to display Information panel
2) Click on the "Edit" button to display the edit form
3) Go to the "Section" selector and select the desired option
4) Click on the "Done" button to save the result and close the form.
The event will be displayed in the specified section of the Timeline mode.
Moving events within a section
You can place several events in one row of the section provided that their schedules do not overlap. Otherwise, the events are placed one below another.
You can drag events along the time scale, to reschedule them.
You can resize events, to change their duration.
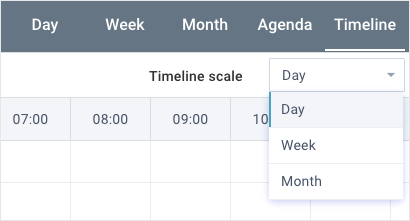
Time scale modes
The Timeline allows you to display the time scale in the following modes:
- Day
- Week
- Month.
In the upper right-hand corner of the Events grid there is a special selector to switch between time modes. The Week mode is set by default.
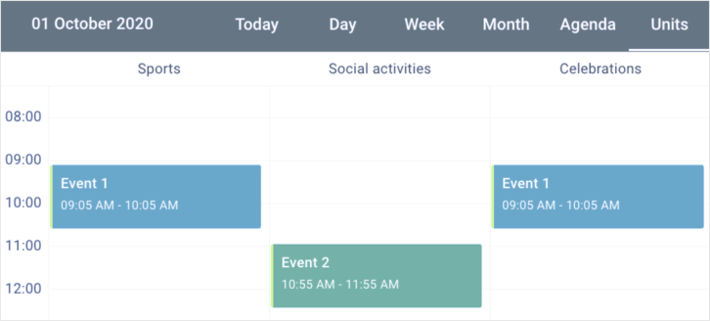
Units Mode
The Units mode allows you to distribute the events of the day by certain categories arranged vertically. Visually, this mode is similar to the Day mode. The horizontal scale displays the categories names, and the vertical scale shows the time scale by hours.
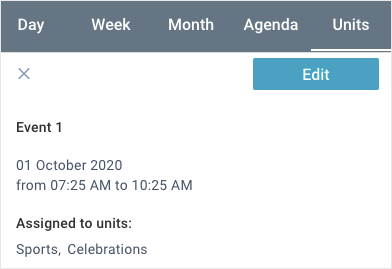
On the Information panel you can find the list of units the event belongs to, even if you are in a different mode.
To assign an event to another unit, drag it to the desired one. You can also assign the event to one or more units via the edit form. To do this, take the following steps:
1) Click on the event to display Information panel
2) Click on the "Edit" button to display the edit form
3) Go to the "Units" selector and select one or more options. The selected options will be displayed as tags in the selector field
4) Click on the "Done" button to save the result and close the form.
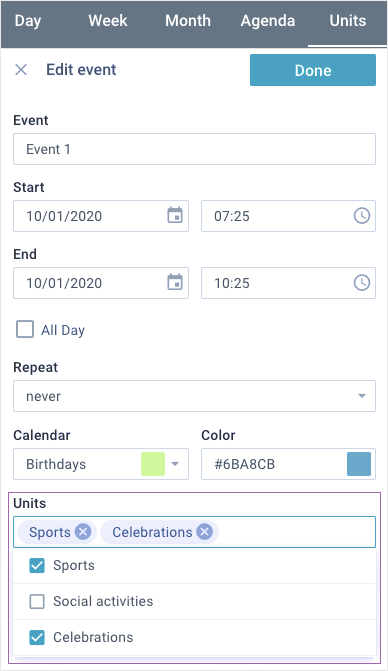
To remove an event from a particular unit, use the edit form. In the selector field, click on the "Close" icon of the required tag or uncheck the required items in the drop-down list of options. If you remove all assigned units from the selector field or drop-down list, the event will not be displayed in the Units mode.
If you assign an event to several units, it will display in each of them.
If events of the same unit overlap one another, they will be displayed as columns parallel to each other.
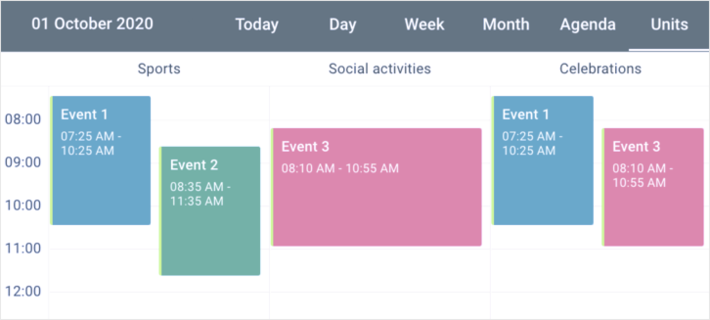
You can drag the event along the vertical time scale, to reschedule it. You can resize the event, to change its duration time.
Back to top