Intermediate
Text Editor Integration
How to Include
JS files for these components aren't included in the lib package and should be taken:
- either from Github https://github.com/webix-hub/components
- or included from CDN as
<script src="https://cdn.webix.com/components/edge/ckeditor/ckeditor.js"></script>The Webix library supports integration of popular text editors in the application with the help of its own components. For now, the following text editors can be included:
To embed any of the editors into your web page, you should link not only to Webix, but also to a special JavaScript file from the components folder. This file will connect you to the chosen editor and load extra required files for it.
Note that in documentation samples files are linked in another way, but in your apps you should follow the patterns described further.
Setting Path to the Component
You can set path to sources of the necessary editor on CDN. Actually, there are three ways to do that:
- via the cdn property in the view configuration. This way allows setting path to the particular version of the necessary library or to the local CDN
- not setting any paths at all. In this case either the official CDN of the component or the global cdnjs (if the source of the component is available there) will be used
- by including all the source files of the component on a page directly. In this case you should set the cdn property to false to avoid possible collisions with the component version included by default.
Editor Configuration
Each third-party editor has its API. If you want to use it to configure an editor, get the editor object with the help of the getEditor() method.
const editor = $$("editor1").getEditor();
The method has the optional waitEditor parameter. If it is set tu true, the method returns a promise and allows you to wait until the editor is ready to be configured and used. For example:
$$("editor1").getEditor(true).then(function(editor){
    // editor is the editor object
});
You can find the links to the API of each editor in the sections below.
Ace Text Editor
You can download JS file for the Ace Editor from github.
Ace is an embeddable code editor written in JavaScript. It matches the features and performance of native editors and can be easily embedded in any web page and JS application.
Related sample: Ace Editor
How to Initialize
Include the editor into your HTML page:
<script type="text/javascript" src="./ace.js"></script>Create an editor instance as follows:
webix.ui({
    id: "editor",
    view: "ace-editor",
    value: "..." // code string
});
NicEdit Text Editor
You can download JS file for the NicEdit Editor from github.
NicEdit is a simple and fast WYSIWYG editor for websites. Being extremely lightweight it makes any element/HTML container editable. It also can convert standard text areas to rich text editing fields.
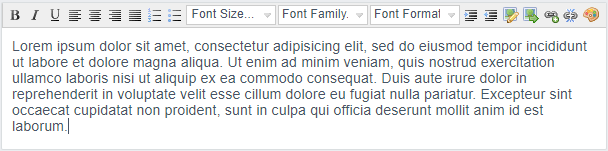
Related sample: Integration: NicEdit Text Editor
How to Initialize
Include the editor into your HTML page:
<script type="text/javascript" src="./nicedit.js"></script>Create an editor instance as follows:
webix.ui({
    id: "editor",
    view: "nic-editor",
    value: "..." //text and HTML markup
});
TinyMCE 4 Text Editor
You can download JS file for the TinyMCE Editor from github.
TinyMCE is a platform independent web based JavaScript HTML WYSIWYG editor control. It has an ability to convert HTML TEXTAREA fields or other HTML elements into editor instances.
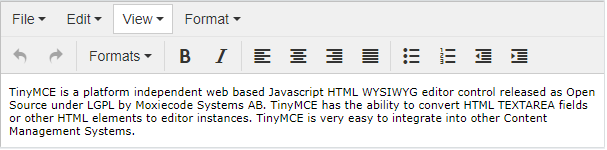
Related sample: Integrations: TinyMCE 4 Text Editor
How to Initialize
Include the editor into your HTML page:
<script type="text/javascript" src="./tinymce.js"></script>Create an editor instance as follows:
webix.ui({
    id: "editor",
    view: "tinymce-editor",
    apiKey:"...",   // your API key, if needed
    value: "..."    // text and HTML markup
});
Configuring the Editor
To set TinyMCE configuration properties, you can use the config property:
webix.ui({
    id: "editor",
    view: "tinymce-editor",
    config: {
        theme:"advanced"
    }
});
TinyMCE 5 Text Editor
You can download JS file for the TinyMCE 5 Editor from github.
As TinyMCE Editor of the 5th version has no full backward compatibility, Webix provides a separate integration for it.
Related sample: Integrations: TinyMCE 5 Text Editor
How to Initialize
The initialization and editor settings are similar to the 4th version:
Include the editor into your HTML page:
<script type="text/javascript" src="./tinymce5.js"></script>Create an editor instance as follows:
webix.ui({
    id: "editor",
    view: "tinymce5-editor",
    apiKey:"...",   // your API key, if needed
    value: "...",   // text and HTML markup
    config:{
        // editor configuration
    }
});
CodeMirror Text Editor
You can download JS file for the CodeMirror Editor from github.
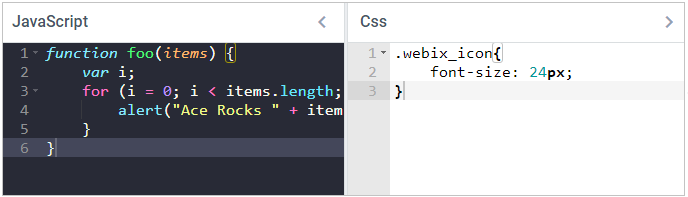
CodeMirror is a JavaScript component that provides a code editor in a browser. When a mode is available for the language you are coding in, it will color your code, and optionally help with indentation.
Related sample: Integration: Codemirror Text Editor
How to Initialize
Include the editor into your HTML page:
<script type="text/javascript" src="./codemirror.js"></script>Create an editor instance as follows:
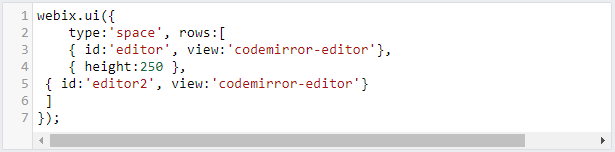
webix.ui({
    id: "editor",
    view: "codemirror-editor",
    mode: "javascript",
    value: "..." // text and HTML markup
});
Note that here appears an extra property mode. It denotes a language you are coding in.
CKEditor 4 Text Editor
You can download JS file for the CKEditor 4 from github.
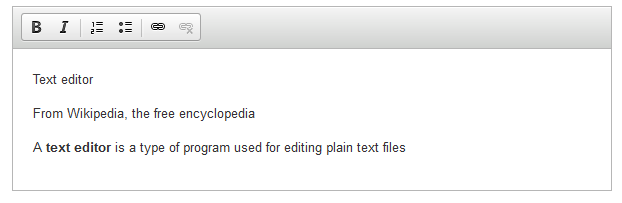
CKEditor 4 is a ready-to-use WYSIWYG editor that brings word processor features directly to your web pages. It is suitable for editing plain texts as well as HTML markup.
Related sample: Integration: CKEditor 4 Text Editor
How to Initialize
Include the editor into your HTML page:
<script type="text/javascript" src="./ckeditor.js"></script>Create an editor instance as follows:
webix.ui({
    id: "editor",
    view: "ckeditor",
    value: "..." //text and HTML markup
});
CKEditor 5 Text Editor
You can download JS file for the CKEditor from github.
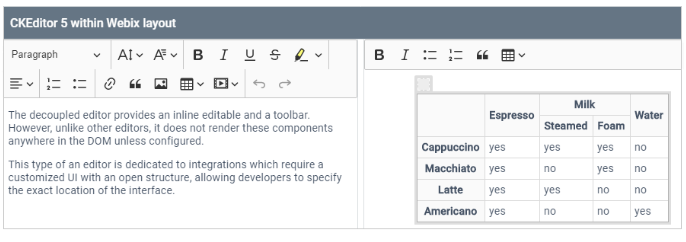
CKEditor 5 Builds are a set of four ready-to-use rich text editors. We use one of them - Document editor. The Document editor (DecoupledEditor) is focused on rich text editing experience similar to the native word processors. It works best for creating documents which are usually later printed or exported to PDF files.
Default editor appearance is similar to the Classic mode. To provide the document-like styling (see the styling tutorial), you need to enable mode:"document" in the view configuration and provide the desired CSS. In such case, the styling should be based on the following classes:
webix_ck_toolbar(toolbar container)webix_ck_body(editor parent container - used for indents in the "document")webix_ck_editor(editor container)
Related sample: Integration: CKEditor 5 Text Editor
How to Initialize
Include the editor into your HTML page:
<script type="text/javascript" src="./ckeditor5.js"></script>Create an editor instance as follows:
webix.ui({
    id: "editor",
    view: "ckeditor5",
    config:{
        // editor configuration
    },
    // optional: allows CSS modification
    mode:"document"
});
Monaco
You can download JS file for the Monaco Editor from github.
The Monaco Editor is the code editor that powers VS Code. It is distributed under the MIT License and supports IE 11, Edge, Chrome, Firefox, Safari and Opera. The Monaco editor is not supported in mobile browsers or mobile web frameworks.

Related sample: Integration: Monaco Editor
How to Initialize
Include the editor into your HTML page:
<script type="text/javascript" src="./monaco.js"></script>Create an editor instance as follows:
webix.ui({
    id: "editor",
    view: "monaco-editor",
    value: "..." //text and HTML markup
});
Rich Text Editor
You can download JS file for the Rich Text Editor from github.
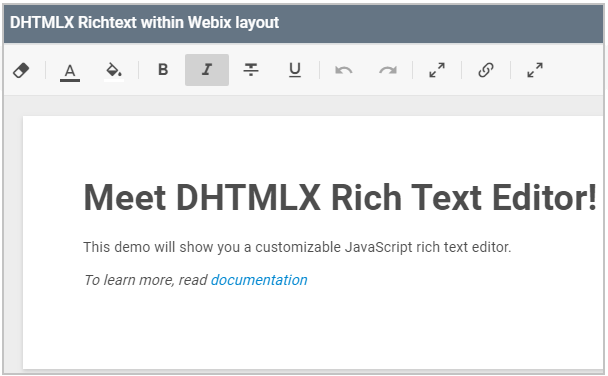
RichText is a fully customizable JavaScript editor with support for HTML and markdown as input and output formats.
Related sample: Webix integration: DHTMLX Richtext
How to Initialize
Include the editor into your HTML page:
<script type="text/javascript" src="./richtext.js"></script>Create an editor instance as follows:
webix.ui({
    id: "richtext",
    view: "dhx-richtext",
    config: {
        // editor configuration
       mode: "document"
    }
});
- mode (string) - the working mode of RichText. Can be either "default" or "document".
Common Methods
- setValue(value) - sets text for the editor (equal to the value property, but allows doing it dynamically). The function is called from the component referring to its ID.
$$("editor").setValue("<p>some text or code snippet</p>");
- getValue() - gets the current editor text with current formatting. Formatted text pieces are wrapped into corresponding HTML tags.
$$("editor").getValue(); // returns e.g. "some<b> text</b> "
- getEditor() - gets the editor object so that you can use its specific API (Read more here).
$$("editor").getEditor();
- focus() - in case of several editors on the page this method allows you to focus a particular instance and place a caret into it.
$$("editor").focus();