Advanced
Maps Integration
How to Include
JS files for these components aren't included in the lib package and should be taken:
- either from Github https://github.com/webix-hub/components
- or included from CDN as
<script src="https://cdn.webix.com/components/edge/ckeditor/ckeditor.js"></script>Webix library allows you to embed geographical maps into the app with the help of its own components. The following maps are supported:
- Here Map
- OpenStreet Map
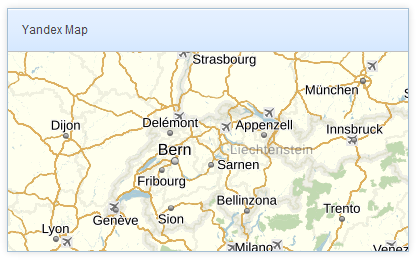
- Yandex Map
- GoogleMap (since version 4.0 is included into the main library package)
UI-related maps inherit from view.
Setting Path to the Component
You can set path to sources of the necessary map on CDN. Actually, there are three ways to do that:
- via the cdn property in the view configuration. This way allows setting path to the particular version of the necessary library or to the local CDN
- not setting any paths at all. In this case either the official CDN of the component or the global cdnjs (if the source of the component is available there) will be used
- by directly including all the source files of the component on a page. In this case you should set the cdn property to false to avoid possible collisions with the component version included by default.
Initialization
Step 1. Add the Connecting File
First of all, you need to add a special file to the head section of your document. The script helps connect to third party applications without linking to them directly:
The extensions are taken from https://github.com/webix-hub/components. Note that in the documentation samples they are linked in a different way, but you should follow the patterns below:
- For Here Map

<script type="text/javascript" src="./heremap.js"></script>- For OpenStreet Map

<script type="text/javascript" src="./openmap.js"></script>Related sample: OpenStreet Map
- For Yandex Map
<script type="text/javascript" src="./yandexmap.js"></script>Related sample: Integration: Yandex Map
Step 2. Specify the Map Container
Secondly, choose where on the page the map will be initialized. You can render it into any HTML element defined as the map's container:
// <div id="mydiv"></div>
webix.ui({
    container:"mydiv",
    //map config
});
Additionally, you can put the map into Webix Window:
webix.ui({
    view:"window", id:"mapwin",
    body:{ ... }, //map config
    head:{ ... }, //place for toolbar
    top:50, left:50,
    width:600, height:500 // dimensions and positioning of the window
}).show();
Step 3. Create a Map
Thirdly, create a map and assign properties to it according to your needs. All map constructors identical differing only in the map view name.
Map Initialization
{
    view:"yandex-map", // or "here-map", "open-map"
    id:"map",
    zoom:6,
    center:[ 48.724, 8.215 ]
}
Map Configuration
Map's properties define the initial position of the map:
- id (string) - defines the component unique ID
- zoom (number) - defines how close you'd like to be to the Earth surface
- center (array) - sets the center of the map. It's an array of two elements ( latitude and longitude) with comma delimiter.
Working with Maps
Getting Map Object
To make online maps interactive you should refer to the API reference each of the services provided. To access the map object you need to use the getMap() method:
var mapObj = $$("map").getMap();
The method can take the waitMap parameter. If passed, the method returns a promise that will be resolved when the map is rendered.
$$("map").getMap().then(function(mapObj){
    // some code
});
Working with Map API
The API for each integrated map offers a rich collection of map options, controls, overlays, services, layers, etc. that you can use while working with a map instance integrated into our library.
For instance:
- to show the necessary map piece on request, you can pass the desired lat, lng and zoom into the related map method:
//for Yandex Map
$$("map").getMap().setCenter([lat, lang], zoom);

//for Here Map
$$("map").getMap().setCenter({lat:lat, lng:lng});

//for Open Map
 $$("map").getMap().panTo([lat, lng]);
- to show a marker on a Yandex map, you should take two steps:
- create an instance of the Placemark class that implements markers
- add the marker to the geoObjects collection (the global collection of map objects):
//for Yandex Map
var myPlacemark = new ymaps.Placemark([lat, lang]);
$$("map").getMap().geoObjects.add(myPlacemark);
Note that you need to check the API of each integrated map to learn its methods, properties and events.