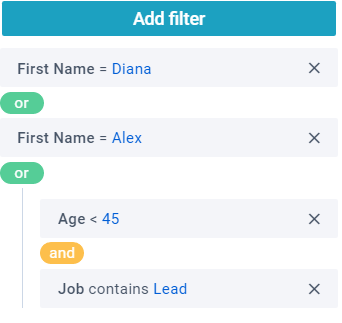
Creating Query on a Page
After installing Query you can create it on a page.
Initialization
To initialize Query provide the following configuration:
webix.ui({
  view: "query",
  id: "query",
  data: data,
  fields: [
    { id: "first_name", value: "First Name", type: "text" },
    { id: "last_name", value: "Last Name", type: "text" },
    // other fields
  ],
  value: { /*filtering rules and fields combinations*/ }
});
Main properties
- fields (array) - mandatory, an array of field objects that will be used for filtering the dataset. Each field object has three properties:
- id (string, number) - the id of the field;
- value (string) - the value of the field;
- type (string) - the type of the filed. Can be: "text","number","date*";
- conditions (array) - optional. Allows specifying custom conditions instead of the default type-related options;
- format (funciton) - optional. Defines how the value will be displayed in the Query.
- value (object) - an object containing filtering rules and fields combinations. Described in detail here;
- data (array, function) - data source for Filter multiselect list. If used as a function it should return a promise that resolves with an array of options;
- simple (boolean) - if true hides the context menu to add rules and groups. false by default;
- type (string) - defines the display mode of the filtering fields. Can be: "list"(default), "bar";
- override (array) - a 2D array. Each element of the array is an array containing the default class and a custom one. Used for customization.
Related sample: Query: Initialization
Arranging Rules as a Row
By default Query arranges rules in a column but you can rearrange them in a row, like the following:

To do this set the type property to "bar":
Setting toolbar mode
webix.ui({
  view: "query",
  id: "query",
  // display rules as a toolbar
  type: "bar",
  fields: [ /*fields for filtering*/ ],
  value: { /*filtering rules and fields combinations*/ }
});
Related sample: Query: Toolbar Mode
Simple Mode
The simple mode hides the context menu of the rule thus preventing users from adding new filters, but they can still edit the existing ones by double clicking the panels.

You can switch to the simple mode by setting the simple property to true:
webix.ui({
  view: "query",
  id: "query",
  // switch to the simple mode
  simple: true,
  fields: [ /*fields for filtering*/ ],
  value: { /*filtering rules and fields combinations*/ }
});
Related sample: Query: Simple mode
Back to top