Query User Guide
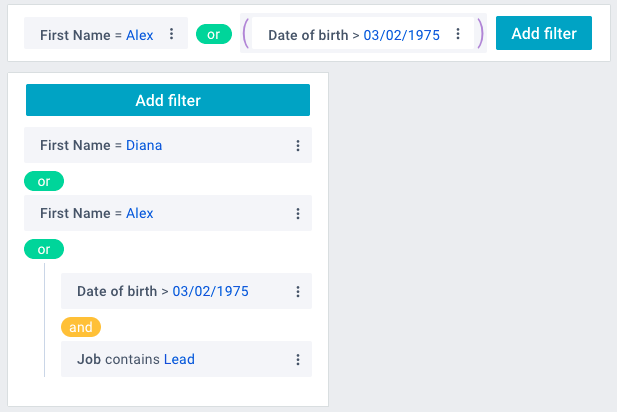
The Query widget is used for filtering application data. Its functionality allows you to filter the information using a wide range of built-in filters. Depending on the configuration, Query can have a horizontal or vertical mode.

Query functionality allows you to create, edit, delete and group filters according to your requirements. Depending on the type of data being filtered (text, number or date), the widget will provide you with an appropriate set of rules for comparison. In the case of working with dates, you will be offered a compact calendar for easy input.
Creating Filters
To create a new filter at the end of the list, you should:
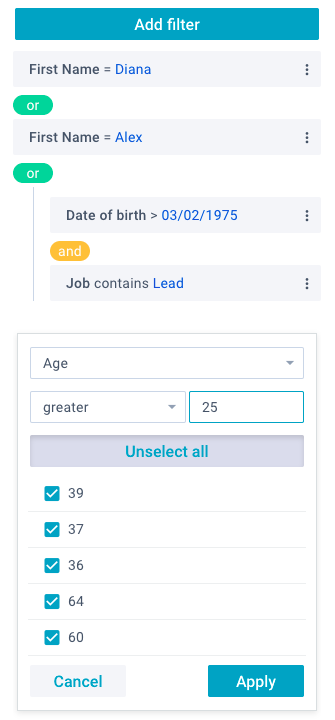
1) Click on the "Add filter" button on the control panel. It will open a form where you can specify essential parameters
2) Click on the data selector and select the required field
3) Click on the rule selector, and select the required rule in the drop-down list
4) Enter the required filtering criteria in the input field.
Below is the list of selected elements corresponding to the filter criteria, which can be used as an optional filter. You can selectively uncheck the list items that are not desirable for display, or unselect all list elements by clicking on the "Unselect all" button. To select all elements in the list, click on the "Select all" button. Click on the "Apply" button to save the filter.
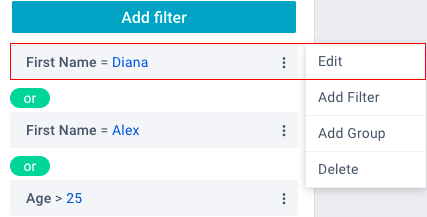
Also, you can add a new filter after any of the existing ones. Click on the "menu" icon on the right side of the filter and select the "Add filter" option.
For instance:
- click on the "Add filter" button to open the form
- click on the data selector and select the "Age" field
- click on the rule selector and select the "Greater" option
- go to the input field and enter "25".

The widget will display all users over 25 years old.
Editing Filters
To edit a filter, click on the "menu" icon and select the "Edit" option. Make the necessary changes in the appeared form and click on the "Apply" button.

Deleting Filters
To delete a filter, click on the "menu" icon and select the "Delete" option.
Grouping Filters

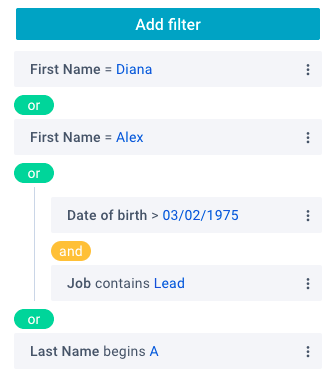
All filters created in Query belong to the main group of filters. Also, you can create additional groups within the main one. Combining filters provides extra options for filtering data.
When you create several filters or groups, the widget will combine them using "AND" or "OR" logic. If the "AND" condition is set, the widget will take into account the conditions of both filters at the same time. If the "OR" condition is set, any of them will be taken.
You can switch between "AND" and "OR" conditions. To do this, click on the oval button with the corresponding name between the filters or filter groups.
In order to create a group within a filter, click on the "menu" icon and select the "Add group" option. In the horizontal mode, groups are wrapped in parentheses. In the vertical mode, groups are highlighted by a strip with a small indent to the left of the filters of the main group.
To delete a group, delete all its filters.
Back to top