How-tos
Check the general rules of File Manager customizations here: Customizing File Manager.
Adding a Bottom Bar
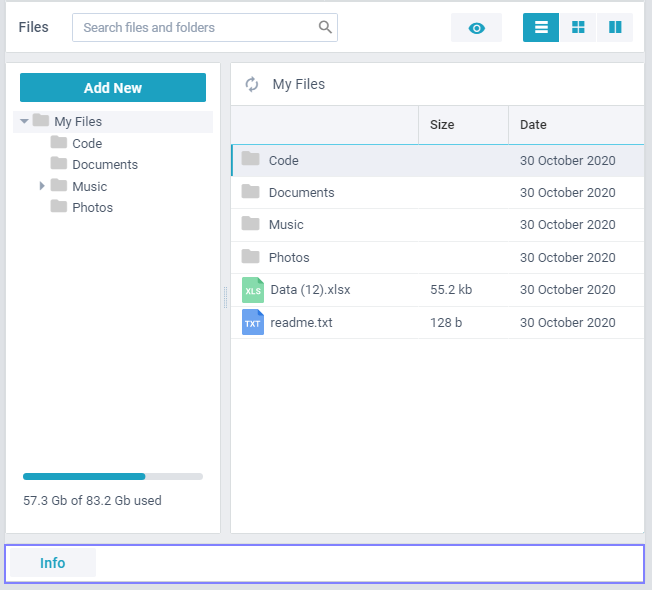
To add a bottom bar, create the new class for it and provide the UI and the needed logic:
//new views are inherited from JetView
class BottomBar extends fileManager.views.JetView {
  config() {
    const info = {
      view: "button", value: "Info", width: 100,
      click: () => this.ShowInfo()
    };
    return { view: "toolbar", cols: [info, {}] };
  }
  ShowInfo() {
    webix.message("Custom button clicked");
  }
}
Then, insert it into the main layout located in fileManager.views.top as a last row:
class CustomTopView extends fileManager.views.top {
  config() {
    const ui = super.config();
    ui.rows.push(BottomBar);
    return ui;
  }
}
And replace the default class with a custom one via the override map:
{
  view: "filemanager",
  url: "https://docs.webix.com/filemanager-backend/",
  override: new Map([[fileManager.views.topbar, CustomTopBar]]),
}
Related sample: File Manager: Bottom Bar
Single Display Mode
To show a particular tab ("cards", "grid", "double") without the ability to switch between them, hide the Tabbar component from fileManager.views.topbar class:
class CustomTopBar extends fileManager.views.topbar {
  init() {
    // default logic
    super.init();
    // removing components can cause errors
    // hiding components is safe
    this.$$("modes").hide();
  }
}
Then, replace the default class with a custom one via the override map:
{
  view:"filemanager",
  mode: "cards", //show any tab other than "grid"
  override: new Map([[fileManager.views.topbar, CustomTopBar]]),
}
Related sample: File Manager: Single Mode
Adding Extra Display Mode
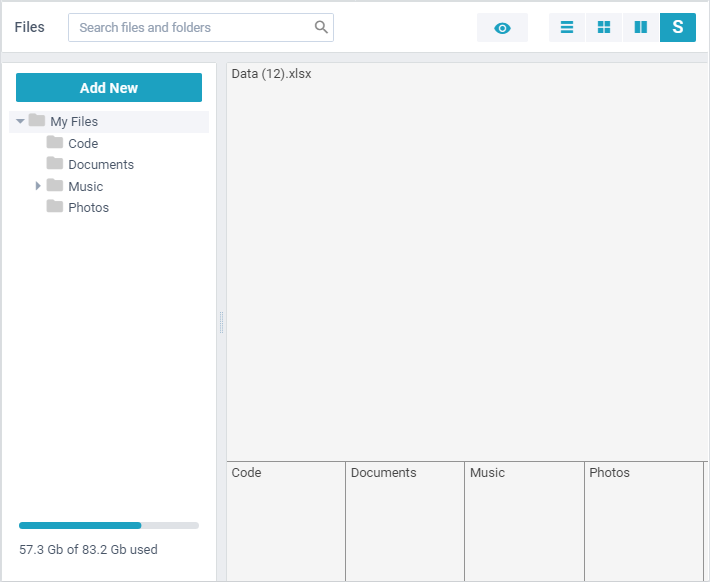
To add a new tab for browsing directories, you need to:
1. Create a UI for it.
2. Add an extra option to the Segmented button on toolbar.
3. Show the tab when the corresponding Segmented option is clicked.
Create new tab
1. Define the config() method to set up the UI of the new view: Treemap.
2. Define the init() method to load the files data into the Treemap:
//new views are inherited from JetView
class SpaceChartView extends fileManager.views.JetView {
  config() {
    return {
      view: "treemap",
      localId: "space",
      template: a => a.value,
      value: a => a.size,
    };
  }
}
init(){
  // parse files from the current directory into the Treemap
  const state = this.getParam("state");
  this.on(state.$changes, "path", v => {
    this.app
      .getService("local")
      .files(v)
      .then(fs => this.$$("space").sync(fs));
  });
}
3. To add the new view into File Manager, use the views property:
{
    view:"filemanager",
  mode: "space",
  views: { "custom.space": SpaceChartView }
}
Show new tab
First, add an extra option to the segmented button on the toolbar:
class CustomTopBar extends fileManager.views.topbar {
  config(value, old) {
    const ui = super.config();
    const modes = ui.cols[ui.cols.length - 1];

    modes.width += 42;
    modes.options.push({
      value: "<span class='space_option'>S</span>",
      id: "space" //option id
    });
    return ui;
  }
}
Then, handle the click on the above option in the fileManager.views.top view by redefining its ShowMode method:
class CustomTop extends fileManager.views.top {
  ShowMode(value, old) {
    const state = this.getParam("state");

    if (value === "space") {
      //handling click on the option with "space" id
      this.Tree.show();
      this.show("custom.space", {
        target: "center",
        params: { state },
      });
    } else {
      super.ShowMode(value, old);
    }
  }
}
At last, replace the default classes with custom classes via the override map:
{
    view:"filemanager"
    override: new Map([
    [fileManager.views.top, CustomTop],
    [fileManager.views.topbar, CustomTopBar],
  ])
}
Related sample: File Manager: Custom Mode
Disabling Drag-n-drop
You can disable default DnD behaviour by returning false in the handler of the onBeforeDrag event for the datatable and dataview components used in grid and cards views.
To listen to this event, you need to to define a new custom class by inheriting it from the default fileManager.views.list or fileManager.views.cards.
Disabling dnd in Cards view
class MyCards extends fileManager.views.cards {
  init() {
    super.init();

    // disable dnd
    this.on(this.$$("cards"), "onBeforeDrag", () => false);
  }
}
After that, override the default class with a custom one:
{
  view: "filemanager",
  override: new Map([
    [fileManager.views.cards, MyCards]
  ])
}
Related sample: Disabling DnD in grids/cards
Changing Context Menu Options
You can add, remove or modify context menu options.
Removing options
You can remove an option from the context menu by calling its remove method with the ID of the unnecessary option as a parameter:
Removing 'upload' option
class CustomAddNewMenu extends fileManager.views["menus/addnewmenu"] {
  init(view) {
    // default logic
    super.init();

    // remove an option from the created view
    view.queryView("menu").remove("upload");
  }
}
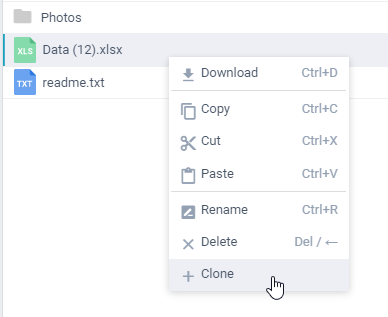
Adding options
Also, you can add a custom option (e.g. "clone") to the array of default options.
Mask for the filtering should be added to an option as a value of the show property. You can provide one mask or combine several with "|".
The following masks are supported by File Manager and Document Manager:
- FOLDER - folders (any folders in tree and right side)
- MANY - deprecated
- TEXT - for code type files
- VIEW - for files that can be opened in a browser (some audio files are downloadable)
- COMPACT - compact mode
- TREE - deprecated
- SEARCH - menu opened in search (search results)
- EMPTY - deprecated
- FILE - for files
- SINGLE - menu is opened for 1 item (file or folder)
- RIGHT - menu is opened on the right side (item or empty space)
- ITEMS - files and folders in both parts
Adding a custom option
class CustomMenuBody extends fileManager.views["menus/menubody"] {
  config() {
    const menu = super.config();
    const RIGHT = 0x80;
        const ITEMS = 0x100;

    //add option to the JS config
    menu.data.push({
      id: "clone", value: "Clone",
      show: RIGHT | ITEMS, icon: "wxi-plus",
    });
    return menu;
  }
}
For the new option you need to provide an action to perform when clicking on it:
class Operations extends fileManager.services.Operations {
  initEvents() {
    super.initEvents();

    this.app.attachEvent("app:action", (name, info) => {
      if (name === "clone") {
        this.addToClipboard("copy");
        this.paste();
      }
    });
  }
}
Related sample: File Manager: Customizing menus
Finally don't forget to tell the component that you are going to override its default views and services:
{
  view: "filemanager",
  override: new Map([
    [fileManager.views["menus/menubody"], CustomMenuBody],
    [fileManager.views["menus/addnewmenu"], CustomAddNewMenu],
    [fileManager.services.Operations, Operations]
  ])
}
Sorting Files Initially
You can provide the default sorting order. To achieve it, you need to:
1. Redefine the RenderData method of list and cards views to sort each directory you are entering.
2. Get the related collection of files for the opened path after the data are received from the backend.
3. Sort the collection whichever you like - the view will reflect these changes.
Initial descending order by title
class MyGrid extends fileManager.views.list {
  RenderData(data) {
    super.RenderData(data);

    // wait until data are returned from backend/cache, then sort it
    data.waitData.then(() => {
      data.sort(/*..custom sorting function*/);
      this.$$("table").markSorting("value", dir);
    });
  }
}

// and redefine RenderData of fileManager.views.cards in the same way
Related sample: File Manager: Initial sorting order
Loading Local Data
To work with File Manager it isn't necessary to have a backend server i.e. you can work with local data provided in the supported format.
You can override default backend methods and return a promise with JSON data.
Loading folders
You can provide data for a folder tree (left side) by changing the folders method logic of the Backend service.
class MyBackend extends fileManager.services.Backend {
  folders() {
    const data = [
      {"value":"webinars","id":"/webinars","size":0,"date":1580820822,
      "type":"folder","data":[
        {"value":"lections","id":"/webinars/lections","size":0,
        "date":1581677679,"type":"folder"},
      ]}
    ];

    return webix.promise.resolve(data);
  }
}
Loading files
To load files, override the files method. It takes the ID of a directory as a parameter. You can load various data depending on the directory you are in.
Loading local data
class MyBackend extends fileManager.services.Backend {
  files(id) {
    let data = [];
      if (path == "/") { // root directory
      data = [
        {"value":"videos","id":"/videos", "type":"folder"},
        // other data
      ];
    }
    return webix.promise.resolve(data);
  }
}
Returning meta data
You can return meta data of your file system (total, free and used space; in bytes) in the getInfo method:
Returning file system data
class MyBackend extends fileManager.services.Backend {
  getInfo() {
    return webix.promise.resolve({
      stats: {
        free: 52 * 1000 * 1000,
        total: 250 * 1000 * 1000,
        used: 198.4 * 1000 * 1000,
      }
    });
  }
}
Related sample: File Manager: Load Local Data
Loading Folders Dynamically
Let's suppose you don't want to have all your directories loaded at once:
Firstly, you need to override default folders methods in Backend and LocalData services to return only the first level of directories. Note that we imitate getting the data for the sake of example only. In real-life projects you do not need to override the Backend service to implement dynamic loading.
Overriding Backend
class MyBackend extends fileManager.services.Backend {
  folders() {
    const data = totalFolders.serialize().map(f => {
      if (f.data) delete f.data;
      return f;
    });
    return webix.promise.resolve(data);
  }
}
And for the LocalData:
Overriding LocalData
class MyLocal extends fileManager.services.LocalData{
  folders(force, path) {
    const hierarchy = this.hierarchy;
    // the method without *path* parameter will return only the first level
    if ((force || !this.folders_ready) && !path) {
      return this.app.getService("backend")
        .folders()
        .then(data => {
          hierarchy.parse({ parent: "../files", data });
          return hierarchy;
        });
    }

    return Promise.resolve(hierarchy);
  }
}
After that you can create an event handler that will load the contents of directories dynamically (after opening a directory):
Handler on dynamic loading
class MyTree extends fileManager.views.folders{
  init(){
    super.init();

    this.on(this.Tree, "onAfterSelect", id => {
      if (id !== "../files")
        this.app.getService("local").folders(false, id);
    });
  }
}
Related sample: File Manager: Dynamically loaded folders
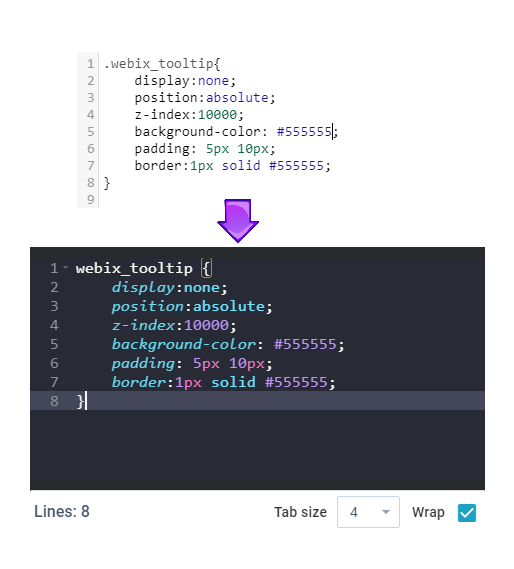
Customizing Code Editor
Customizing editor (files with type: "code") follows the common rules.
In this how-to we'll try to achieve the following result using the Ace editor instead of CodeMirror, which is used by default:
Related sample: File Manager: Customizing code editor
Replacing default editor
You need to define a new custom class by inheriting it from the default fileManager.views.editor. Inside the config() method we set the configuration for the new editor and replace the default one:
Overriding editor config
class Editor extends fileManager.views.editor {
  config() {
    const ui = super.config();

    let editor = {  // config for the editor
      localId: "editor", //keep this localId
      view: "ace-editor",
      theme: "dracula",
    };
    ui.rows[1] = editor; // replace the default editor with a new one

    return ui;
  }
}
Adding files
To add files using other editor API (Ace in this case), redefine the AddDoc method. Create a new ace.EditSession and save it to the editor buffer. After that you need to set the file type for the editor:
AddDoc(file, text) {
  this._oldValue[file.id] = text;

  // using ace api
  this.Buffers[file.id] = new ace.EditSession(text);
  this.Buffers[file.id].setMode(this.GetFileType(file));
}
Opening files
To be able to show contents of the files in the editor using the Ace API, you need to redefine the OpenDoc method:
OpenDoc(name) {
  this.$$("editor")
    .getEditor(true)
    .then(editor => {
      // using ace api
      editor.setSession(this.Buffers[name]);
      // focus the edit area
      editor.focus();
    });
  }
Don't forget to override the default Editor view with the new one:
Overriding default editor
const app = new fileManager.App({
  override: new Map([[fileManager.views.editor, Editor]])
});
By this moment you already have something like this:
Adding controls
You can add controls to the editor. This can be done by:
- Either overriding the default top bar:
Overriding default top bar
class Editor extends fileManager.views.editor {
  config() {
    const ui = super.config();

    // get the array of toolbar controls and add new ones here
    const toolbarEls = ui.rows[0].cols;
    toolbarEls.push({ /* some control here */ });
    return ui;
  }
}
- Or creating a bottom toolbar and adding controls there:
Adding bottom toolbar
class Editor extends fileManager.views.editor {
  config() {
    const ui = super.config();

    const bottomBar = {
      view: "toolbar",
      cols: [
          // ... toolbar controls will be here
      ],
    };

    ui.rows.push(bottomBar);
    return ui;
  }
}
Related sample: File Manager: Customizing code editor
This is how a bottom toolbar with controls may look like:
Additionally, you can apply our dark theme to the toolbars and buttons or add you own styles.
Back to top