Customizing Kanban Board Structure
Kanban Board has a layout structure. It means that it consists of rows and columns that can be combined in different ways.
A column has a header with its name and a body that can contain either a KanbanList view or other rows- or cols-layouts (to create a more complex structure).
The rows property is used to specify rows on the board, and the cols property is used to define columns.
A simple Kanban Board may look as:
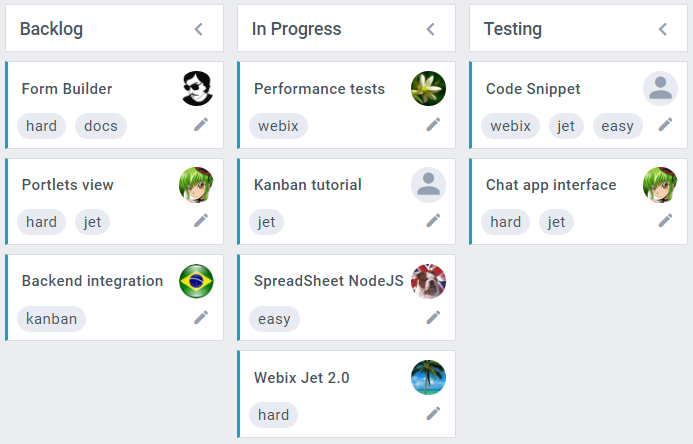
Adding Headers to KanbanLists
Kanban has a stylish functional header - "kanbanheader" - that can be placed above KanbanLists. KanbanHeader has an icon that can be used for quick adding of cards.
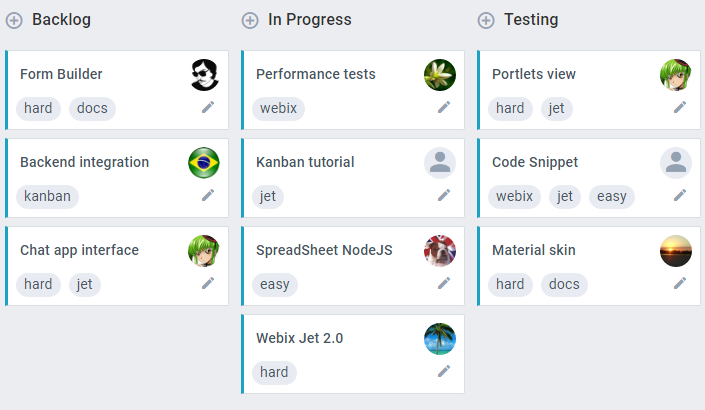
This is how you can add KanbanHeader above KanbanList:
webix.ui({
    view:"kanban",
    cols:[
        {
            rows:[
                { view:"kanbanheader", label:"Backlog", link:"new" },
                { id:"new", view:"kanbanlist", status:"new" }
            ]
        },
        ...
    ],
    url:"./data/tasks"
});
A click on the icon will add an empty card to the list. To make the icon add cards with some text, handle the onBeforeCardAdd event of KanbanHeader:
webix.ui({
    view:"kanban",
    cols:[
        {
            rows:[
                {
                    view:"kanbanheader", label:"Backlog", link:"new",
                    on:{
                        onBeforeAddCard(obj,list){
                            obj.text = "New task";
                        }
                    }
                },
                { id:"new", view:"kanbanlist", status:"new" }
            ]
        },
        ...
    ],
    url:"./data/tasks"
});
Adding Subheaders
Kanbanheader has an aditional type for subheaders. The styling can be enabled with type:"sub", e.g.:
{
    view:"kanbanheader", label:"Backlog", type:"sub", link:"new"
}
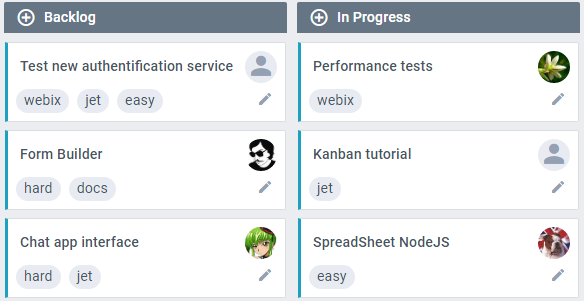
Headers and Icons
If a Kanbanheader or a subheader is linked to a Kanbanlist, you can change the default header icon:
// header
{
    view:"kanbanheader", label:"New", link:"new", icon:"wxi-pencil"
}
// subheader
{
    view:"kanbanheader", label:"Work", type:"sub", link:"work", icon:"wxi-pencil"
}
The icon will work as the default one - add a card to the linked list.
Related sample: Kanban: custom header icons
If the header or subheader is not linked to a list, the icon is not added. You can add an icon, but you will have to provide the action for the icon on your own.
In case your working process consists of many stages, you may need to make a more complex Kanban board to reflect the full flow of work.
Splitting Columns
Suppose you want to make a Kanban Board consisting of 4 columns, one of which contains two sub-columns.
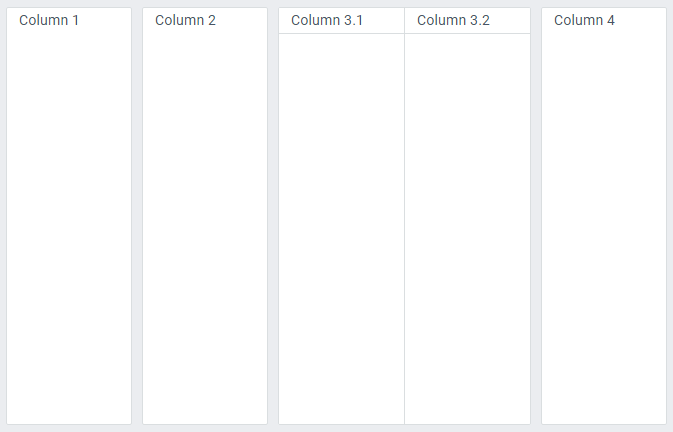
Each column will have a header, a click on which will collapse the list, and the sub-columns will have simple headers:
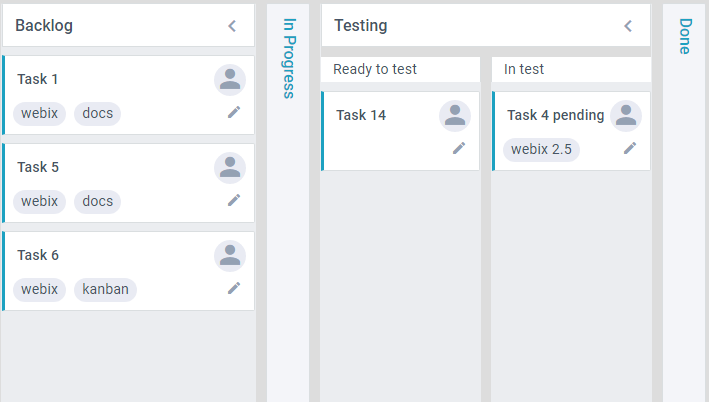
To implement this scheme we'll use the code below:
webix.ready(function(){
    webix.ui({
        view:"kanban",
        cols:[
            { header:"Backlog", body:{ view:"kanbanlist", status:"new" }},
            { header:"In Progress", body:{ view:"kanbanlist", status:"work" }},
            {
                header:"Testing", gravity: 1.3,
                body:{
                    cols:[
                        {
                            rows:[
                                { template:"Ready to test", height:40 },
                                { view:"kanbanlist", status:"ready" }
                            ]
                        },
                        {
                            rows:[
                                { template:"In test", height:40 },
                                { view:"kanbanlist", status:"test" }
                            ]
                        }
                    ]
                }
            },
            {
                header:"Done",
                body:{ view:"kanbanlist", status:"done" }
            }
        ],
        data:base_task_set
    });
});
Creating a Complex Structure
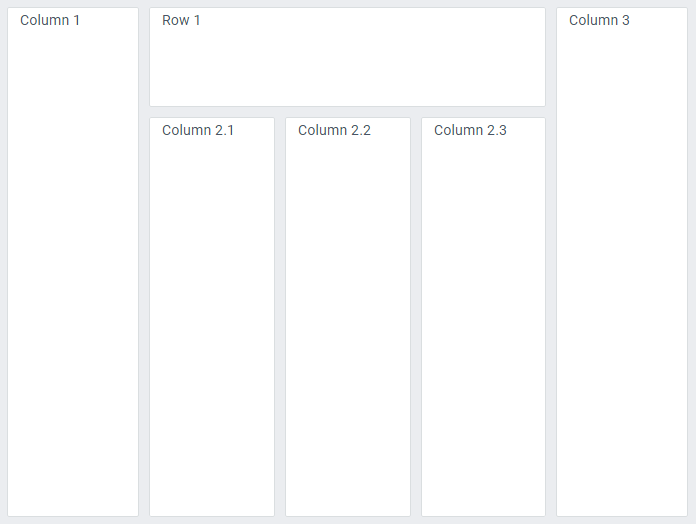
For example, you need to create a Kanban board's structure consisting of 3 columns, besides:
- the 1st and the 3rd columns contain lists
- the 2nd column has a rows-layout:
- the upper row has a list with cards that are placed next to each other
- the lower row contains three columns with lists
The picture below illustrates the idea:
The code snippet below creates the Kanban Board described in the above-mentioned scheme:
webix.ready(function(){
    webix.ui({
        view:"kanban",
        cols:[
            { header:"Backlog", body:{ view:"kanbanlist", status:"new"}},
            {
                header:"Ready", gravity: 3,
                body:{
                    type: "wide",
                    rows:[
                        { view:"kanbandataview", status:"ready", gravity: 0.3 },
                        {
                            cols:[
                                {
                                    header:"In Progress",
                                    body:{ view:"kanbanlist", status:"work"}
                                },
                                {
                                    header:"Testing",
                                    body:{ view:"kanbanlist", status:"test"  }
                                },
                                {
                                    header:"Done",
                                    body:{ view:"kanbanlist", status:"done"  }
                                }
                            ]
                        }
                    ]
                }
            },
            { header:"Done", body:{ view:"kanbanlist", status:"complete" }}
        ],
        data:task_set
    });
});
The picture below illustrates the result:
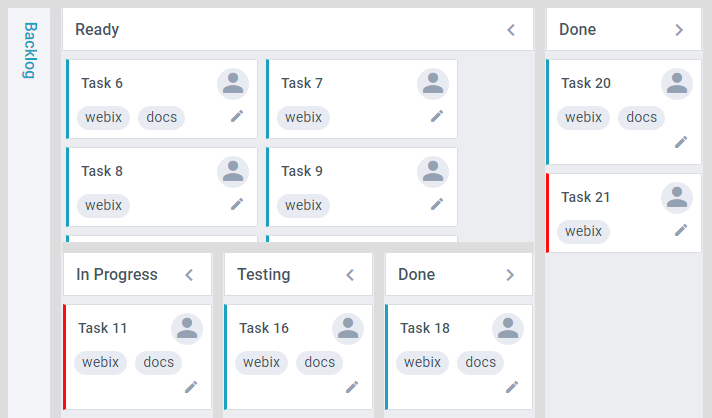
Note that in the second column the cards at the top are not placed one below the other, but several cards are placed in a row. This is achieved by using KanbanDataview instead of KanbanList.
Related sample: Rows and Columns
Creating Swimlanes
You can assign a complex value to a status property of a Kanban list. This will allow you to implement swimlanes in your Kanban board.
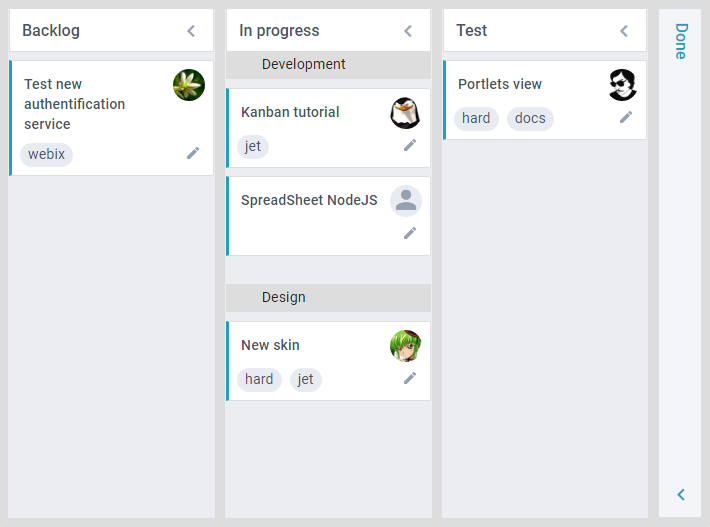
For example, lets take a Kanban board with To Do, In Progress and Done columns containing lists with new, work and done statuses. The In Progress column should contain tasks for development and design teams. So, instead of one list, you can set two lists with complex statuses that consist of two properties: status and team.
webix.ui({
    view:"kanban",
    cols:[
        { header:"To Do", body:{ view:"kanbanlist", status:"new" }},
        {
            header:"In progress",
            body:{
                rows:[
                    { template: "Development", height: 27},
                    { view: "kanbanlist", status: { status: "work", team: 1 }},
                    { template: "Design", height: 27},
                    { view: "kanbanlist", status: { status: "work", team: 2 }}
                ]
            }
        },
        {
            header:"Done",
            body:{ view:"kanbanlist", status:"done" }
        }
    ],
    data:[
        { id:1, status:"work", team: 1, text:"SpreadSheet NodeJS" },
        { id:1, status:"work", team: 2, text:"New skin" }
    ]
});
Each loaded data item (task) will be placed into a list the "status" values of which correspond to "status" and "team" properties of the task.
Related sample: Kanban: Complex status (Swimlanes)
You can use any names of data properties within the complex status of a Kanban list, and these names will be used to filter data items. Yet it is highly advisable to have status among the names and use the status property in the item data. It ensures correct work of a Kanban board when the task is moved into another Kanban list with a simple status.
Back to top