Kanban Board User Guide
Kanban board is a modern tool for workflow visualization. You can add any number of tasks, assign them to a team member, add tags, move tasks from one column to another using drag-n-drop, and much more. Read further to dive into the app interface and main controls.
Main Screens
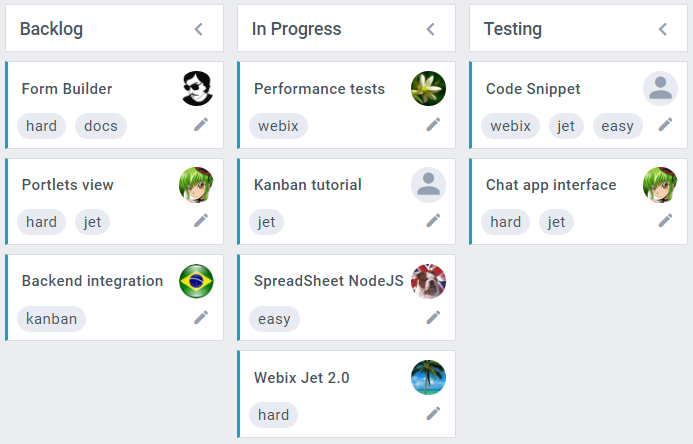
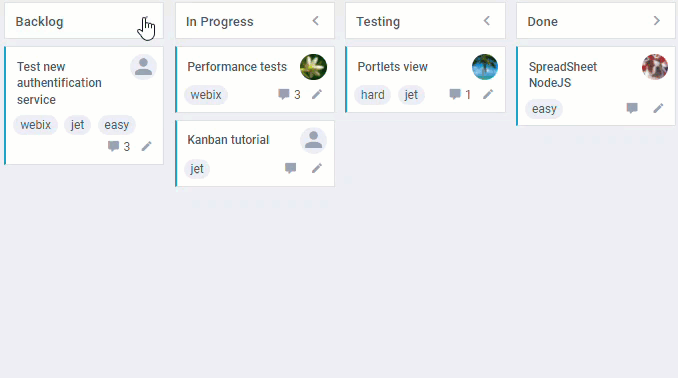
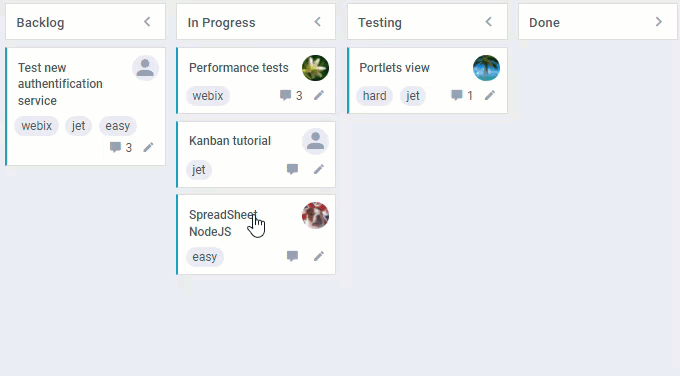
Visually Kanban board consists of the following elements:
- cards
- columns
- swimlanes.
Columns
Depending on the configuration, the widget may include the following columns:
- Backlog
- In Progress
- Testing
- Done.
Each column represents the state of the Kanban cards. You can specify the column names according to your project needs.
You can collapse/uncollapse columns by clicking on the “arrow” icon in the column header.
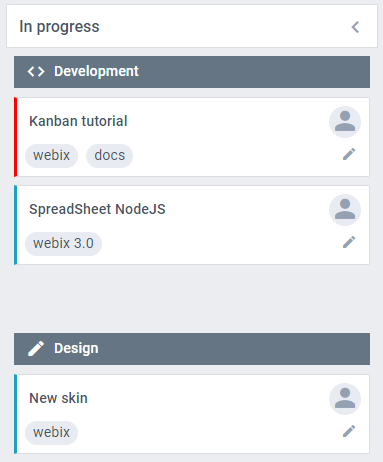
Swimlanes
Depending on the configuration, the cards can be arranged into horizontal swimlanes to separate the tasks of different categories.
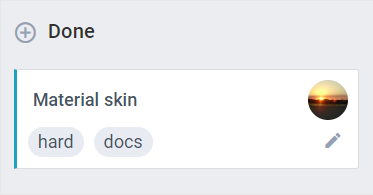
Cards
Kanban cards display the tasks information. It can include the following elements:
- card name
- assigned employees
- attached files
- priority
- status
- tags
- comments.
The users can perform the following operations with cards:
- add new cards
- edit cards
- copy cards
- move cards
- delete cards
- comment on cards.
Adding New Cards
To add a new card, click on the “plus” icon in the header of the corresponding column. You can display this icon instead of an "arrow" one via the Kanban configuration.
Editing Cards
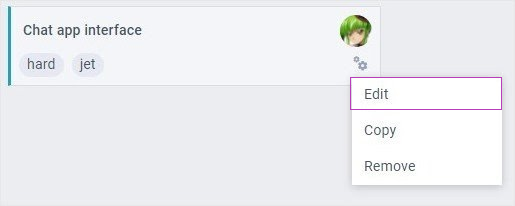
You can edit Kanban cards using a special Editor. It can be opened in 3 ways:
- By clicking on the "pencil" icon
- By double clicking on the card
- Via the card menu.
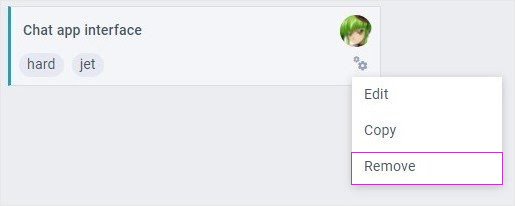
To open the Editor via the card menu, click on the "config" icon and select the "Edit" option.
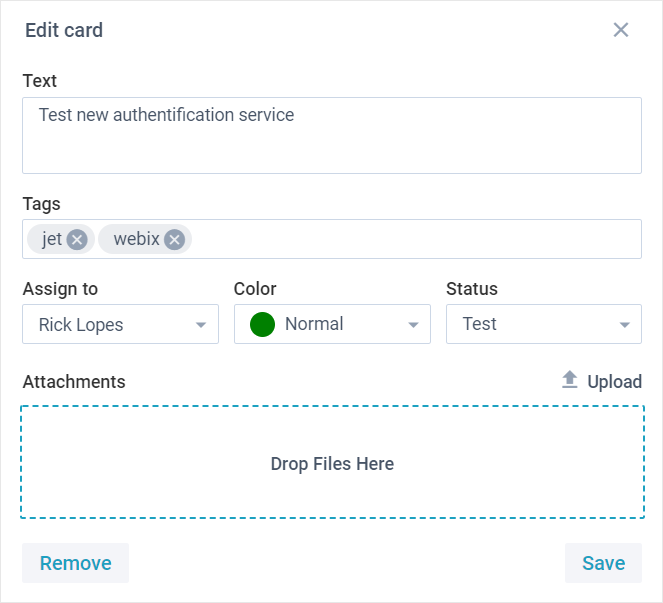
In the Editor you are able to edit the following fields of the card:
- card name
- tags
- assigned employees
- priority
- status
- attached files.
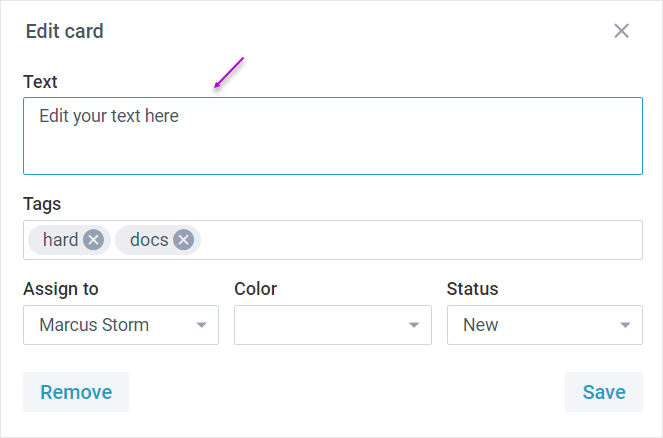
Card name
To edit the card name, you should take the following steps:
1) Click on the “Text” area.
2) Make necessary changes.
3) Click on the "Save" button to save the changes and get back to the board.
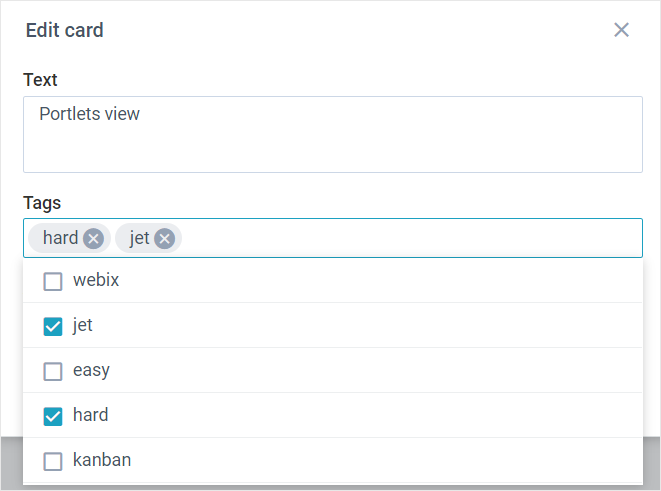
Tags
To change the tags of the task, you should take the following steps:
1) Click on the "Tags" selector and select one or more options. The selected options will be displayed as tags in the selector field.
2) Click on the "Save" button to save the changes and get back to the board.
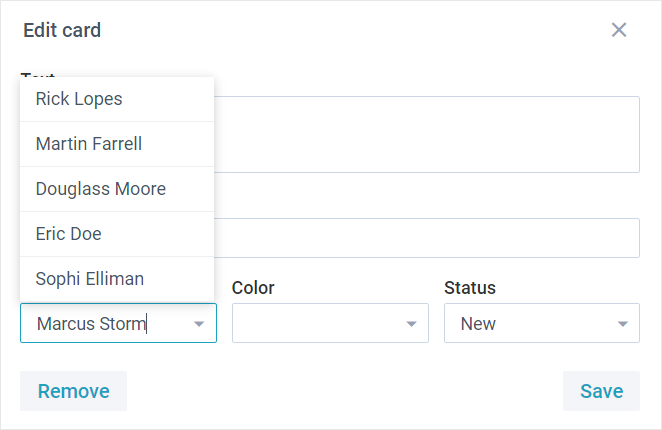
Assigned employees
There are two ways how to assign an employee to the task:
- via the editor
- via the card.
To assign the employee via the editor, you should take the following steps:
1) Click on the "Assign to" selector and select the desired option from the drop-down list.
2) Click on the "Save" button to save the changes and get back to the board.
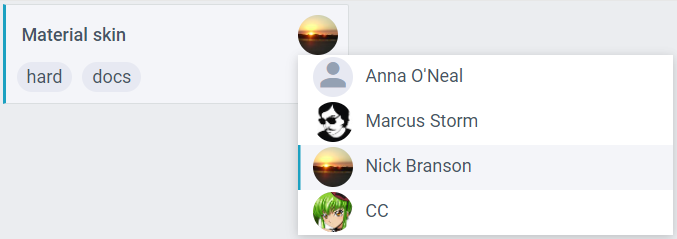
To assign the employee via the card, you should take the following steps:
1) Click on the avatar on the needed card to open the list of the available users.
2) Select the desired person from the drop-down list.
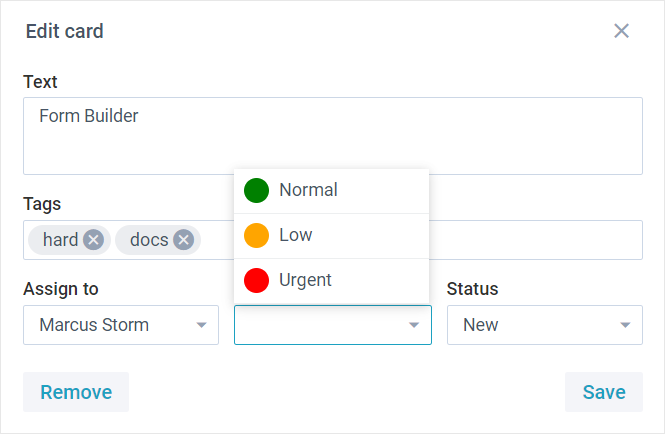
Priority
To change the priority of the task, you should take the following steps:
1) Click on the "Color" selector and select the desired option from the drop-down list.
2) Click on the "Save" button to save the changes and get back to the board.
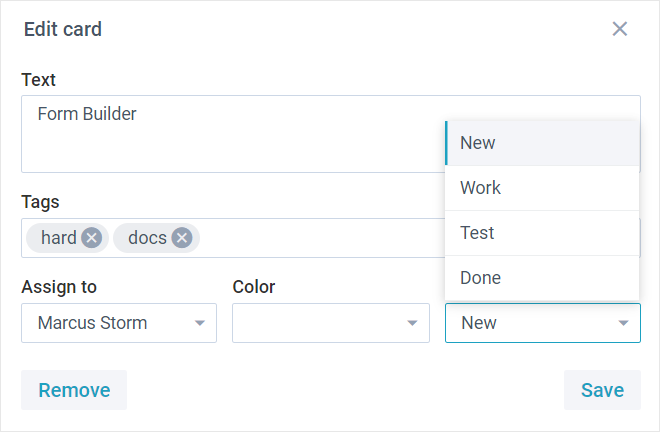
Status
To change the status of the task, you should take the following steps:
1) Click on the "Status" selector and select the desired option from the drop-down list.
2) Click on the "Save" button to save the changes and get back to the board.
Attachments
The widget provides you an ability to attach extra files to the card. The attached images can be displayed on cards.
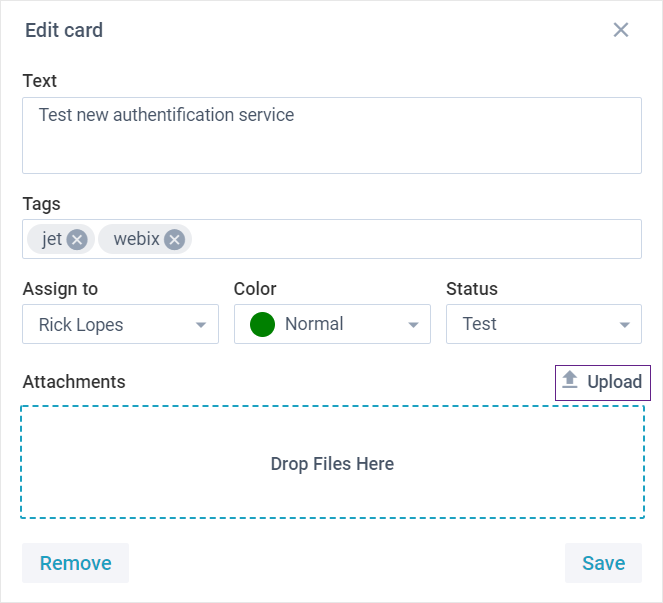
There are two ways to attach a file:
- via the uploader
- via drag-and-drop.
To attach a file via the uploader, you should take the following steps:
1) Click on the “Upload” button to open the uploader.
2) Select the desired files you want to attach.
3) Click on the "Save" button to save the changes and get back to the board.
To attach a file via drag-and-drop, you should take the following steps:
1) Drag and drop files to the “Attachments” field.
2) Click on the "Save" button to save the changes and get back to the board.
Copying Cards
To copy a card, you should take the following steps:
1) Click on the “config” icon on the card to open the dropdown menu.
2) Select the "Copy" option in the dropdown menu.
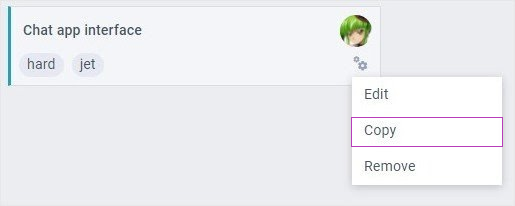
The copy would be added to the same column as the original one.
Moving Cards
To move a card from one column to another, you should drag and drop it in the target one.
Deleting Cards
There are two ways to delete a card:
- via the editor
- via the card menu.
To delete a card via the editor, you should take the following steps:
1) Open the editor.
2) Click on the "Remove" button.
3) Click on the "OK" button in the popup window to confirm deleting.
To delete a card via the card menu, you should take the following steps:
1) Click on the “config” icon to open the menu.
2) Select the "Remove" option in the dropdown menu.
3) Confirm deleting.
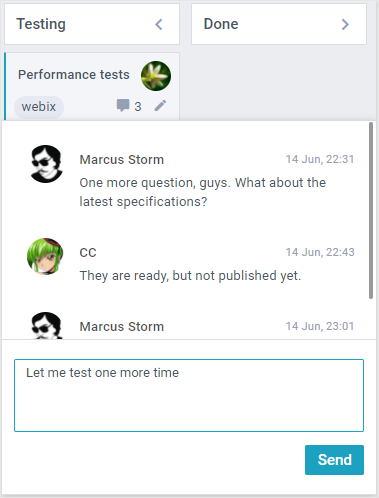
Commenting on Cards
To add a comment to the card, you should take the following steps:
1) Click on the “comment” icon on the card to open the popup window.
2) Type your message in the text field.
3) Click on the “Send” button to post it.