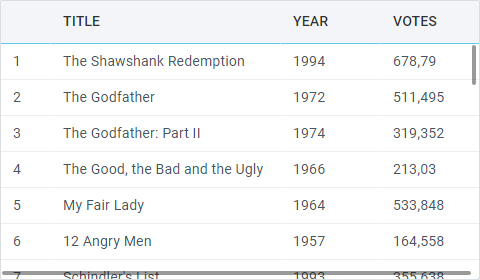
Scroll Control
Webix provides extensive scrolling management tools.
- First, Webix components are supplied with vertical and horizontal scrollbars, that can be shown and hidden with the help of the related API;
- Second, scrolling in an application can be controlled with the help of common methods and properties;
- Third, Webix library features a separate component called scrollview, a container view with scrollbars for placing any content there (plain text, HTML, Webix views);
By default, Webix uses native browser scrollbars. In Webix Pro edition custom Webix-made scrollbars are available.
Tuning Scrolling
By default, a component features vertical scrolling. It can be modified via the dedicated scroll property that may take the following values:
- "y" or true - sets a vertical scrollbar;
- "x" - sets a horizontal scrollbar;
- "xy" - sets both horizontal and vertical scrollbars;
- "auto" - sets scrollbars when they are necessary (when the size of the content exceeds the size of the container);
- false - defines a non-scrollable component.
webix.ui({
    view:"list",
    id:"mylist",
    scroll:"x", //"y", "xy", "auto", false
    // ... config
});
Some components have the scrollX and scrollY properties that take boolean values to enable/disable the specified scrolling direction. Check the API Reference for details.
Scrolling and Dynamic Loading
With dynamic loading, only part of the stored records are loaded into the component during initialization. Each time you scroll down/up the component, a data request is sent to the server to load the next portion of data.
Read more about dynamic loading.
Scrolling to a definite position in the view
If the dataset is too long, it seems nice to have the ability to scroll to a definite part automatically with a click of a button.
Here you have several possibilities:
- Make use of the scrollTo(x,y) method of a component:
The function is called from a scrollview object and takes the horizontal and vertical position of the necessary line into it. If you state this position as the ID of a button, the function will look like this:
{ view:"scrollview", id:"verses", body:{/* content */} },
{
    view:"button", value:"Imitation of Spenser", id: "130",
    width:250, click:function(id){
        $$("verses").scrollTo(0, id*1);     // scrolls to the position at top:130px
    }
}
Scroll position can be calculated during development state with the getScrollState() method that returns an object with X and Y parameters.
For touch devices you can also set the time for the scrollTo() function to perform. Define the scrollSpeed property value in milliseconds:
webix.ui({
    view:"list",
    scrollSpeed:"100ms",
    ...
});
- Scrolling via focusing on the necessary view within the scrollview.
Here the ID of a button should be connected to the ID of the row in the scrollview:
{ view:"button", value: "Verse 1", id: "1", click:scroll},
{ view:"button", value: "Verse 2", id: "2", click:scroll},
Then the showView() method sets focus to the scrollview item with the corresponding ID.
webix.ui({
    view:"scrollview",
    id:"verses",
    body:{
       rows:[
           { id:"verse_1", template:"...Some long text"},
           { id:"verse_2", template:"...Some long text"}
       ]
    }
});

function scroll(id){
    $$("verses").showView("verse_"+id);
}
- Make the view show the definite item specified by its ID:
$$("mylist").showItem(5); // the list should be scrollable
Related sample: Horizontal List
Within Datatable scrolling can be done with the following methods:
- showItem(rowId) - scrolls to a definite row indicated by its ID;
- showItemByIndex(rowIndex) - scrolls to a definite row defined by data item index in the data source;
- showCell(rowID, cellID) - scrolls to a definite cell (both vertical and horizontal scrolling modes work).
Defining scroll position
Scroll state is defined as the combination of a top and left scroll position (how much is the component scrolled from its top and left border). In case you have either a horizontal or vertical scrollbar, the scroll state includes only one value - X or Y respectively.
The current scroll position can be derived with the getScrollState() method:
var scPos = $$("mylist").getScrollState(); // returns data as ({x:30,y:200})
var posx = scPos.x; // 30
var posy = scPos.y; // 200
Webix Custom Scroll
The feature is available in Webix Pro edition only.
Webix offers custom scrollbars to replace native browser ones. The advantages are as follows:
- the neat design of the thin grey semi-transparent bars;
- the bars are initially hidden and appear only when a scrolling movement is detected on the page.

The feature is provided by a separate CustomScroll module that you need to enable before use.
Make sure you wrap everything into the webix.ready() function, that is executed after page loading:
webix.ready(function(){
    // enabling CustomScroll
    webix.CustomScroll.init();

    // your webix app
    webix.ui({
        ...
    });
});
Custom scroll and iframes
Custom scroll will not work if your layout has an iframe and the mouse wheel is turned while the pointer is over the iframe. This happens because iframes do not dispatch events to parent windows, and custom scroll relies on several mouse events, including mousewheel.
A possible solution to this problem is modifying the iframe's code so it would create an event for the parent page:
document.onmousewheel = e => window.parent.postMessage({ type: "wheel", delta: e.wheelDelta });
Then the parent can process it and create a corresponding event for the component with custom scroll:
window.addEventListener("message", message => {
    if (typeof message.data == "object" && message.data.type == "wheel") {
        const evt = document.createEvent("MouseEvents");
        evt.initEvent("mousewheel", true, true);
        evt.wheelDelta = message.data.delta;
        $$("scrollview").$view.dispatchEvent(evt);
    }
}, false);