Sizing and Resizing
In this chapter you will learn how to set and change sizes for 3 different DataTable elements:
- DataTable container,
- Column,
- Row
in 3 possible situations (scenarios):
You can also read about sizing in Webix tutorials.
Setting Correct Sizes
The width and height of a datatable must be set through number values. The usage of string values is incorrect and will cause errors in the sizing logic.
webix.ui({
    view:"datatable",
    height:400,
    width:300
});
Setting Fixed Size
DataTable container
By default, DataTable adjusts to the size of the parent container that gives us 2 ways to set the fixed size for it:
- to set the size of the parent 'div' container
- to use the width and height parameters within DataTable constructor.
Setting the fixed size for DataTable
// way 1
<div id="box" style="width:300px;height:400px;"></div>

webix.ui({
    container:"box",
    view:"datatable",
    // datatable configuration
});

// way 2
<div id="box"/>

webix.ui({
    container:"box",
    view:"datatable",
    height:400,
    width:300,
    // other config settings
});
Related sample: Adjusting to the Parent Container
Related sample: Sizing through the 'Width', 'Height' Parameters
Column
Fixed column width
By default, datatable columns are 100px wide and their width cannot be changed via the UI.
You can change the value for a particular column or for all the table in general.
To change the size of a particular column use:
- width while configuring the column to set width to a column individually;
- minWidth in the column configuration to define the minimum width for it. If there's more space initially or after resizing, column width will be increased, but it can never be less than minWidth value;
- maxWidth in the column configuration to define the maximum width for it. On resizing, the component cannot take more space than specified. At the same time, the component may take smaller width values and take less space.
You can also use the following properties to set the changes for all columns in a table:
- columnWidth while configuring the datatable to set a common width for all the columns. Like the default common width, it can be overridden by width for a specific column;
- minColumnWidth property in datatable configuration to set common minimum width for all columns. It can be overridden by minWidth for a specific column;
- maxColumnWidth property in datatable configuration to set common maximum width for all columns. It can be overridden by maxWidth for a specific column.
Setting different widths for columns
webix.ui({
    view:"datatable",
    columns:[
        { id:"title", header:"Film title" ,   width:80},
        { id:"title", header:"Release year" , maxWidth:100}
    ]
});
Altering common width for all columns
webix.ui({
    view:"datatable",
    columnWidth:200,
    columns:[
        { id:"title", header:"Film title"},
        { id:"title", header:"Release year"}
    ]
});
Relative Sizing
- adjusting the width of datatable to the parent container
If the sum of column widths is less than the width of the parent container, you can use the fillspace attribute to make some of columns fill the unused space.
Using attribute fillspace
webix.ui({
    view:"datatable",
    columns:[
        { id:"title", header:"Film title", fillspace:true},
        // more columns
    ]
});
Related sample: Adjusting Columns to the Parent Container
- adjusting the width of a column to other datatable columns
There can be more than one fillspace in the datatable. You can set fillspace as a number. The width of the table will be proportionally divided between columns:
webix.ui({
    view:"datatable",
    columns:[
        { id:"id", header:"ID", fillspace:1},
        { id:"title", header:"Film title", fillspace:4}
    ]
});
In the above code, the title column is 4 times wider than the id column, which is 20% to 80%.
- adjusting the width of a column to its content
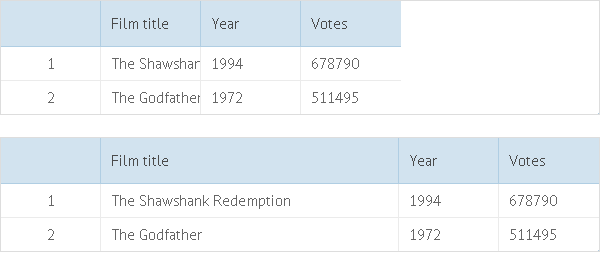
If you want to adjust the width of a column to the related content size, you can use the adjust attribute. It is defined for the needed column individually and features the following modes:
- "data" - adjusts the column width to the content of the widest item in it;
- "header" - adjusts the column width to its header content;
- true - searches for the widest item among data and header(s) and adjusts column width to its content.
Adjusting the column width to fit the content size
webix.ui({
    view:"datatable",
    columns:[
        { id:"title", header:"Film title", adjust:"data"},
        { id:"rank", header:"Rank", adjust:"header"},
        { id:"votes", header:"Votes", adjust:true}
        // more columns
    ]
})
Related sample: Adjusting Columns to the Content
Note that the resulting column width after adjusting won't be smaller than minWidth and bigger than maxWidth for this column provided that minWidth and maxWidth are set.
If you have a large dataset, you can limit the number of rows that will take part in the calculation of the maximum column width with the help of the adjustBatch attribute of the column config. The property works in tandem with the adjust:"data" or adjust:true attributes.
webix.ui({
  rows:[
    { view:"datatable",
     columns:[
       {id:"id"},
       {id:"title", adjust:"data", adjustBatch:50},
       {id:"title", adjust:true}
     ],
     //data count is big
     data:grid_data
    }
  ]
});
Row
To set the fixed height for a row, you should use $height while defining the data you will load into DataTable. If you set the height in such a way, it will save its value regardless of any other enabled size parameters (e.g. - autoheight).
Note that you need to provide the fixedRowHeight:false setting for the datatable as well, to avoid errors in the scroll or editors position.
Setting different heights for rows
webix.ui({
    view:"datatable",
    fixedRowHeight:false,
    data:[
        { $height:20, id:1, title:"The Shawshank Redemption", year:1994},
        { $height:40, id:2, title:"The Godfather",            year:1972},
        // other data fields
    ]
});
Related sample: Setting Custom Size for Rows
Autosizing
Autosizing to parent container
DataTable automatically adjusts to the size of a parent container provided that no content autosizing is enabled.
To make the DataTable fill the entire width, you should define fillspace for at least one of its columns:
webix.ui({
    view:"datatable",
    columns:[
        { id:"title", header:"Film title", fillspace:true},
        { id:"year", header:"Year", width:100}
    ]
});
In this case, the title column will be calculated as container width - 100.
Autosizing to content
You can enable width, height (or both of them) autosizing to adjust DataTable to the size of its content horizontally or vertically. Autosizing is enabled by the following parameters:
DataTable autosizing
webix.ui({
    view:"datatable",
    autoheight:true,
    autowidth:true
});
Related sample: Height and Width Autosizing
Resizing by User
Mouse resizing
To enable the possibility to resize columns (rows) by mouse you should use one of the following parameters (or both of them at once):
Enabling the possibility to resize columns and rows by mouse
webix.ui({
    view:"datatable",
    resizeColumn:true,
    resizeRow:true
});
Note that resizeColumn: true enables resizing of columns by their borders regardless of the environment. This mode is not adapted for touch devices. To use column resizing on touch devices, you should enable column resizing via a resizer icon by setting resizeColumn: { icon: true }.
For these resizing options there exist relevant events onRowResize and onColumnResize.
Related sample: Column and Row Resizing
If you use the Material skin, you need to define column borders to visualize resize zones by specifying the related CSS classes. Please, check the related article for instructions.
Setting custom size for area where "resize" is detected
You can also define the size of the area where resizing can be activated. You can do this by setting the resizeRow or resizeColumn parameters and passing an object with the size property to them:
webix.ui({
    view:"datatable",
    resizeColumn: {size: 6},
    resizeRow: {size: 6}
});
Related sample: Size of Resize Area
Resizing only in the header area
One more resizing possibility is to limit the area allowed for resizing to the datatable header.
It can be achieved by specifying the resizeRow or resizeColumn parameters and passing an object with the headerOnly property set to true to them:
webix.ui({
    view:"datatable",
    resizeColumn: {headerOnly:true},
    resizeRow: {headerOnly:true}
});
Related sample: Resize within Header Only
Resizing via a resizer icon
To provide column resizing via a resizer icon, use the icon property in the resizeColumn configuration object:
// enable resizing via a resizer icon
webix.ui({
    view: "datatable",
    resizeColumn: { icon: true }
});
Related sample: Datatable: Column Resizing Icon
Related sample: Datatable: Column Resizing Icon (mobile version)
It adds a resizer icon to each valid column. Dragging the icon resizes the corresponding column. This mode provides the ability to resize columns on touch devices.
Live resizing works together with the icon: true property, it is enabled by default. You can disable it by setting live: false within the resizeColumn configuration object:
// resizing via a resizer icon without live mode
webix.ui({
    view: "datatable",
    resizeColumn: { icon: true, live: false }
});
Related sample: Datatable: Column Resizing Icon without Live Mode
Related sample: Datatable: Column Resizing Icon without Live Mode (mobile version)
Disabling live resizing is recommended when working with a large number of columns, as it reduces performance overhead.
Additional notes on column resizing via a resizer icon
Resizers are rendered for both headers and footers, when they are enabled.
By default, resizers appear on the last row of headers and the first row of footers. This can be overridden via the resizerIcon property in the header config object. Setting resizerIcon: true explicitly renders the resizer in that specific header row/cell.
When a header has a colspan defined, resizerIcon applies to the correct target column header (e.g., for right-positioned resizers -> last column in that span).
When a column has resize: false specified, the resizer will not be displayed in that column's header. If the header has a colspan defined, the target is adjusted accordingly.
Enabling the column resizing via icon: true applies default padding to header cells (where appropriate), regardless of whether the resizer is visible.
Pay attention that the size and headerOnly properties can't be applied when the icon and live properties are set in the resizeColumn configuration object.
Disable resizing of a particular column
You can disable resizing of a particular column by setting the column's resize property to false:
webix.ui({
  view:"datatable",
  // enable resizing of all columns
  resizeColumn: true,
  columns:[
    // disable resizing of the rank column
    { id:"rank", resize:false, header:"", css:"rank", width:50},
    { id:"title", header:"Film title",  fillspace:true},
    { id:"year", header:"Year", width:80},
    { id:"votes", header:"Votes", width:100}
  ],
});
Related sample: Datatable: Deny Resizing for a Column
Resizing by API
The library offers the resize() method. When you change widget size and call this method, it will adjust to the new size.
Adjusting the parent container to the DataTable size
grid = webix.ui({
    view:"datatable",
    // datatable configuration
})

grid.define("width", 700);
grid.resize();
Related sample: Dynamic Adjusting to the Parent Container
In some situations you may need to adjust an element to the size of the outer parent HTML container. In such the situation you may use method adjust() instead of resize():
Adjusting DataTable to the size of the parent container
var grid = webix.ui({
    container:"box",
    view:"datatable",
    // datatable configuration
});

webix.toNode("box").style.width = "700px";
grid.adjust();
Related sample: Dynamic Adjusting to the Parent Container
The resize() and adjust() methods can lead to one and the same effect. For example, you have DataTable placed into a 'div' container named 'box'. The initial height of DataTable is 50 px. You want to increase it to 80 px. Possible solutions can look as shown in the table below:
| Image | Related code |
|---|---|
 |
|
 |
|
You can use event handlers to call the above methods:
Adjusting DataTable to the size of a window, it’s placed into
webix.event(window, "resize", function(){
    grid.adjust();
});
Related sample: Sizing and Events
Adjusting of Columns and Rows
To dynamically adjust the column width or row height to the size of their content, you can use the corresponding Datatable API.
Adjusting column width
The adjustColumn(id) method adjusts the width of a chosen column specified by its ID.
The method takes two parameters:
- id - (string,number) the ID of a column;
- mode - (string) optional, the adjustment mode ("header", "data", "all").
datatable.adjustColumn("title");
datatable.adjustColumn("title", "header");
The adjustment modes are:
- header - adjusts the column to the width of its header;
- data (default) - adjusts the column to the width of its content;
- all - combines the above mentioned modes and adjusts the column to the bigger value.
Adjusting row height
The adjustRowHeight(id) method adjusts the height of all rows based on the cell content of a particular column or all columns.
Note that the method can slow down the application.
The method takes two optional parameters:
- columnId - (string) the ID of a column
- silent - (boolean) apply the method without repainting
Note that you need to set fixedRowHeight to false for your datatable, otherwise the method will not have any visible result.
webix.ui({
    view:"datatable",
    fixedRowHeight:false,
    columns:[
        { id:"title", header:"Film title", fillspace:true},
        { id:"year", header:"Year", width:100}
    ]
});

// adjusts the height of each row to
// the height of the "title" column cells
dtable.adjustRowHeight("title");

// adjusts the height of each row to the highest cell in it
dtable.adjustRowHeight();
The row height is adjusted to:
- the height of the cell in a column, which is defined by the columnId parameter;
- the height of the "biggest" cell in a row, if columnId is not provided.
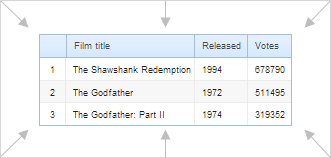
If you want to apply auto-sizing just after data loading, you can use the following code:
webix.ui({
    view:"datatable",
    columns:[
        { id:"rank",    width:40,   header:"", css:"rank"},
        { id:"title",   width:380,  header:"Film title" },
        { id:"year",    width:160,  header:"Released"   },
        { id:"votes",   width:120,  header:"Votes"      }
    ],
    fixedRowHeight:false,
    on:{
        "onresize":webix.once(function(){
            this.adjustRowHeight("title", true);
        })
    }
});
Related sample: Row Auto-Height
Scrolling
By default, scrolling (vertical and horizontal) is enabled in DataTable. It can be disabled by parameters scrollY, scrollX.
Disabling vertical scrolling
webix.ui({
    view:"datatable",
    scrollY:false
});
You can also force DataTable to be scrolled just by whole rows, i.e. you won't be able to scroll along the full length of rows. The related parameter you should enable is scrollAlignY:
Scrolling DataTable by whole rows
webix.ui({
    scrollAlignY:true
});
Related sample: Different Scrolling Behaviours
Back to topIf you have not checked yet, be sure to visit site of our main product Webix javascript framework and page of web datagrid product.